Home Blog Page 8

Ultimate iPhone Vlogging Camera Setup

1
iPhone vlogging setup

Vlogging with iPhone can give you terrific results. I first tried it on a family vacation to Europe. I wanted to learn how to make a simple travel VLOG (video blog) and upload to YouTube, so I set myself a challenge to publish a Vlog every day during our holiday. 19 days in total.

Apart from knowing some basics about iMovie and YouTube, I knew virtually nothing about how to make a vlog with the iPhone. So I set about learning and discovered it’s actually quite easy. Let me show you a simple iPhone Vlogging setup and workflow.

Note: This post may contain affiliate links. Please read our disclosure policy for more information.

Why I Switched to iPhone Vlogging

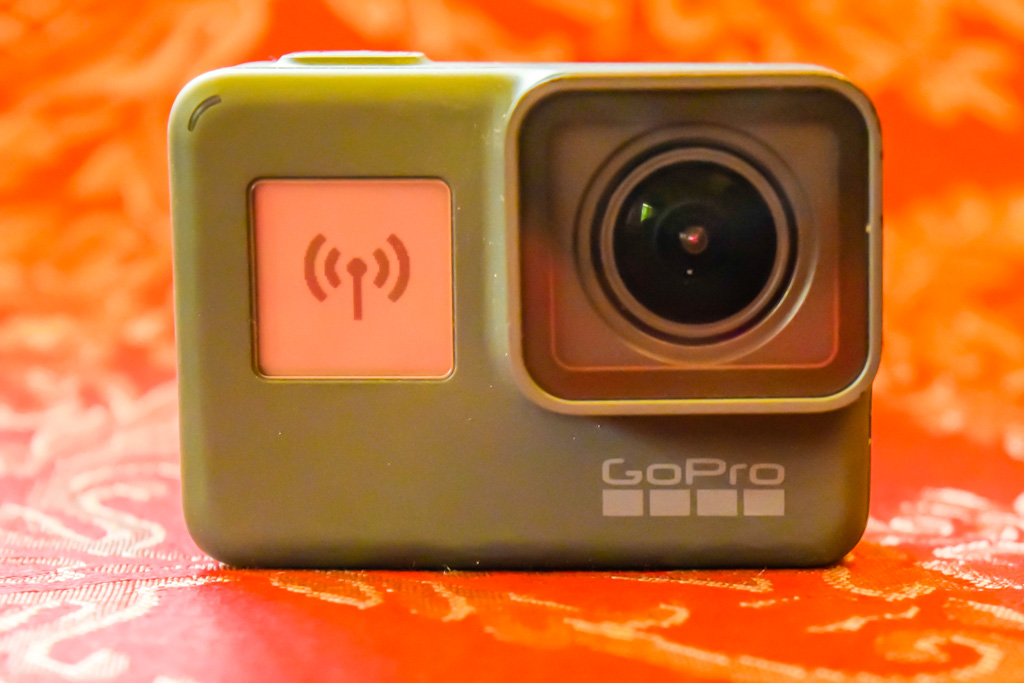
I started off using my GoPro Hero 5 Black as a vlogging camera, however, I quickly discovered how terrible the sound was. This camera has nowhere to plug-in an external microphone without using a special GoPro Microphone adaptor.

I really wanted to have live voice recording in my travel Vlogs. After persisting with the GoPro for a few Vlogs, I turned to my iPhone to see how it would perform.

Don’t get me wrong, I love GoPro’s. Nowadays I use the GoPro Hero7 Black, which is a true game-changer with its incredible image stabilisation.  But there are still many great reasons for switching to your iPhone video camera for holiday Vlogging.

  1. iPhone Vlogging allows you to capture, edit and produce all on one device.
  2. A good iPhone Vlogging setup doesn’t require a big list of accessories.
  3. iPhones camera specs are now officially just as amazing as competing cameras.
  4. There is a huge variety of IOS apps to support your vlogging pursuits.
  5. No need to buy another camera, so long as you have an iPhone in your pocket.
  6. iPhones are so easy to use, and the Video camera menu is super easy.

My iPhone XS Max Set Up

These days I’ve updated to an iPhone XS Max. My previous iPhone was an iPhone 6 Plus, which had rather poor image stabilization. Now the optical image stabilization in the iPhone XS Max is far superior, and actually quite smooth.

Audio, on the other hand, is still an issue with iPhones  But to be fair this is an issue with most video cameras on the market. Initially, I purchased a cheap Boya BY-M1 lapel microphone that I used for almost all my iPhone videos, and it generally worked well enough.

I’ve since upgraded to the Shure MV88. Higher cost and higher quality. This microphone is truly pro quality, and many pro bloggers still use this exact model. This is an essential accessory for your iPhone vlogging setup.

Producing Vlogs on iMovie

Most of my movies were produced quickly on iMovie for IOS, directly on my iPhone. IOS iMovie is a slimmed-down version to the iMac version, however, it does the job to get basic Vlogs produced quickly, and without a steep learning curve. When you’re first learning how to Vlog with iPhone, I highly recommend using iMovie to produce your videos.

FilmoraGo

I also experimented with an IOS app called FilmoraGo for some videos. This is a fun app which has heaps more flexibility than iMovie. It even has a bunch of free backing tracks, much more than the limited number of backing tracks available on iMovie.

Luma Touch

I have since moved up to what I consider to be the Rolls Royce of video editing apps, Luma Fusion for IOS, also called Luma Touch. It costs a few dollars but gives you full multi-track editing power. Read all about Luma Fusion in this Mac World review.

Walking or Talking Vlog?

I made the decision to avoid the ‘Talking Head‘ style Vlog. You know, the person sitting in front of a camera telling a story. I’m just not all that comfortable sitting in front of a camera.

For that style of Vlog, I strongly recommend you invest in a good Smartphone tripod adaptor clamp (I use Manfrotto Universal) and a tripod (I use Joby GorillaPod). Combined with a lapel microphone, this is all you will need for a Talking Head Vlog.

Actually, I recommend the Joby GorillaPod even if you’re not doing a Talking Head Vlog. That’s because these handy little gadgets allow you to attach your iPhone to a chair, a post, a tree… and get a perfectly stable image.

Image Stabalization on the iPhone

I prefer to do walking ‘Documentary’ style Vlogs, sometimes with talking along the way. For this, I find the result on older iPhones like the 6S Plus a little shaky, but still usable by using the image stabilization editing features of iMovie on the Mac. iPhone XS Max, this stabilization issue is fine straight out of the camera.

For a better alternative, I strongly recommend you get a Gimbal like the DJI Osmo Mobile 2 hand stabilized gimbal. The stability is immaculate, however, it’s a little bulky to carry around. But the video quality is 100% better than the shaky video you get with no gimbal.

Workflow for iPhone Video

When you’re first learning how to Vlog with an iPhone, it’s important to get a good workflow or you’ll end up wasting a lot of time and effort. Here’s my basic workflow. I’m not claiming that this is the absolute best workflow but should help you to learn the basics of how to vlog on iPhone.

This is a quick and dirty method, which helped me to produce and publish 19 Vlogs in under 3 weeks. And that includes getting them published on YouTube. Production was done whilst sitting on a bus, in airports, having lunch, whenever I could find a spare 20 minutes on our busy holiday.

Shooting the Video Footage

The only mandatory part of iPhone Vlogging is shooting the video footage to use in the Vlog. My number 1 accessory is a lapel microphone attached to my collar. This is really as complicated as you need to get for your iPhone Vlogging setup.

A better option is the Shure MV-88 Condenser microphone, which attaches directly to the iPhone via the lightning port. Although I have yet to try this, it’s on my wish-list as the ultimate audio upgrade. The only downside is that it won’t work in conjunction with my DJI Osmo Mobile 2 gimbal.

Importing the Video Files

The beauty with an iPhone is that importing is done automatically via the Photos app. In my case, I pay $15 per month for a whopping 2 TB of iCloud storage, so it doesn’t really matter how many videos I add.

Whenever I was staying in a hotel with good internet bandwidth, I found an entire day of video shooting (typically 5-15 GB) would upload to iCloud in a couple of hours, and I could download to my iPad or MacBook Pro to produce the Vlog.

I much prefer producing videos on the iPad than the iPhone, mainly due to the extra screen size. iMovie also has a few minor features on the iPad which are missing on the iPhone.

Free Music Archive for Backing Music

This is optional, but I prefer to use Free Music Archive to find a free backing track to mix with the video. There are so many choices of free tracks here, but it’s critical to familiarise yourself with the copyright license details and give the artist some credit on the Vlog. The last thing I want to do is get sued for copyright infringement!

Luckily it’s usually quite easy to figure this all out on FMA, as they give you clear instructions. Check out any of my YouTube clips and you’ll see my music disclaimer at the end of the description. This is the standard practice as per Free Music Archive recommendations.

Producing the Video on iMovie

Producing the video on iMovie is straightforward enough. I averaged about an hour to produce each 10-minute video file. My most time-consuming part was making the Vlog short enough to fit into a 10 minute Vlog.

Sometimes I would shoot 30-40 minutes of iPhone video in a single day! If you shoot less video, it’s quicker to produce the Vlog. Note that FilmoraGo is another great option if you’re using an iPhone or iPad, but there is no mac app available.

I found FilmoraGo quite a bit slower to use than iMovie, mainly because this app makes it difficult to find your original video clips.

Exporting to iCloud

Once the movie is produced, I like to export it to iCloud for archiving as a .mp4 video file. This is normally the file I will send to YouTube. Although you can export straight from iMovie to YouTube, it is incredibly annoying because you must keep iMovie open right through the upload.

Click into another app the upload is cancelled. In some slow internet places, an upload could take 3-6 hours, so essentially the iPhone is tied up in this process for 3-6 hours. In this day and age, that’s an eternity to go without a phone! Also, forgetting to disable the screen lock will cancel the upload, as soon as the screen lock activates.

I generally back up my produced file to at least one hard drive as well. My motto is that you should never rely on a single backup. Actually, I back up to iCloud and 2 hard drives, call me paranoid, but I’ve had a few hard drives fail in the past. I always use the 3 backup rule!

Making a 16:9 Thumbnail Using Lightroom

Another thing I like to do is produce a nice 16:9 photo to load onto the YouTube clip. YouTube offers 3 thumbnails which it extracts automatically from the video, but more often than not they are 3 terrible images. Much better if they are a custom photo, hand-picked by yourself.

This photo is usually the first thing potential viewers see, and it influences their decision on whether to open your Vlog or not. And Lightroom mobile is my preferred photo editing and cropping app. I export this from Lightroom directly into Dropbox, because that’s where I store all my website graphics.

I do recommend taking this one step further and producing an image with a title on Canva, these make your Vlog more ‘clickable’ on YouTube. The video at the top of this blog is an example of Canva. And that’s the object right, to get people to click on your YouTube Video.

After creating your masterpiece on Canva, you can just download it to your computer or phone for free. Gotta love that!

Exporting to YouTube

Export or import, that is the question. I had much better success opening YouTube in a Safari browser and importing the video file from iCloud. Not only is it faster, but does not interrupt your other activities as much.

You can open another session and continue working or playing. I did this with upload great success on my MacBook Pro, iPad, and an iPhone since iCloud makes it easy to sync across all Apple devices. Yes, I do love how apple just works.

Uploading the Thumbnail to YouTube

After the upload, I then upload my custom thumbnail to the YouTube clip. This is a simple process and takes mere seconds, as long as you have the file in an easy to find location. That’s another reason why I like to name the file and save it to Dropbox, where it can be filed in a specific easy to find folder.

Adding a YouTube Ending

Another nice addition to YouTube is to add an ending. I have a very simple ending slide made by myself in Canva, which has the word Subscribe with a big arrow. At the end of the arrow, I ask YouTube to position my Google Avatar, which viewers can click on to subscribe to my channel.

I also place a couple of related YouTube video links on the same ending page. This interactive ending screen runs for about 10 seconds at the end of my YouTube Vlog, and is one way to keep your viewers engaged in more of your content.

Adding YouTube Description and Tags

The last part of the process is to add a description and some tags. Optional is to do some SEO research (Search Engine Optimisation) and pick out 3-4 good keywords to enhance your search rankings.

Initially, I used the SEO Book Keyword suggestion tool to find a couple of relevant search terms, although I often got a little bit lazy and just choose a name which suits.

Another good way is to use the YouTube search field. Just start typing your Vlog name, and it will offer you the most popular suggested alternatives. It’s that simple! Then just add a bunch of variations as your tags, add a description and you’re done.

If you want to go professional, you can pay a subscription for the awesome TubeBuddy app. This subscription is not cheap, but it has amazing tools to help you fine-tune your SEO and craft the perfect title and keywords. I am a paid subscriber and highly recommend it.

Equipment Required for Vlogging on iPhone

Although not all of this mandatory, here is the equipment that I use with my iPhone as a Vlogging Camera.

Hardware

iPhone (iPhone XS Max recommended)

Lavalier microphone (Rode SmartLav recommended)

Shure MV-88 Condenser Microphone

External battery pack for the iPhone

MacBook Pro for producing videos on iMovie

iPad Pro for producing videos

Samsung SSD External hard drive for backing up

Smartphone tripod adaptor clamp (I use Manfrotto Universal)

Tripod (I use Joby GorillaPod)

Note: To see my full video gear store CLICK HERE

Software

iCloud (paid subscription)

FreeMusicArchive (free website)

iMovie (mobile and mac app)

Dropbox (paid subscription)

FilmoraGo (free mobile app)

Canva (free mobile app)

SEO Book (free website)

Lightroom (free on IOS, paid subscription on Mac)

Does an iPhone work as a Vlogging Camera?

Now for the million-dollar question – is an iPhone a good Vlogging camera? First, let me outline a few pros (good points) and cons (bad points).

Pros

  • Easy set up as a vlogging camera. You can literally pull your phone out of your pocket and start shooting, it’s that easy!
  • No extra cost. You can start shooting without having to purchase anything.
  • Easy to use. We all know how to use our phone, right? There are so few video controls on the iPhone that you literally can’t go wrong.
  • Each version of the iPhone produces superior video over the previous version.
  • iPhones are unobtrusive, people don’t seem to mind when you pull out your phone to start filming. They may be alarmed if you pulled out a dedicated video camera.

Cons

  • iPhones have become expensive. iPhone X was really expensive, but then the iPhone XS Max is out of reach for many people. For the record, they are worth every cent. But the truth is you can buy 3 flagship GoPro Hero7 Blacks for the same price as 1 new iPhone.
  • Image stabilization on earlier models is poor, but getting quite good from the iPhone X onwards. The image can become quite shaky when you walk around. This could be improved quite a lot by mounting the iPhone on a gimbal such as the DJI Osmo mobile hand stabilized gimbal.
  • The battery goes flat quickly. The iPhones have an awesome battery,  usually lasting a couple of days between recharges. However shooting video drains it rapidly, normally after about half a day, or 15 minutes of footage it’s due for a recharge. For this, it requires a spare battery pack.
  • Storage issues. You will fill up your iPhone memory dramatically fast. Not a problem if you synchronize to iCloud and store it there, instead of on the iPhone.
  • Not so good in low light. Forget about night videos, they don’t work out well. Even low light videos like in twilight are not so successful.
  • Requires external microphone with lots of cables. The audio is not very impressive straight into the iPhone. This is fine if you’re planning to add music, however, if you want to hear the voices clearly you will probably require an external microphone. And this generally means wires hanging off your iPhone, which can be annoying.
  • Limited zoom capability. The newer iPhones come with dual lens 2X zoom which is awesome, but not as good as compact cameras.

The Bottom Line for iPhone Vlogging

I had a lot of fun learning how to Vlog on iPhone. My iPhone vlogging setup is by no means a professional set up, but the results are quite acceptable. I found that over time you do pick up a few tricks on how to hold the iPhone steady for better footage.

What I love is that you don’t have to lug around any extra equipment with you, except an extremely compact microphone. I hope you give your iPhone a shot as a Vlogging camera before lashing out on some other expensive video camera.

To compare different iPhones and their camera capabilities, check out this handy iPhone comparison chart.

Recommended Accessories

Download a Free iPhone Vlogging Checklist

If you would like to download a checklist of workflow and equipment to use for your iPhone Vlog setup, click the below button. You can download it in PDF, Word document or Excel spreadsheet. And if somebody asks you “can you use an iPhone for Vlogging?”, just send them the checklist!

Our European Vlog series

Would you like to see how my Vlogs turned out using the iPhone as a Vlogging camera? You can catch our whole series of 19 Vlogs from our Europe vacation, just follow the links below.

Filmed on the iPad Pro

Filmed mostly on the GoPro Hero 5 Black

Filmed on the iPhone 6 Plus

What to do in Sofia in One Day – City Centre Walking Tour

0
what to do in sofia in one day church
Church of St.George

There is so much to see in the center of Sofia, Bulgaria. After all, it is the second oldest city in all of Europe. If you are wondering what to do in Sofia in One Day, this city center walking tour may be just your thing.

Note: This post may contain affiliate links. Please read our disclosure policy for more information.

What is the City Centre Walking Tour

From a church that’s been around since the 10th century in the city centre, to a massive Bulgarian Orthodox Cathedral which can hold 10,000 worshippers. This walking tour takes in many of the big sights of Sofia Bulgaria, and a few of the lesser seen sights.

You will need about 3 hours to complete this 3 km Sofia sightseeing tour. Whilst it is possible to rush it and complete the walk in 2 hours, I recommend you take your time and allow about 4 hours.

Stops on the City Centre Walking Tour

You can start right in the heart of Sofia at the St.Nedelya Church, or at the biggest attraction in town the Alexander Nevsky Cathedral. Both of these sites have a metro subway station virtually right out the front, and they are one stop apart. This makes for an easy and cheap way to get back to the starting point.

Check out the map below, with all of the stops in this walking tour marked.


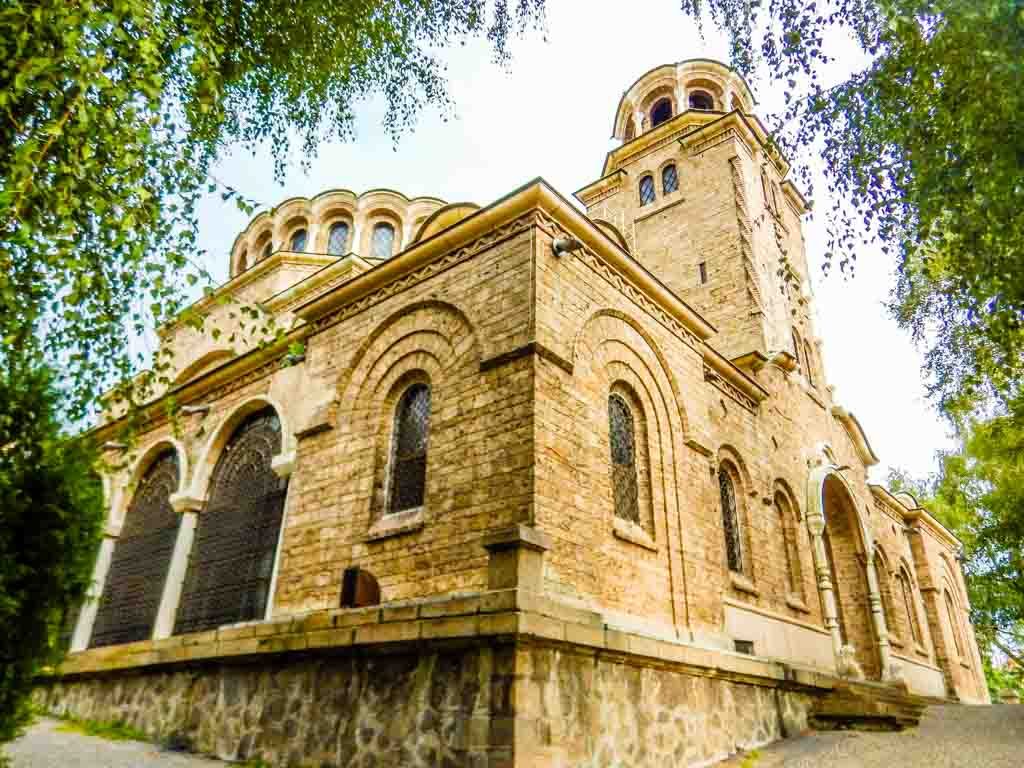
1: St.Nedelya Church

Right in the center of town, this imposing church is one of the main Sofia attractions. It is an Eastern Orthodox Church, which has been around in its various iterations since the 10th century.

The church is situated alongside a large town square, which is always bustling with locals going about their daily business, as well as vendors trying to lure the tourists into buying food and drinks. It’s actually one of the best places in town to do a little ‘people watching’, if that’s your thing.

Also alongside the church, you will find some recent archaeological diggings, where the local authorities are uncovering the next Sofia tourist attractions, some ancient Roman ruins.

what to do in sofia in one day
St.Nedelya Church

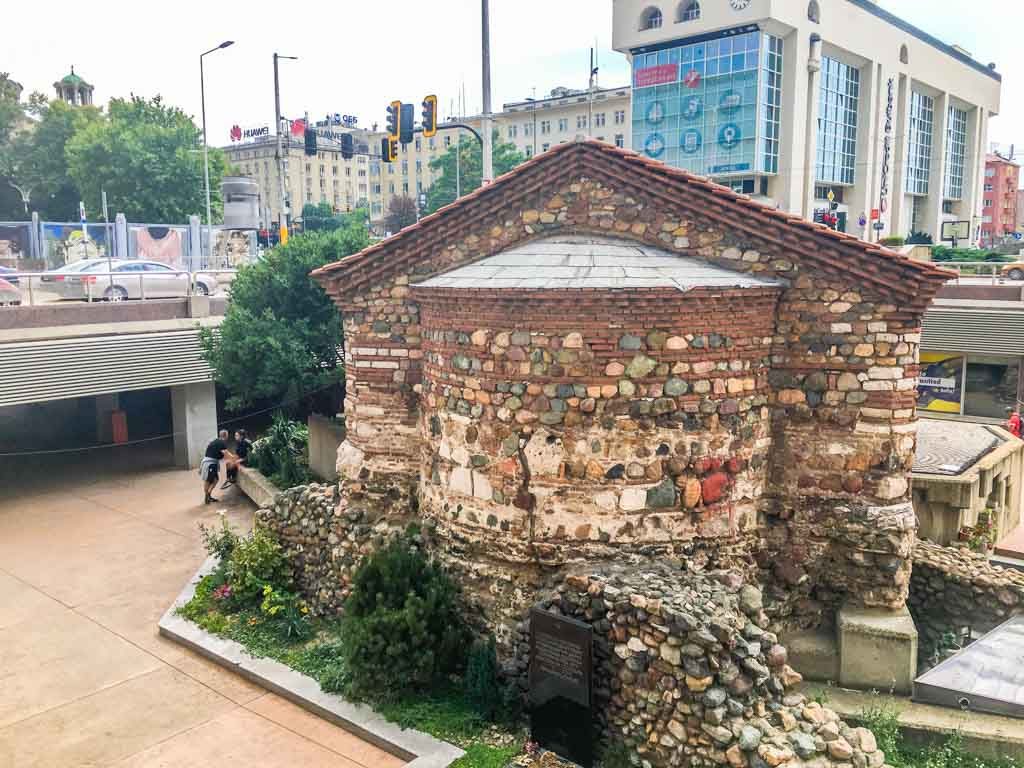
2: Church of St.Petka of the Saddlers

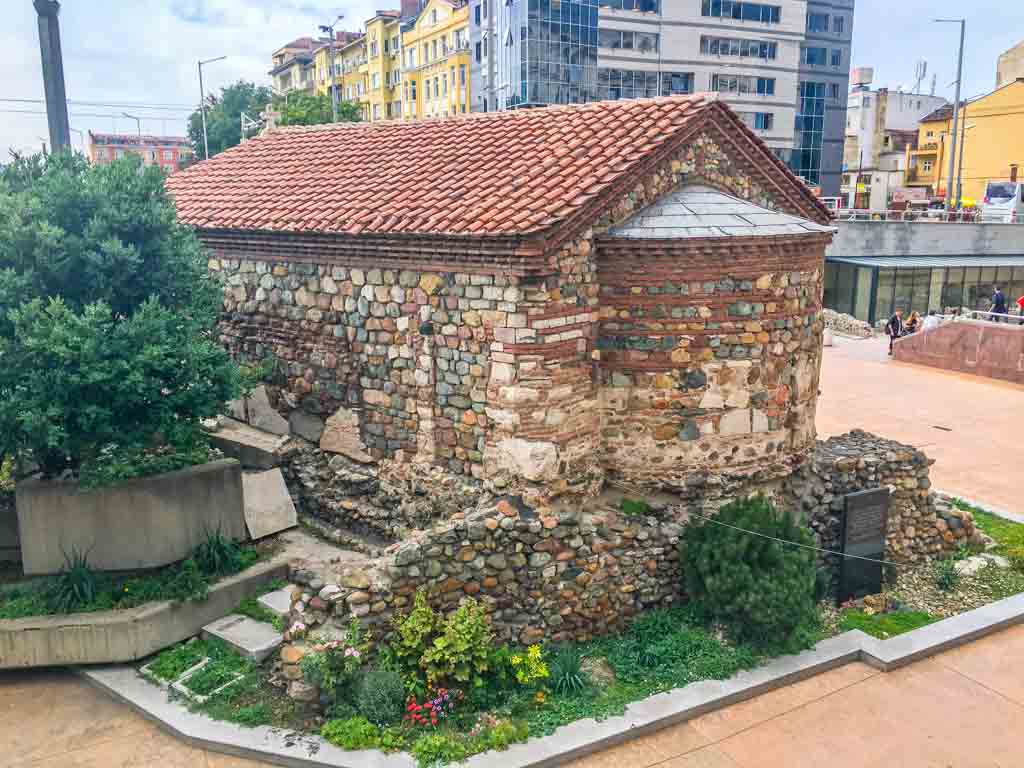
Nearby you will pass this remarkable church in the center of Sofia, located at the Serdica subway station. The church is Bulgarian Orthodox, is half buried, and has walls 1m thick.

Be sure to pay the small entry fee to go inside and see the mural paintings dating back to 14th, 15th, 17th and 19th centuries. You will be instantly transported back into turbulent medieval times when you enter this incredible little church.

what to do in sofia in one day St Petka
Church of St.Petka of the Saddlers

3: Ruins of Serdica

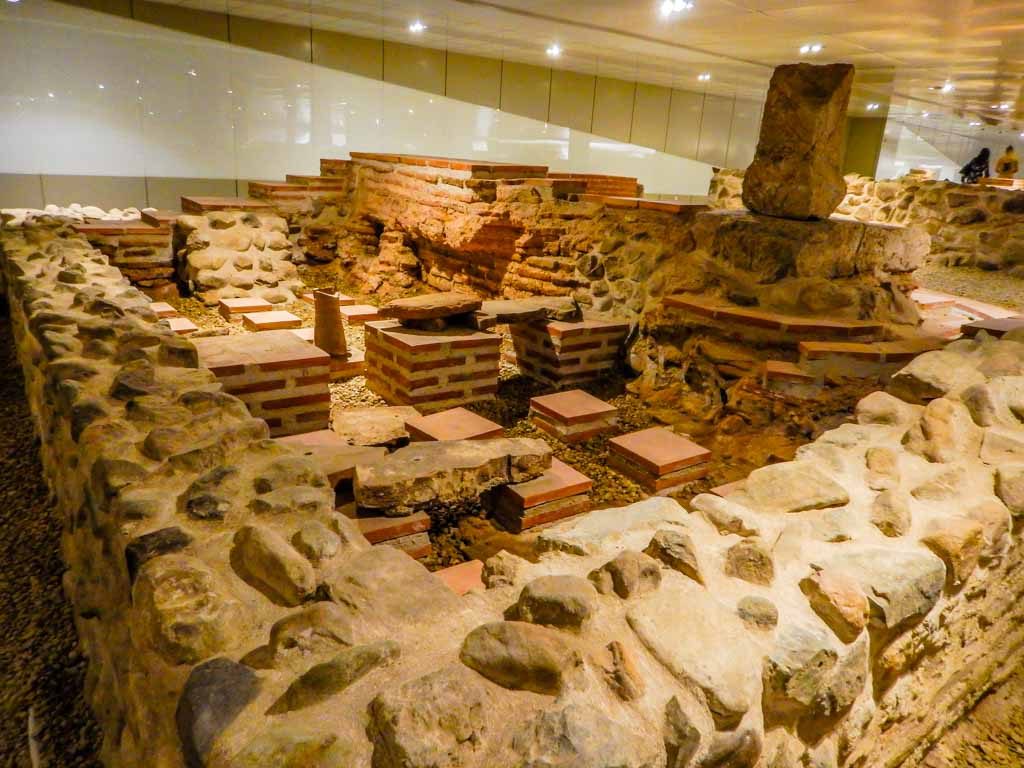
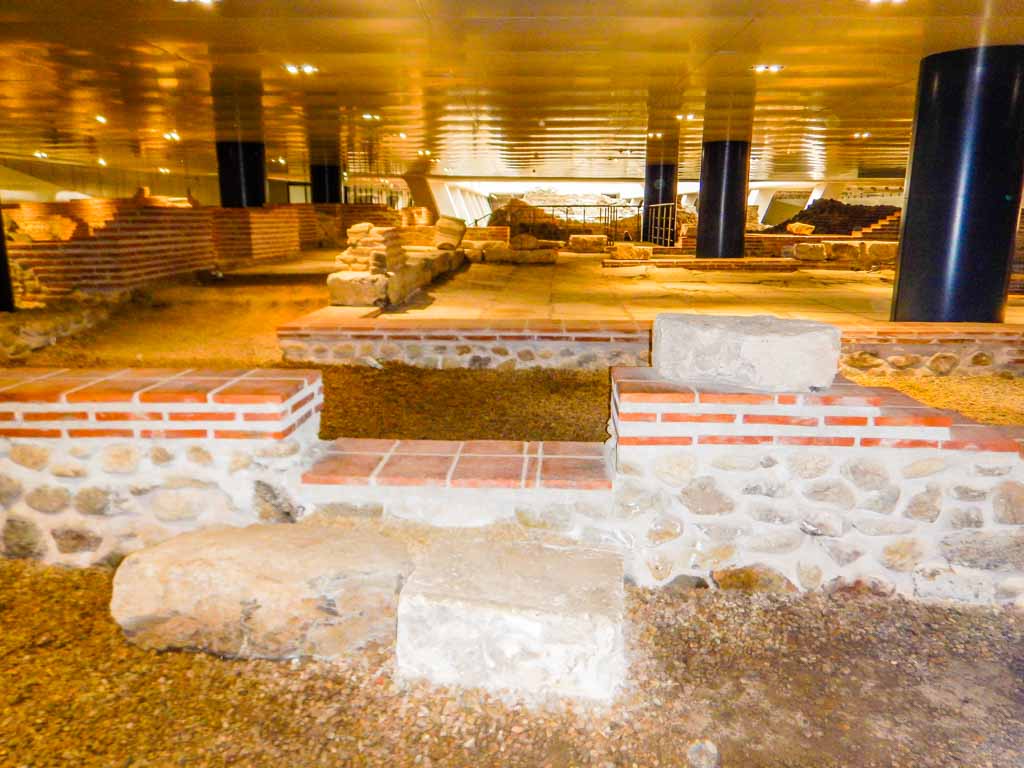
As you pass the Church of St.Petka of the Saddlers you enter an ancient Roman archaeological site of the Ruins of Serdica. Here you will find an old town gate, many houses and other assorted buildings. Incredibly you are able to walk through many of these buildings, taking you back about 1,500 years to the time of their construction.

This is probably the most popular of all places to visit in Sofia, because the ruins extend into the busiest subway station in town. That is the Serdica Metro station.

what to do in sofia in one day Serdica
Roman Ruins in Serdica Metro Station

4: Cathedral of St. Joseph

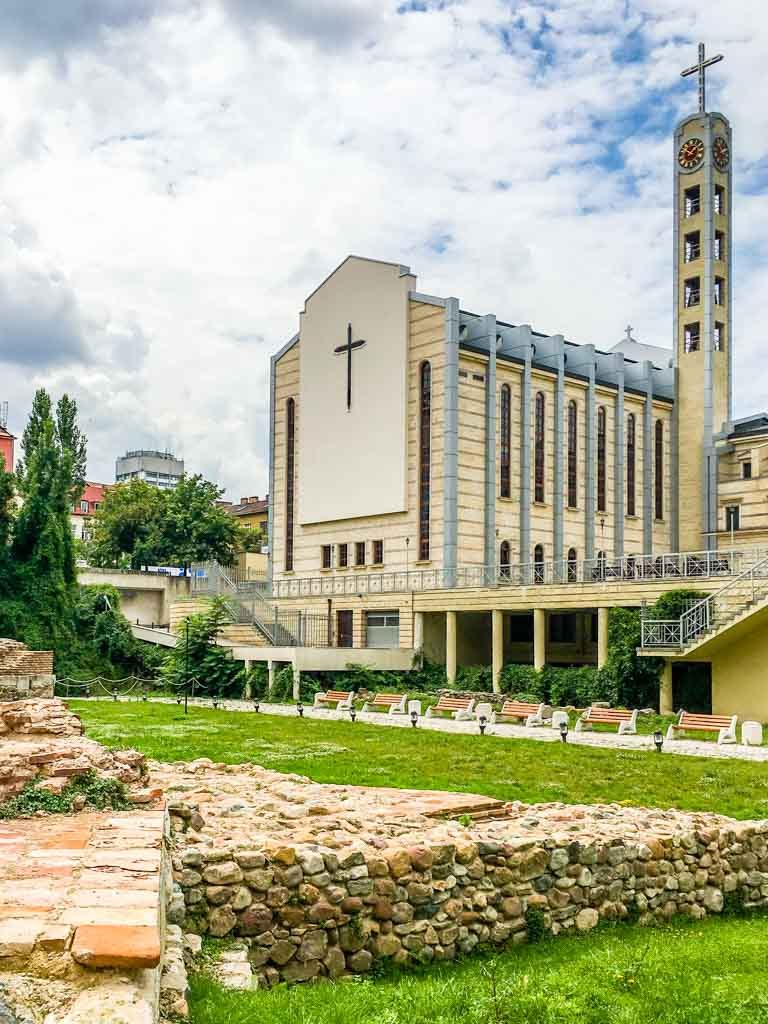
Alongside the ruins of Serdica is the main Roman Catholic Church in Sofia, the Cathedral of St.Joseph. This is a modern building, with the first stone laid by Pope John Paul II back in 2002. The Cathedral has a great viewing platform out the back where you can admire more of the Ruins of Serdica.

what to do in sofia in one day St Joseph
Cathedral of St.Joseph with Roman Ruins in foreground

5: National Archaeological Museum

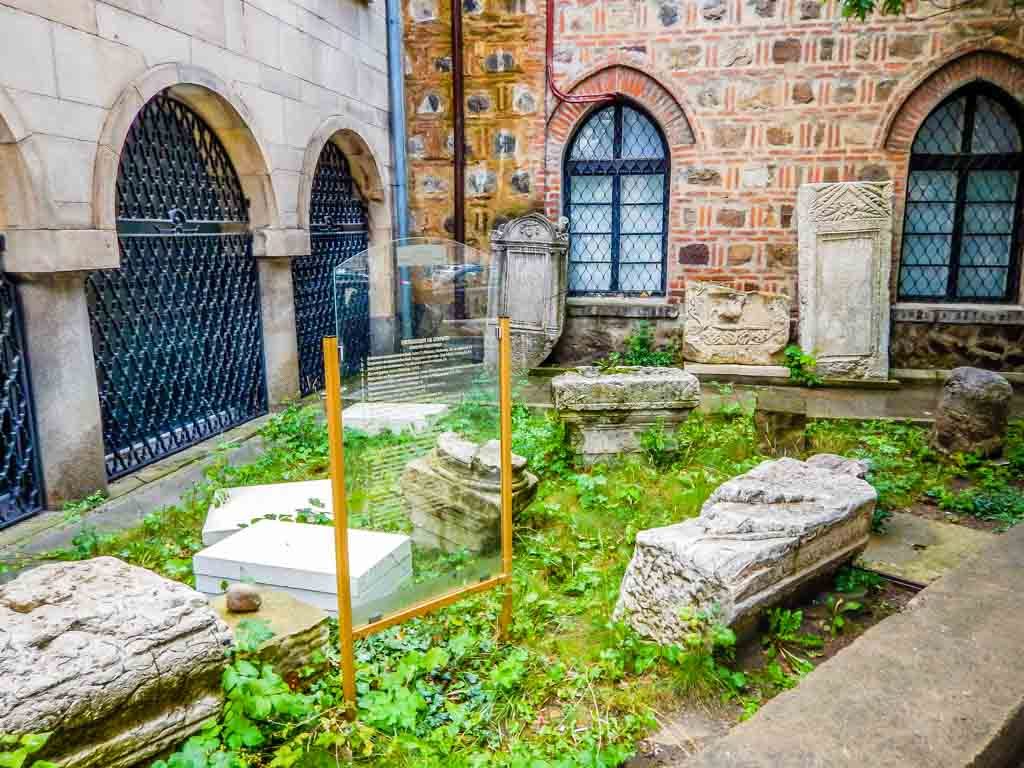
This building was a former Ottoman mosque in the heart of the city walking built way back in 1474. The museum was established here back in 1905. If you don’t want to enter the museum, there are many ancient Roman carvings on display out the front. These carvings alone are worthy of any Sofia sightseeing tour.

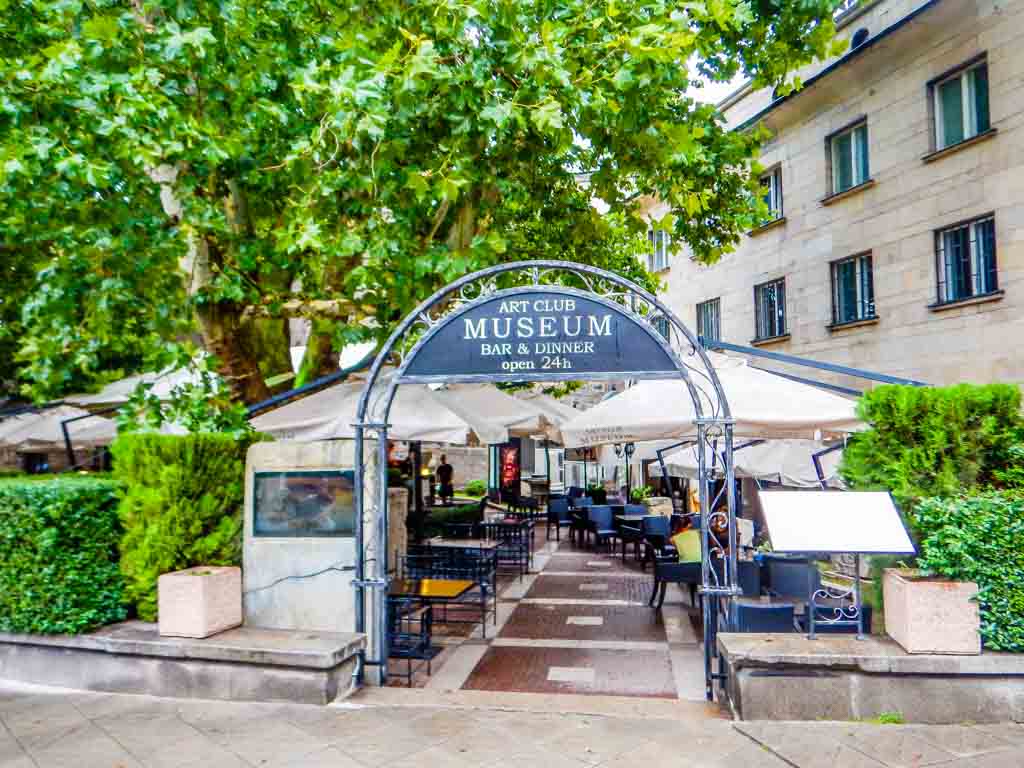
Around the back of the museum you will find a chic cafe, which happens to be open 24 hours. One of the more popular spots in Sofia for the local hipsters, and a great place to refuel for the rest of the Sofia walking tour.

The National Archaeological Museum is also where you will encounter the first of the yellow cobblestones, as they extend east towards the Tzar Liberator monument. Check out the Yellow Brick Road tour if you want to see more of these.

what to do in sofia in one day museum
Some of the treasures outside the museum

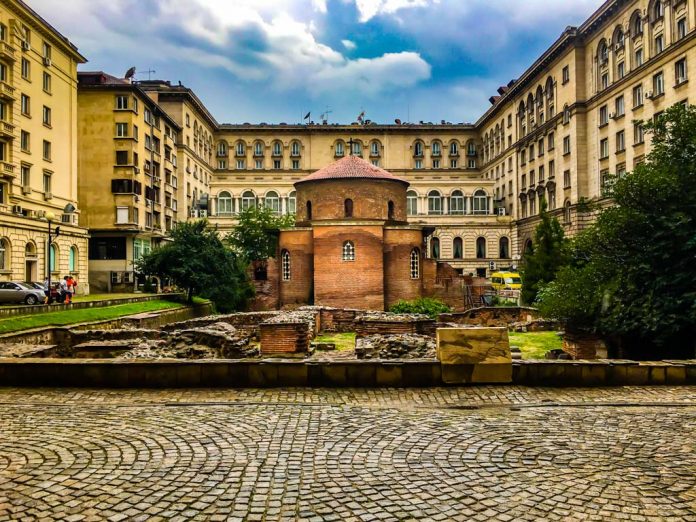
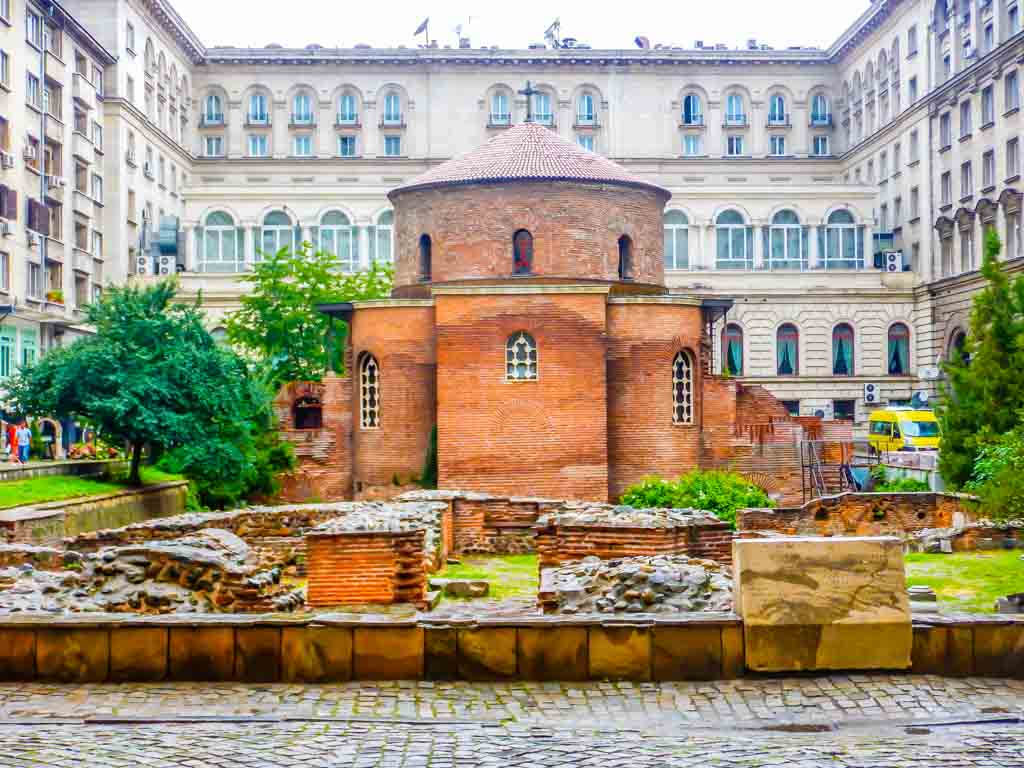
6: Church of St. George

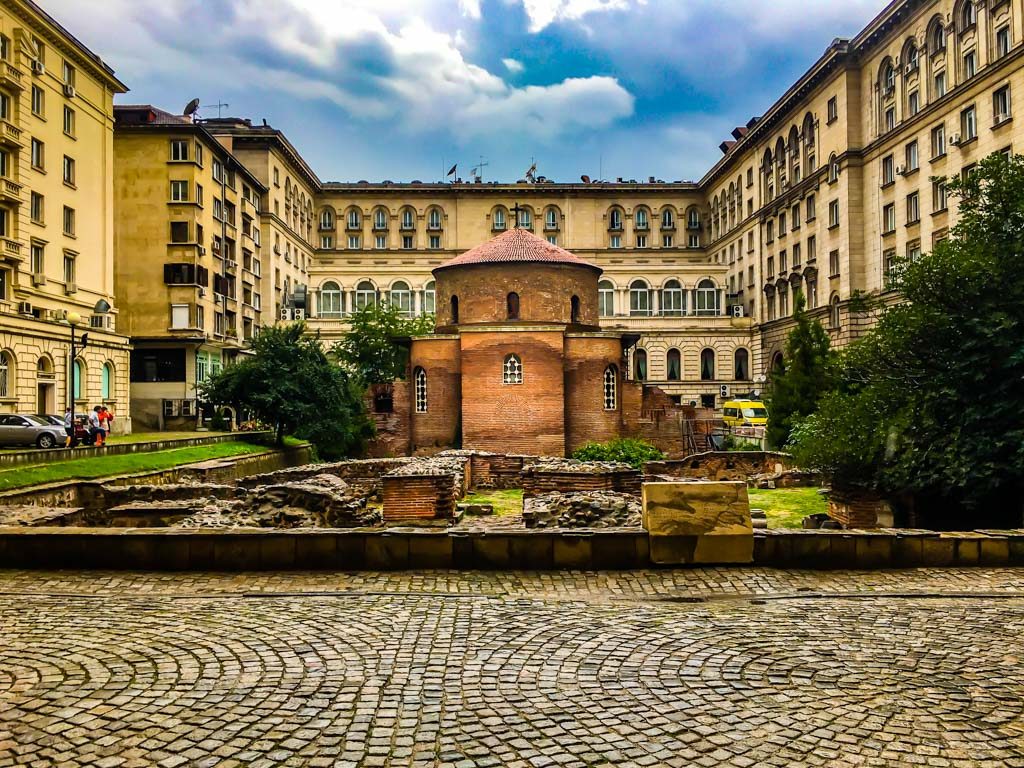
This is the oldest building in Sofia, built in the 4th century by the Romans. Amazingly it is still standing and is famous for its fresco paintings inside, dating back to the 12th Century.

The church is a little tricky to find, surrounded on all sides by multi-story buildings. There is a public entrance just to the west of the National Archaeological Museum, right at the start of the yellow cobblestones. In my opinion, this is the most amazing of all Sofia attractions because it carries such tremendous historical significance.

what to do in sofia in one day church
Church of St.George

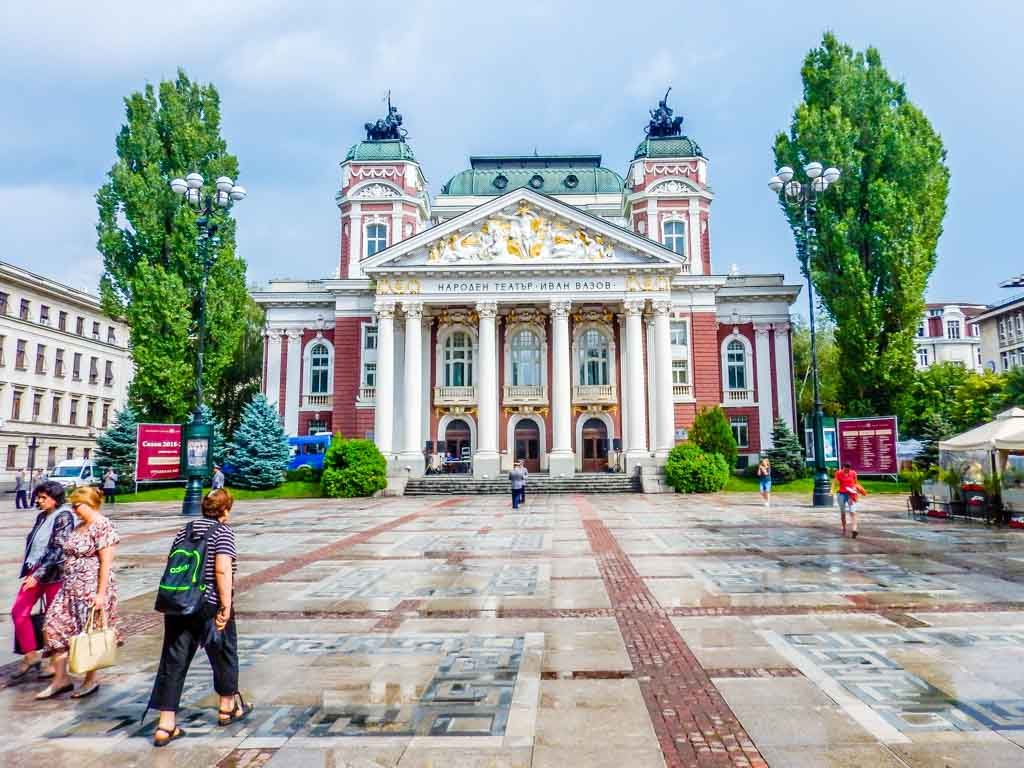
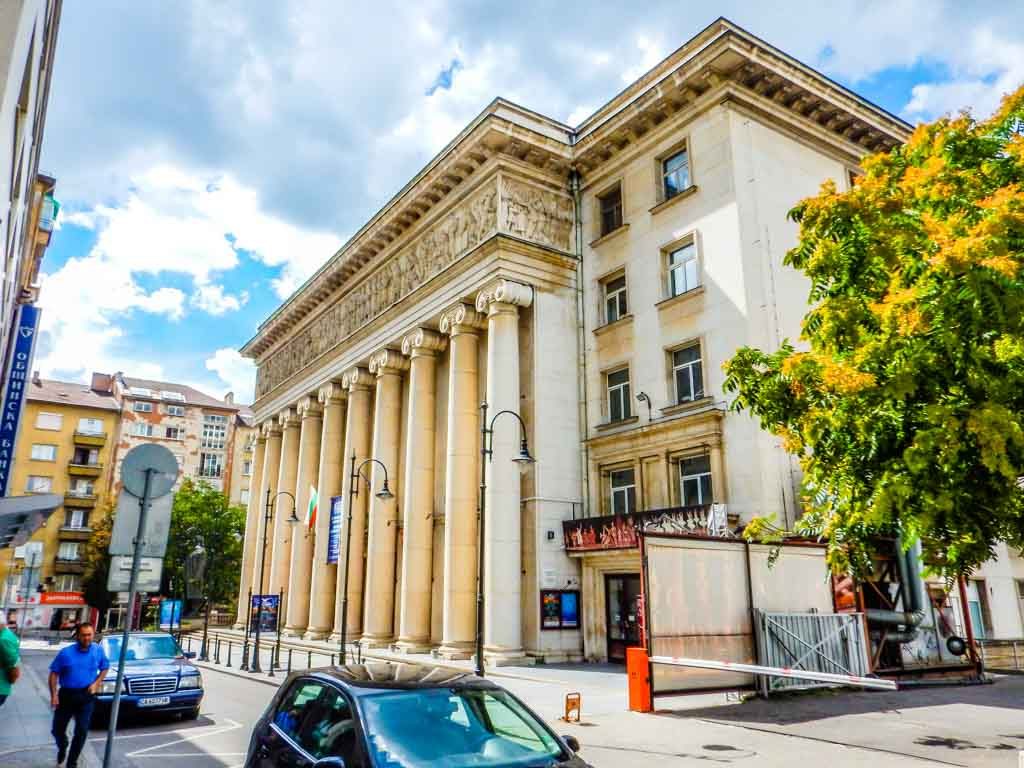
7: Ivan Vazov National Theater

This national theatre dates back to 1904. It is an exquisite building in classic Viennese styling. You will find this theatre on older 50 Lev bank notes. At the front of the theatre are some magnificent water fountains and the magnificent City Gardens, towards the back of Battenberg Square. Not only are these City Gardens one of the prettiest Sofia sights, they are a popular place for locals to chill out.

what to do in sofia in one day Ivan vast
Ivan Vasov National Theatre

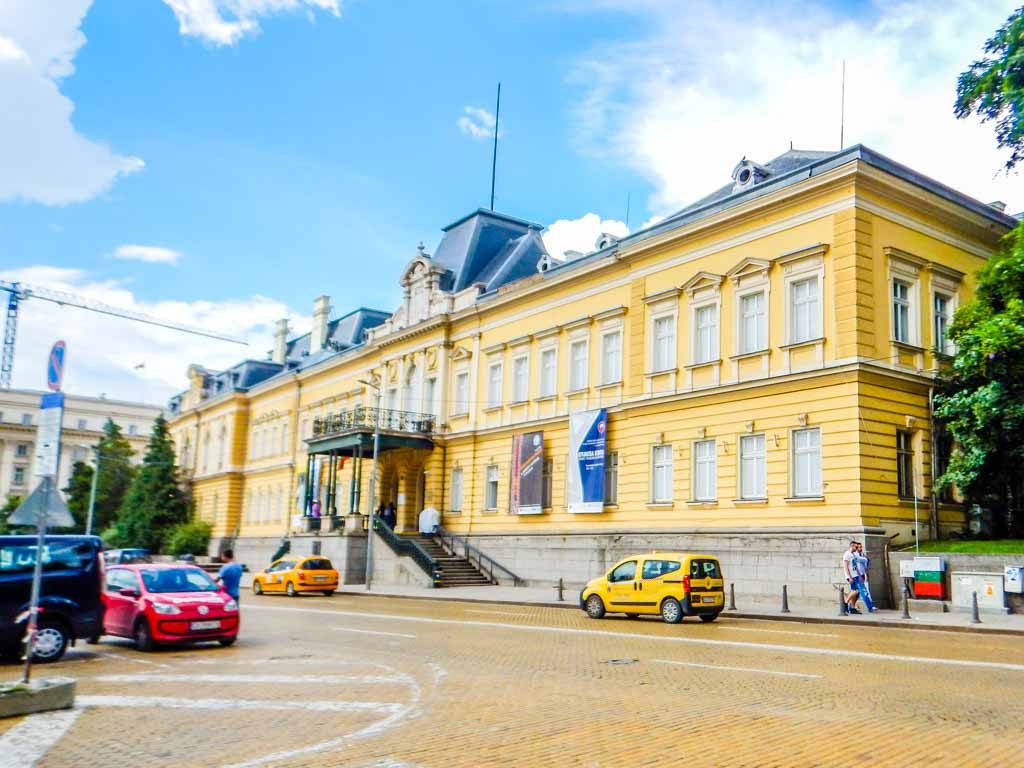
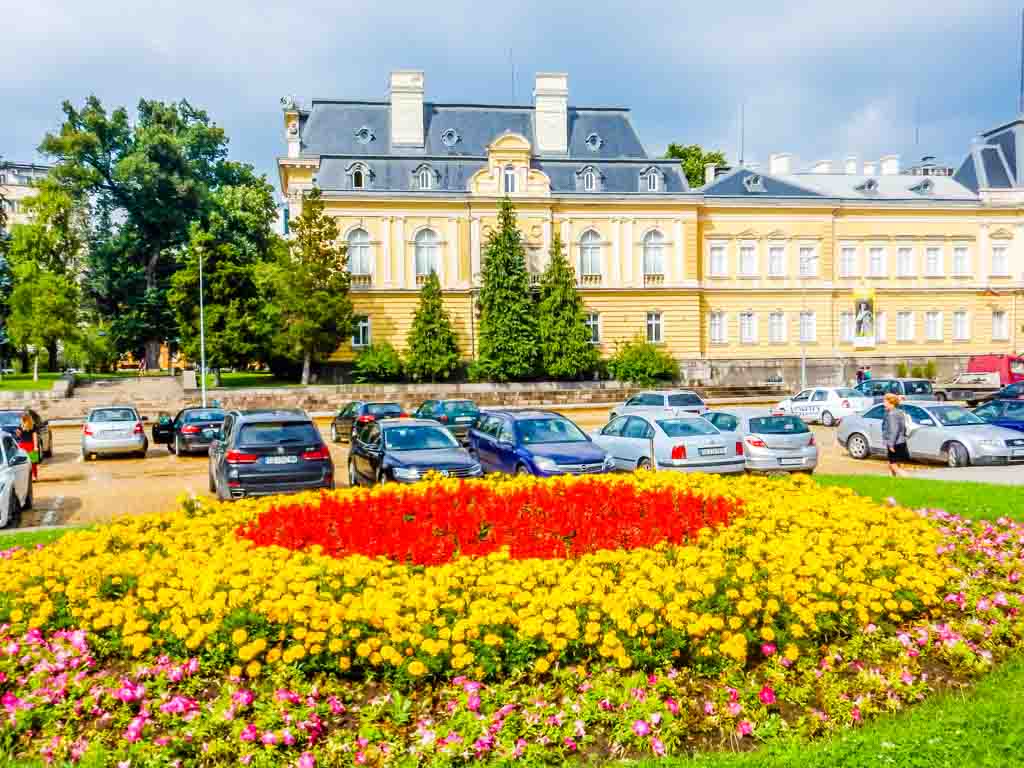
8: National Art Gallery

As you walk to the front of Battenberg Square you will be confronted by the exquisite National Art Gallery. The former Royal Palace was transformed into Bulgaria’s National Art Gallery back in 1946 after the monarchy was abolished. The palace itself was built in 1880.

Closed on Mondays, this Art Gallery is normally open to the public. It is well worth a look inside, particularly if you are interested in medieval art. This gallery is home to Bulgaria’s largest collection of Medieval paintings and a worthy inclusion on your Sofia tour.

what to do in sofia in one day art gallery
Royal Palace now National Art Gallery

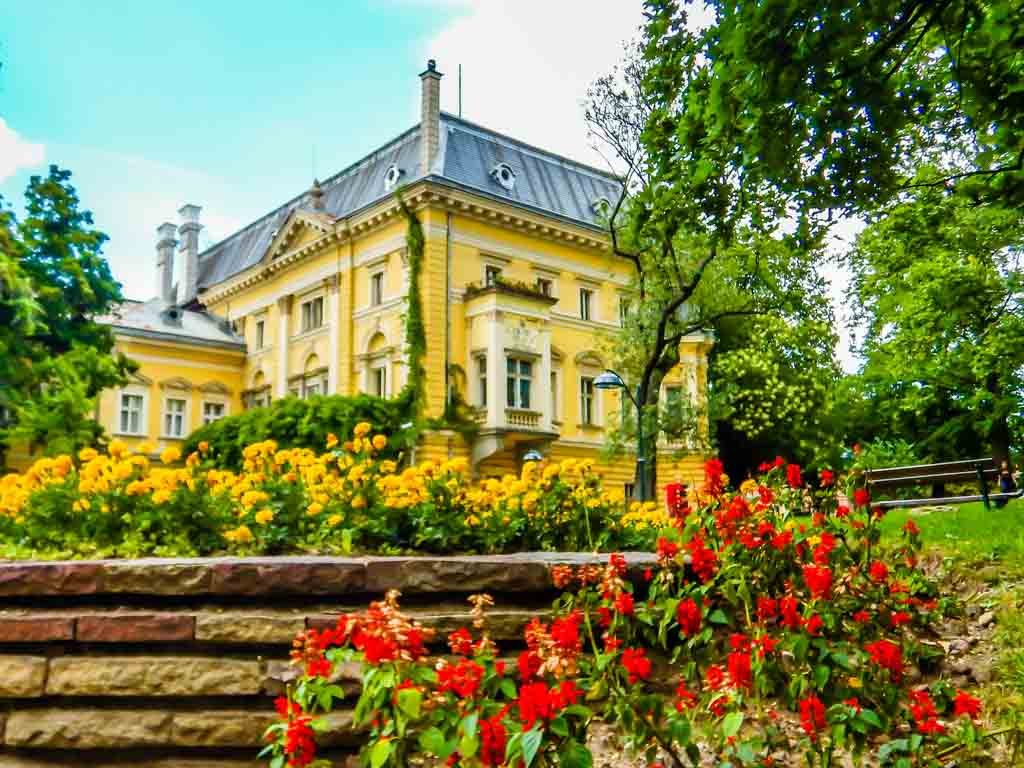
9: Ethnographic Museum

This 1892 Museum also forms part of the Royal Palace complex, alongside the National Art Gallery. A large and beautiful building, it is surrounded by beautiful parklands where you will find many locals watching the day go by.

what to do in sofia in one day ethnographic museum
Ethnographic museum

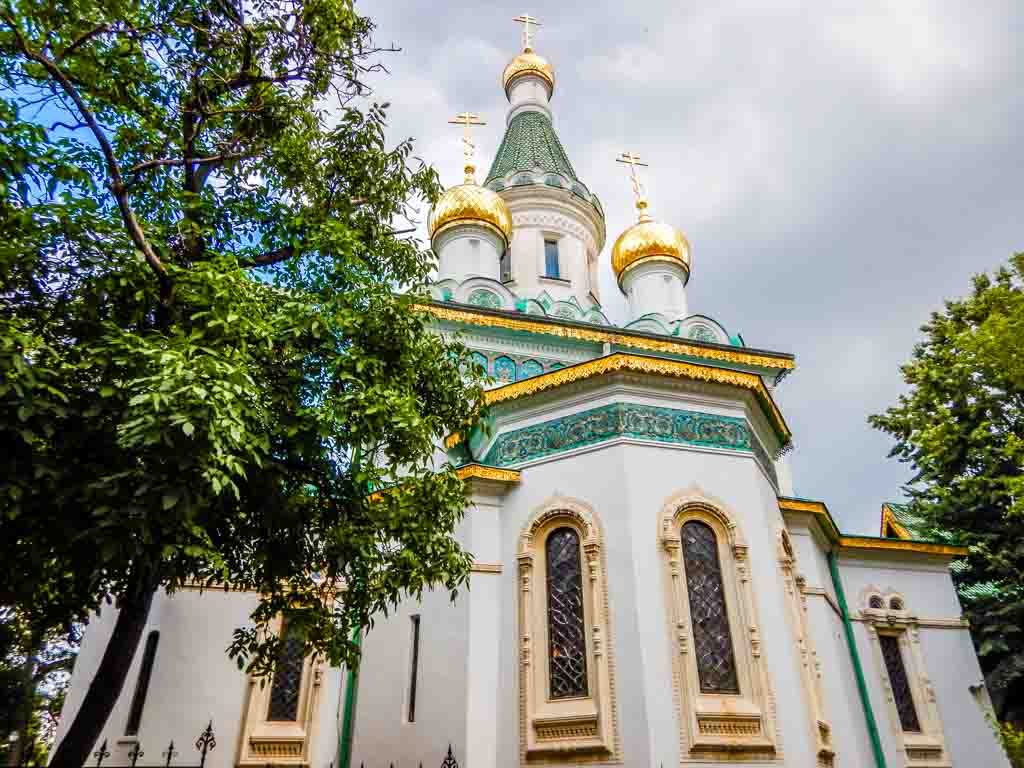
10: The Russian Church

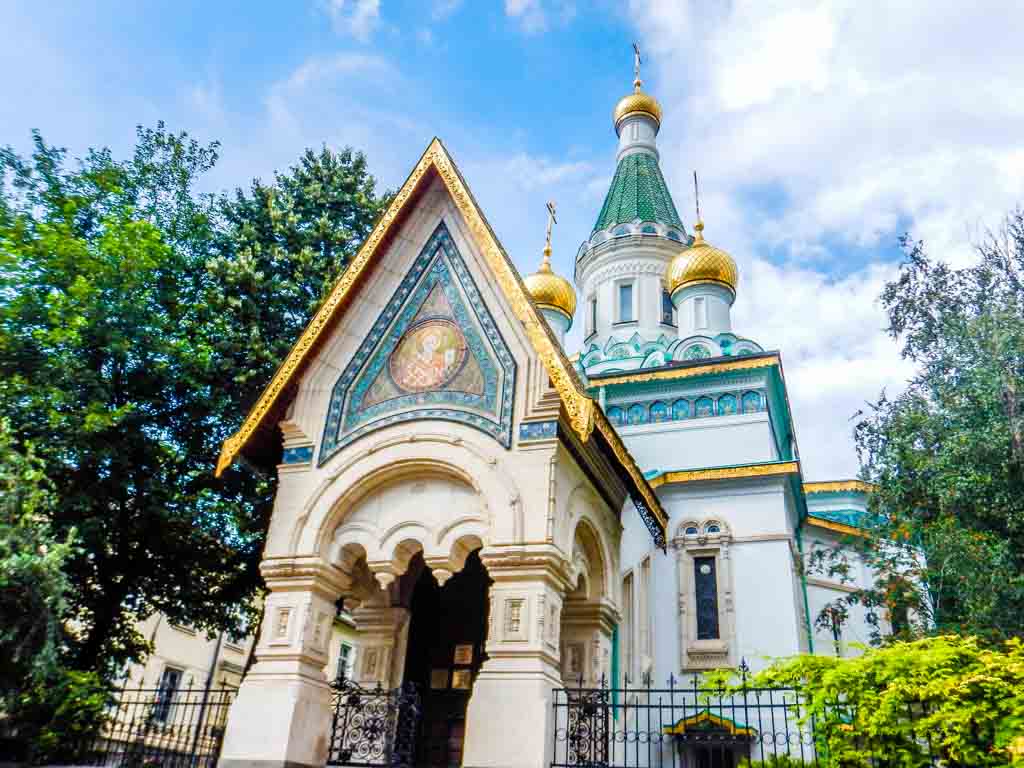
The Church of St.Nicholas the Miracle Maker is a Russian Orthodox Church with striking golden domes. This was built in 1907 in the style of 16th-century Russian churches and makes for a striking sight in middle of the city. You are welcome to go inside an admire the magnificent artwork, just remember to remove your hat.

what to do in sofia in one day Russian church
Russian Church

11. National Opera and Ballet

At the rear of the Russian Church, you will find some lovely parklands to walk through. This will also lead you into an arts precinct, with the National Opera and Ballet House. This enormous structure was built in 1890 and is obviously the place to go if you want to catch an opera show in Sofia.

what to do in sofia in one day opera
National Opera and Ballet

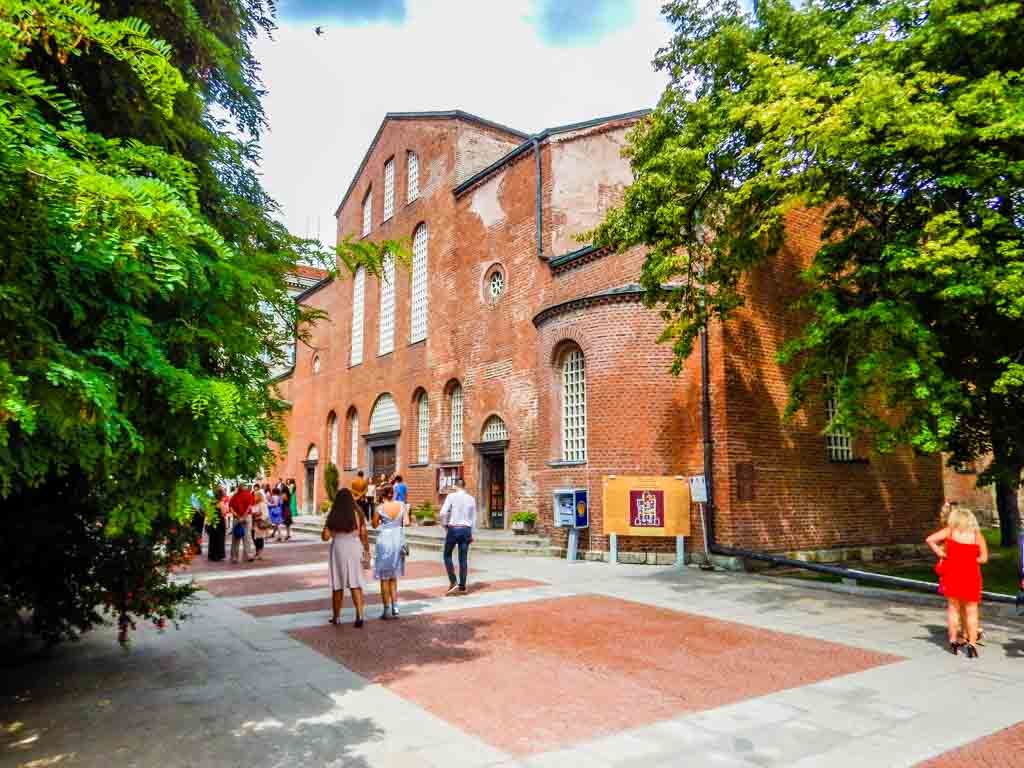
12. Saint Sofia Church

This is the second oldest church in Sofia, dating back to the 6th century. It is remarkably well preserved, with public access to a network of underground crypts. You do have to pay to go underground, and no photos are allowed even for paying visitors. Otherwise, you can take a free tour inside the ground level part of the church.

what to do in sofia in one day st Sofia church
St. Sofia Church

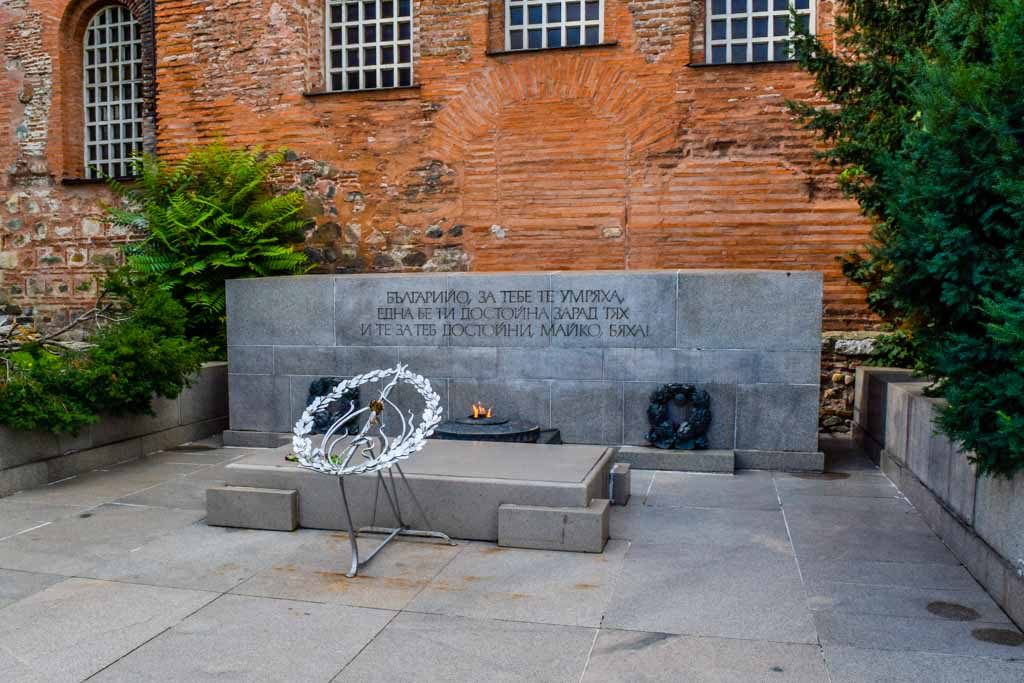
13. The Tomb of the Unknown Soldier

Located next to the 6th century Saint Sofia church is this monument to honor the thousands of soldiers who died in wars over the years. There is an “eternal flame” burning at the monument. It was built in 1981, which happened to be the 1300th anniversary of the Bulgarian state.

what to do in sofia in one day tomb of unknown soldier
Tomb of the Unknown Soldier

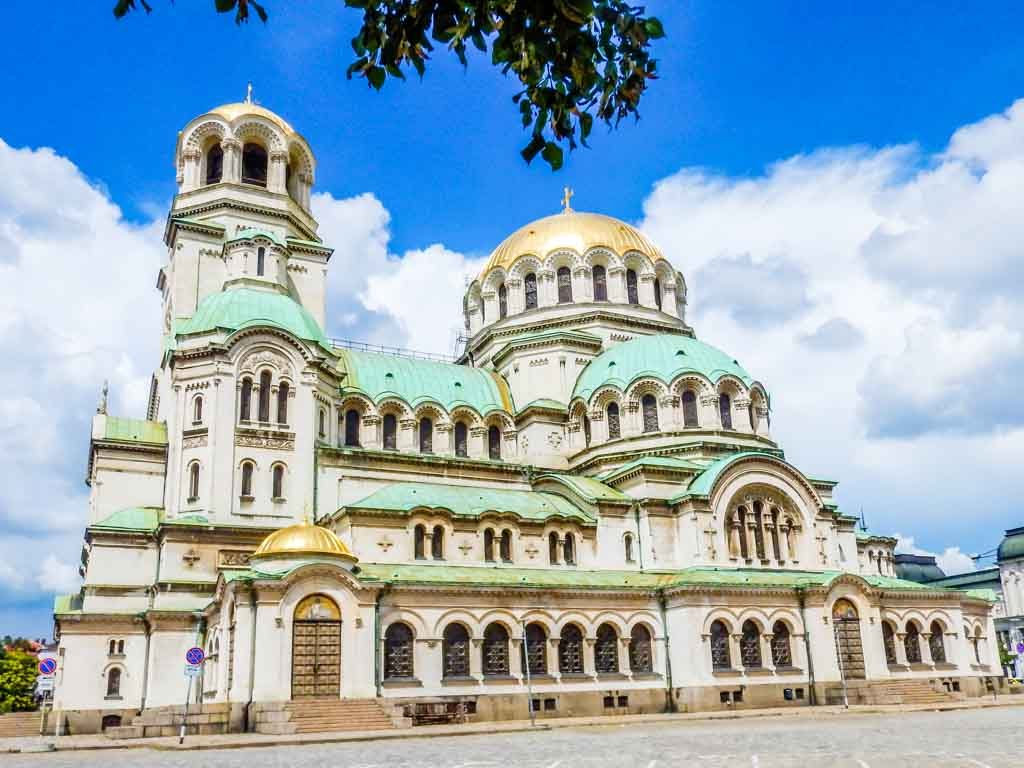
14. Alexander Nevsky Cathedral

Saving the best for last, this is the biggest and best attraction in Sofia. It’s a massive 53 meters tall. The giant cathedral is a Bulgarian Orthodox cathedral and is said to be able to hold 10,000 people inside. Personally, I would not like to be one of those 10,000 people because my estimation is only about 2,000 people.

what to do in sofia in one day Alexander Nevsky cathedral
Alexander Nevsky Cathedral

This is an impressive cathedral to photograph from all sides. That is actually one of the unusual features, that you can get great photos from any angle. But the real treat is to go inside and admire the massive frescos in the massive domes. Unfortunately, you are not permitted to photograph the interior.

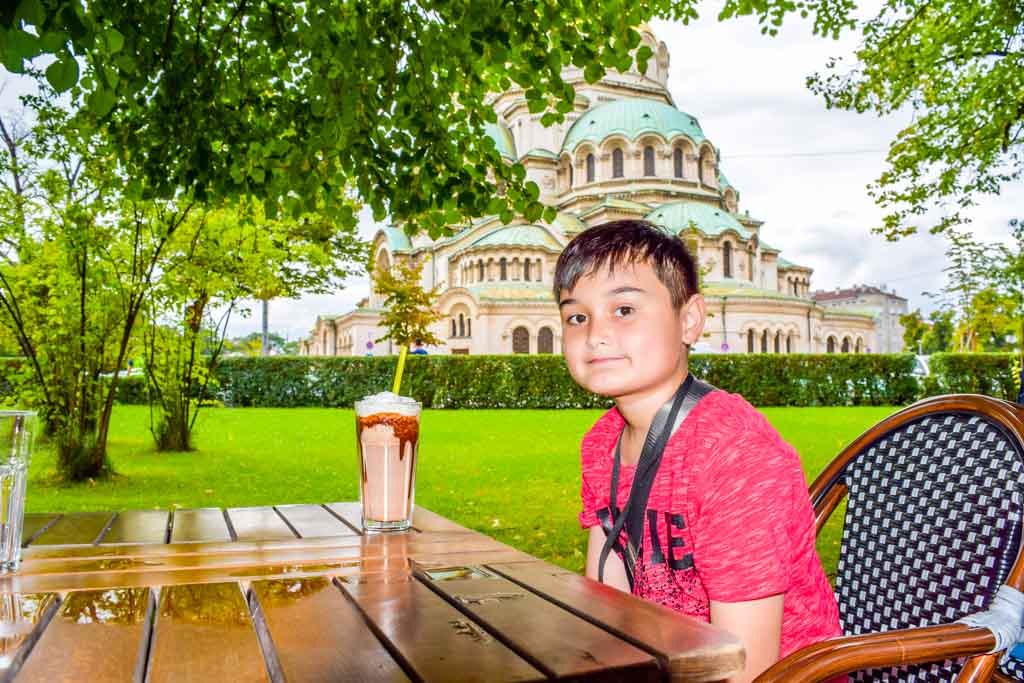
I recommend a little cafe at the front of the National Art Gallery, where you are treated to outstanding views of the cathedral. It’s a little expensive but the view is priceless, with million dollar views of the finest of all Sofia attractions.

what to do in sofia in one day cafe
Cafe near the Alexander Nevsky Cathedral

Plenty More to See in Sofia

As you take this walking tour, you will see many more interesting looking buildings, monuments, and parks along the way. Why not take a little detour and check them out.

That’s why I suggest you allow a good 4 hours for this walk, there is so much to see. In fact, why not take 6 and have lunch along the way? Now you know what to do in Sofia in 1 day, in fact, you may even need more a little more time.

Would you like a free copy of our Ultimate Bucket List?

Not sure where to travel to next? We have created the Ultimate Bucket List to help you plan your next trip. 1170 awesome travel destinations in 167 countries. And we want you to have it for FREE.


Top 10 Tips to Visit Sofia Bulgaria

0
Visit Sofia 250 tzum

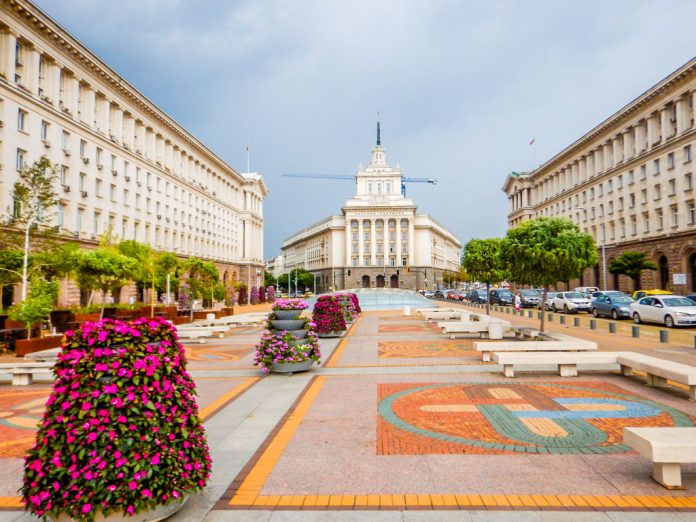
Sofia Bulgaria is not really on the tourist map, but there is plenty to see in this interesting city. They say this is the second oldest city in Europe. It is built on Roman ruins, and the whole city seems to be an archaeological wonder. But you need to be a little careful if you visit this city. That’s why I’ve put together these top 10 tips to visit Sofia Bulgaria.

Note: This post may contain affiliate links. Please read our disclosure policy for more information.


Tip 1: Beware of Rip-off Taxi Drivers

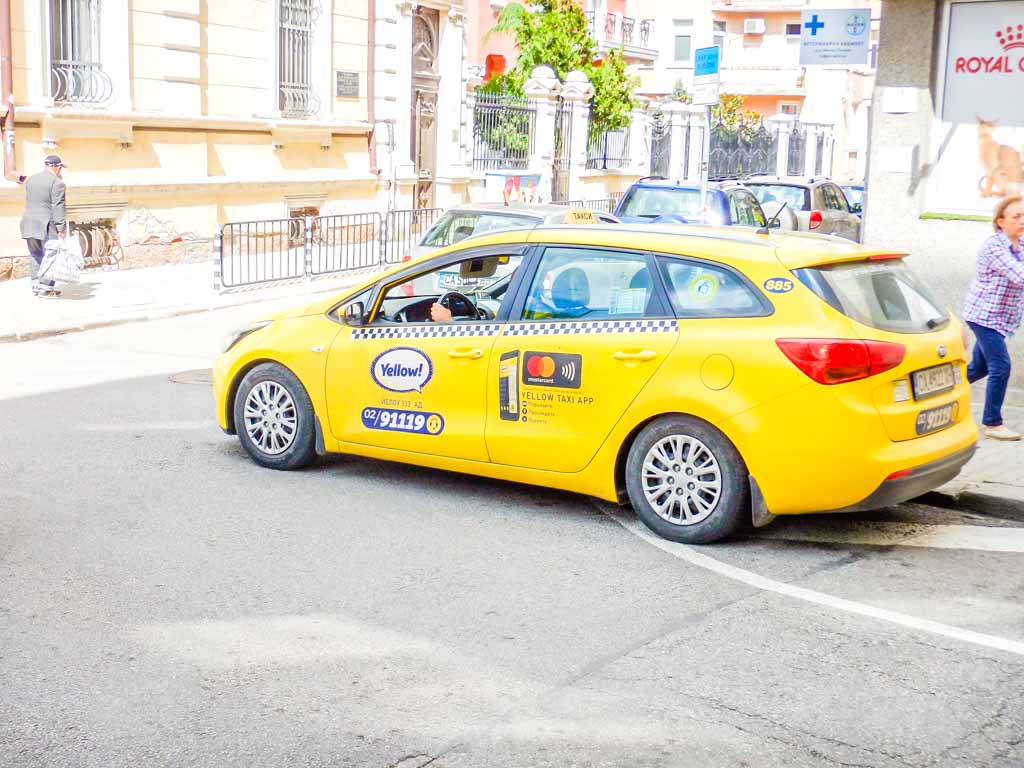
I’ll give you a typical taxi experience in Sofia. First, the taxi driver will take you the long way, due to one-way streets. Then he will take you yet another long way to avoid unexpected roadworks. Nothing unusal there, it could happen anywhere in the world.

Finally, you arrive at your destination. When you hand over 20 Lev for the fare the driver quickly reaches down and then holds up 5 Lev. The taxi driver looks you squarely in the eye and emphatically states “You only gave me 5 Lev.” Your jaw drops as you wonder how this driver could be so deceitful.

These are all from actual experience in Sofia. Yes they are extremely dodgy taxi drivers. If you hand over 20 Lev, you must say out loud “I’m giving you 20 Lev”. Better still, take public transport or walk.

Visit Sofia 250 tzum
Beware of this taxi

Tip 2: Taxi Me App

There is a neat phone app called Taxi Me. It’s a bit like the Uber or Grab Taxi app, where you just enter a destination, and the app is designed to quickly find a nearby taxi. I used this app many times, but not once did I successfully hook up with a taxi. Every time it timed out. I found this app to be utterly useless.

Hailing a taxi is a better way to go, they are generally plentiful around the city centre. Otherwise just phone Mega Taxi 24/7 on 91119.

Tip 3: Bulgaria is Uber Free

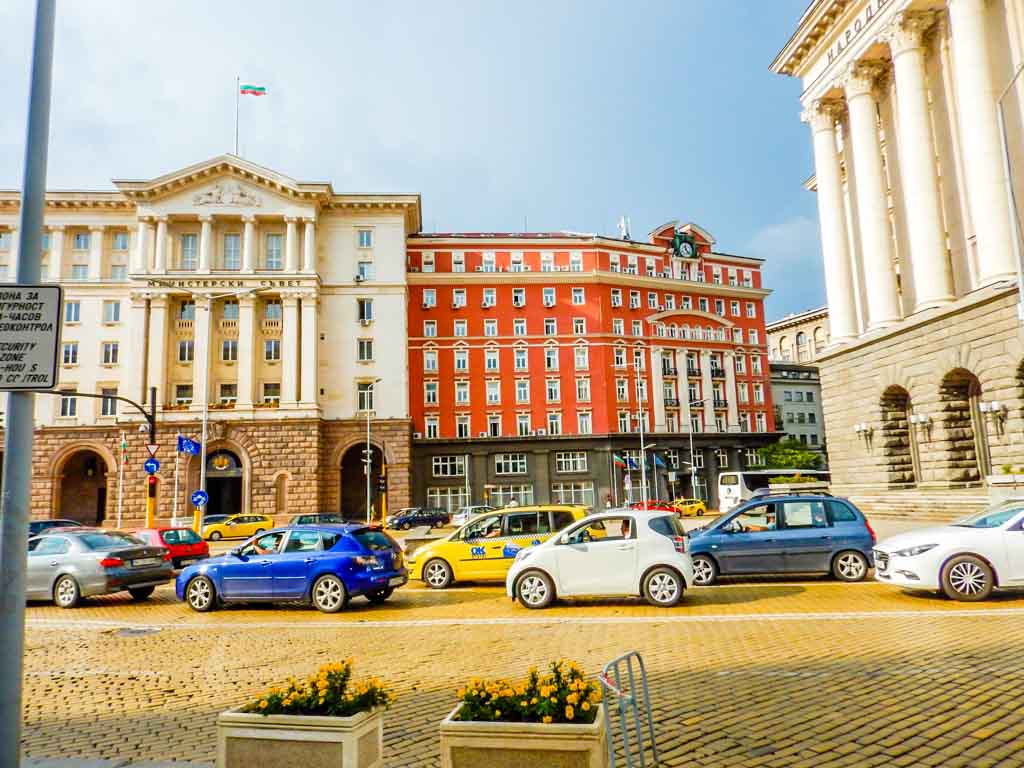
You will not find Uber in Sofia Bulgaria. So, unfortunately, Taxis are your only choice for getting around Sofia. I am a big fan of Uber (and Grab) because the app will calculate the fare for you, not some dodgy taxi driver. Sofia desperately needs this layer of honesty, I hope it arrives soon.

Visit Sofia 250 traffic
You won’t find an Uber in this traffic!

Tip 4: ATM’s Are Hard to Find

I don’t quite know why ATM’s are notoriously hard to find in Sofia. Even at the main Serdika Bus Station, where international buses drop off their passengers, I could not find a single ATM at the bus station. I had to walk inside a supermarket across the street to find an ATM.

As you walk around the city center you do not see ATM’s everywhere as in other cities. The best plan is to not let your cash run out before finding an ATM, and leave a bit of spare cash in your wallet.

Tip 5: SIM Cards Are a Hassle to Buy

In some countries, SIM cards are very easy to buy. For instance, in Australia, you can just purchase tourist SIM cards in vending machines when you arrive at the airport. Not in Sofia.

You are required to produce your passport, and the seller must call the phone company and give your passport details to activate the SIM card. This can lead to a rather time-consuming experience.

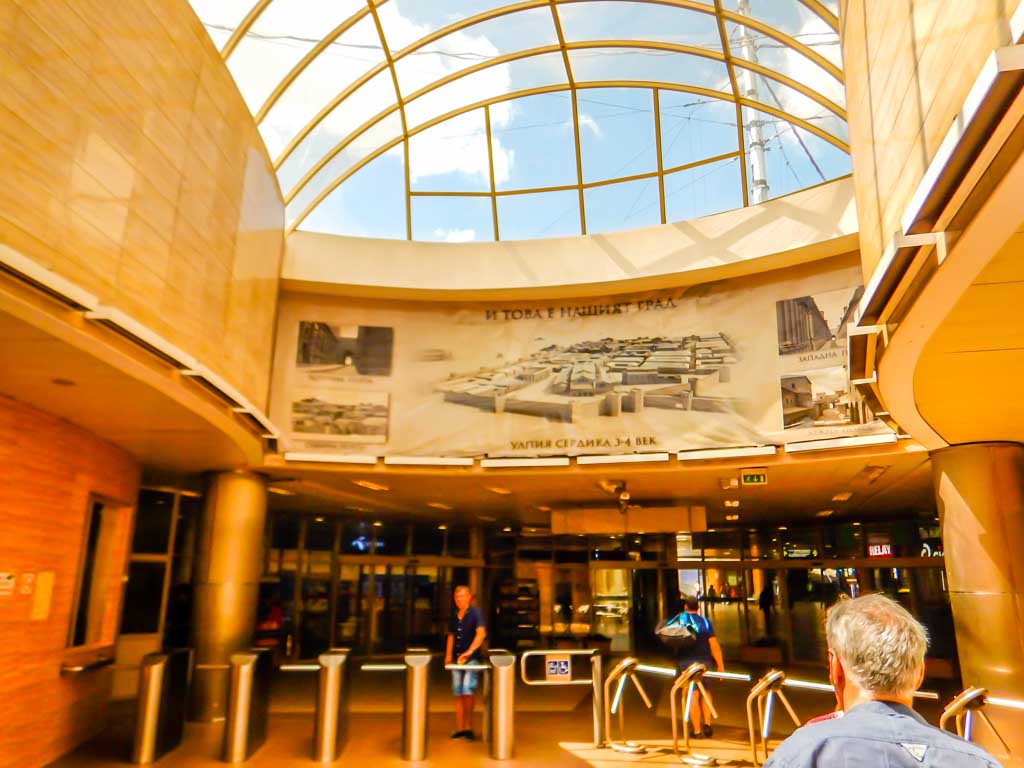
So where do you purchase SIM cards in Bulgaria? The city subway stations have many vendors like fast food and newspaper shops in the station entrances. You can find vendors here who will sell you a SIM card. If you buy one of the main 3 brands you can’t go wrong, that’s A1, Telenor or Vivacom.

P097 Visit Sofia 100 underground
SIM cards can be purchased at subway station vendors

Tip 6: European SIM’s Don’t Work in Bulgaria

One thing we love about Europe is that when you buy a SIM card, it magically works in different countries when you travel about. For example, we purchased a Three SIM card at Heathrow airport and used it all over Europe.

Not in Bulgaria. European SIM cards won’t work here, instead, you’ll have to purchase a new SIM card. I hope this changes in future, but in the meantime it may pay to check out the phone WIKI before you go.

Tip 7: Public Transport is Cheap

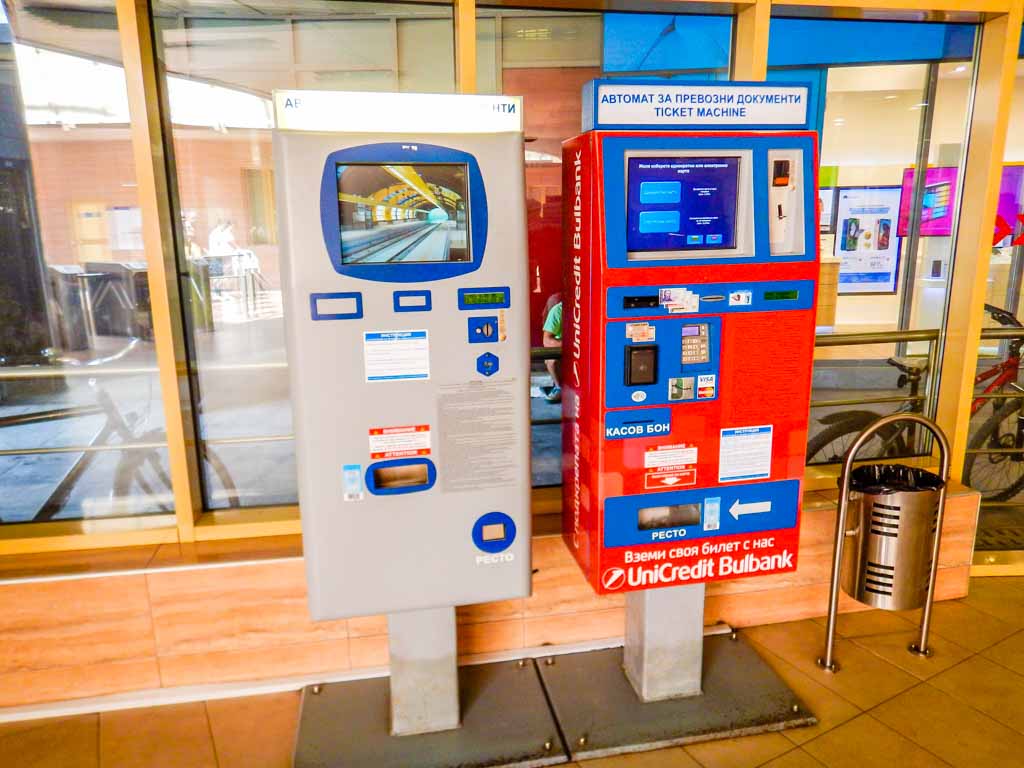
It’s a good idea to learn how to use the public transport system, particularly the metro train system. Vending machines are in the main stations and are very easy to use. Tickets cost just 1.6 Lev in the vending machines. This is far cheaper than taxis.

P097 Visit Sofia 100 ticket machine
Ticket vending machine in Serdica Metro Station

Tip 8: City Centre Prices are Inflated

Bulgaria is one of the cheapest cities in Europe to visit. Accommodation is cheap and the food is cheaper. But not in the city center. Here you will find street vendors selling food and drinks for the same price as you would pay in downtown London. Walk a couple of blocks and you will find the same stuff for a quarter the price.

Tip 9: Try the Local Food

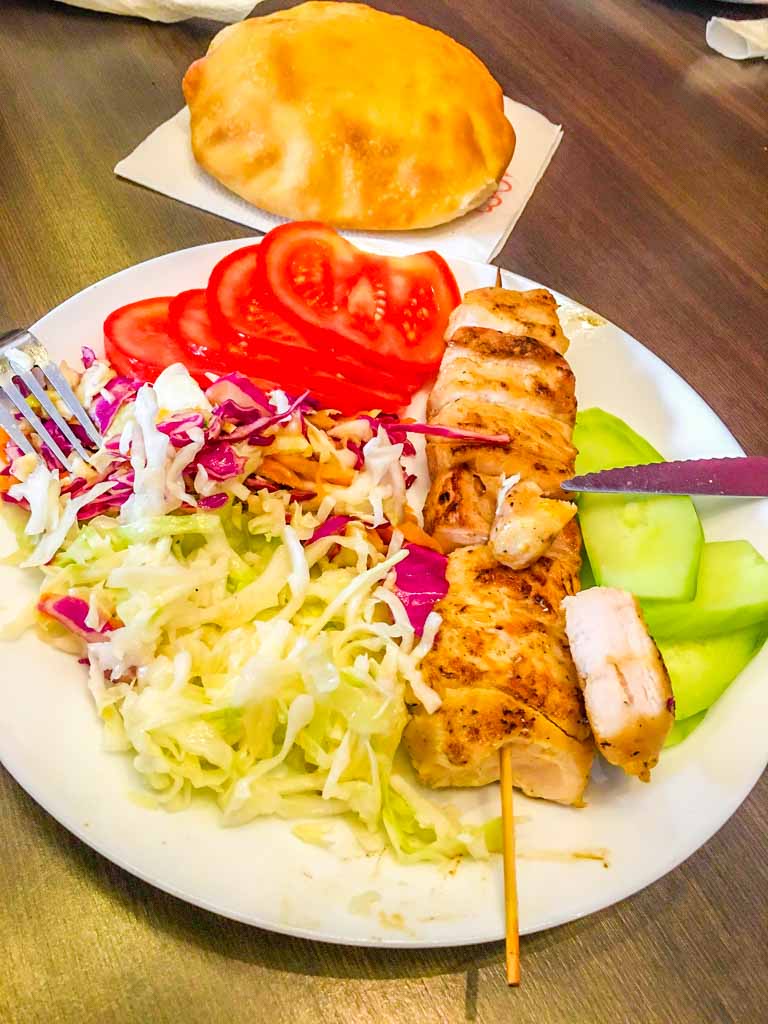
Make sure you go to a local cafe or restaurant to sample the local food. It is very cheap. Servings are huge. And it is very very tasty. Sofians love their meat and the portions are oversized. We couldn’t get enough of this cuisine, and it’s quite healthy too!

P097 Visit Sofia 100 food
Typical dish at a local cafe/restaurant

Tip 10: Get Accommodation in the City Center

Sofia is a fairly compact city in that most of the best attractions in Sofia are within walking distance in the city center. So it is a wise choice to get accommodation in the city center.

Hotels are not exactly plentiful, so we recommend an Airbnb apartment in Sofia city center. Staying in downtown Sofia will also help you to avoid those shady taxi drivers.

Impressions of Sofia

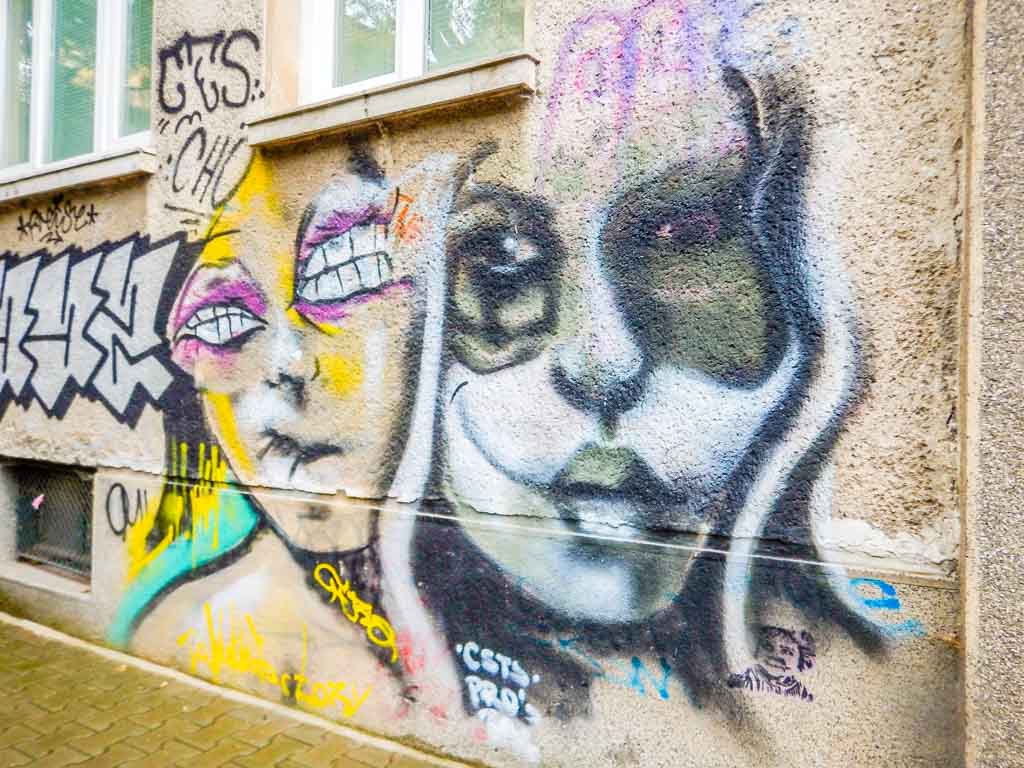
The thing that caught our eye in Sofia is the high level of graffiti. It’s everywhere. This tells us that the youth are a little out of control. So I think it pays to be a little more careful than usual when walking around Sofia.

We also noticed a high number of homeless people and beggars. So once again, this may be a good indication to be careful of your possessions as you wander around, particularly at night. And make sure you have some loose money to give to those needy people you pass on the street!

P097 Graffiti
Some of the abundant Sofia graffiti

Apart from these minor precautions, we found Sofia to be a pleasant city to stroll around, and the people friendly enough. Shopping is scattered and not of a high standard, so don’t visit Sofia expecting some kind of shopping paradise. But what Sofia lacks in shopping it definitely makes up for in amazing tourist attractions.

Would you like a free copy of our Ultimate Bucket List?

Not sure where to travel to next? We have created the Ultimate Bucket List to help you plan your next trip. 1170 awesome travel destinations in 167 countries. And we want you to have it for FREE.

Ultimate Bus Tour from Sofia to Rila Monastery

0
Sofia to Rila Monastery

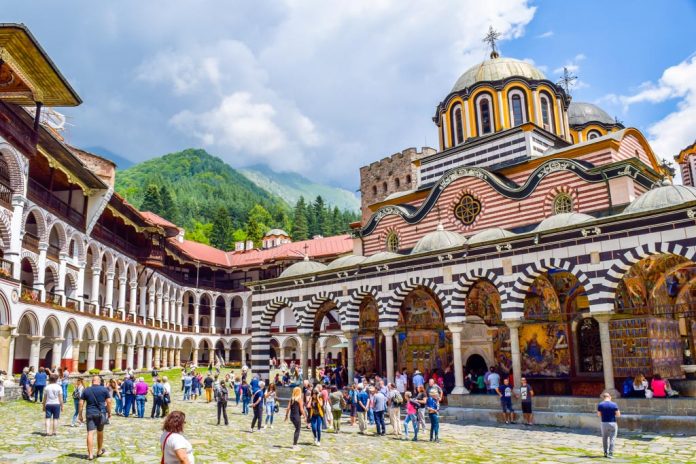
Rila Monastery Bulgaria is a UNESCO World Heritage site just 2 hours drive from the capital city of Sofia. As you will see it is easy to take a day trip out to the Rila Mountains to see this famous monastery. This is the bus tour we took from Sofia to Rila Monastery.

Note: This post may contain affiliate links. Please read our disclosure policy for more information.

How to Find a Bus from Sofia to Rila Monastery

Our favorite online booking platform is Getyourguide.com. This is where we went to find our bus from Sofia to Rila Monastery. There are literally dozens of tour options available on this tour platform, and they are reasonably priced. Check out the current prices by clicking on the below tour options.

Our tour operator was Zelanos Tours, and you could contact them directly to negotiate a cheap deal. Their contact details are +359 88 890 5811 or info@zelanos.com.

Most bus tours also include Boyana Church, a second UNESCO World Heritage attraction on the outskirts of Sofia. As you will read below, Boyana Church pales in comparison to the star of the show, the awesome Monastery of Rila.

Bus Pick up from Sofia City Centre

Our bus pick up time was a respectable 9:00 am, we just entered our apartment address at the time of booking the tour on Getyourguide.com. The bus was a 10 seater luxury bus. As it turns out the bus showed up about 15 minutes early, and there was only one other person on board.

After a quick meet and greet, we were on our way to drive directly to Rila Monastery. As we drove through Sofia our friendly tour guide gave us an interesting commentary on the history and layout of Sofia. “Ask me anything,” he said. It was great to have our own personal guide.

Sofia to Rila Monastery 100 tour bus
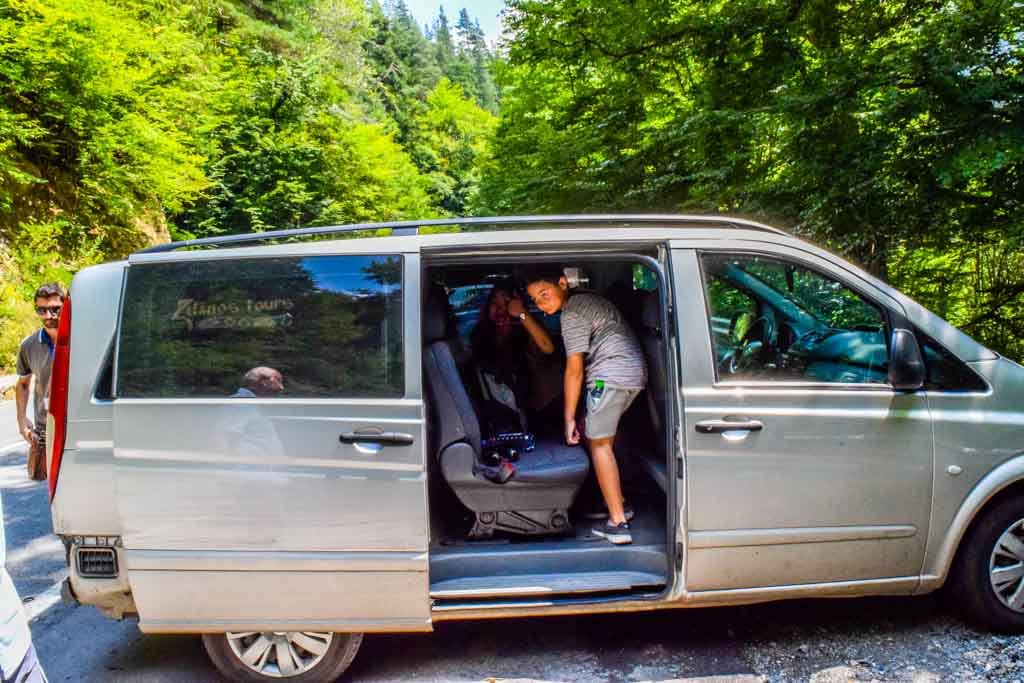
Our comfortable tour bus

The Drive to Rila Monastery

Driving to Rila Monastery from Sofia takes about 2 hours in total. The first 20 minutes of the drive was interesting, driving through the outskirts of Sofia. It is amazing to see the old Soviet apartment blocks, and to try to imagine the harsh life prior to the 1989 revolution.

Then it was time to hit the freeways for the next hour or so. If you like to see neverending fields of sunflowers then this drive will amaze you. Otherwise, it’s just like any other freeway drive, not terribly interesting.

After the freeway, you take an exit up into a small winding road into the Rila Mountains. This is a very scenic drive, passing through some small villages and driving along a beautiful scenic valley. This part of the drive takes about 40 minutes.


The Monastery Dress Code

Our tour guide neglected to inform us of the strict dress code at Rila monastery. Women are not permitted to bare their shoulders. In our case, my wife was wearing a sleeveless summer top. Being a hot summer day, we had no other clothing to cover up with. We started scanning for some kind of shop to purchase a scarf or shawl.

Sofia to Rila Monastery 100 bare shoulders
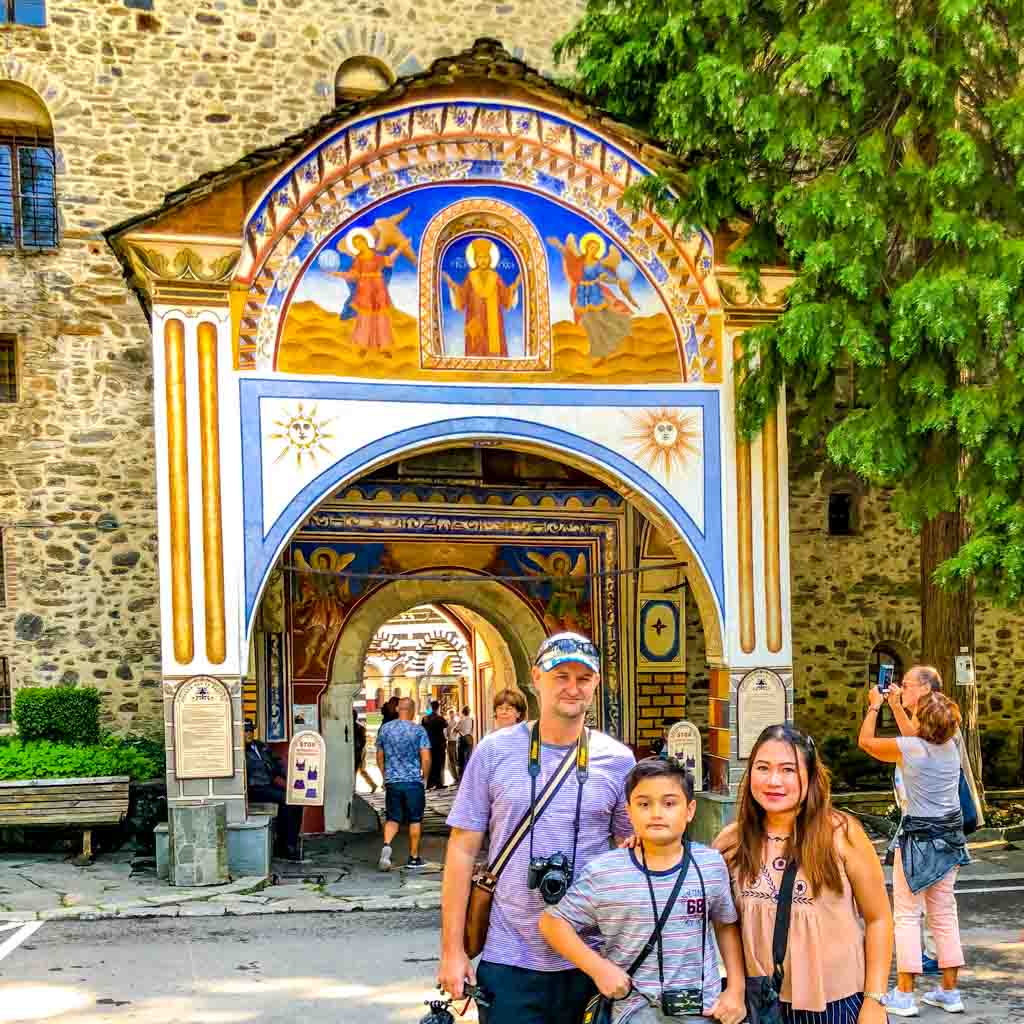
At the entrance with sleeveless top

The friendly security staff at the gate noticed our dilemma and jumped in to assist, offering us the loan of a shawl for my wife to cover her shoulders. This was a complementary loan, and the guard was very polite through the whole ordeal. It was a happy ending. Thank you nice security man!

At the front of the monastery, there is a free drinking water fountain with fresh mountain water. You will find several of these scattered throughout the monastery. It is clear, fresh mountain water and great for refilling your drink bottle.

Sofia to Rila Monastery 100 shaws frescos
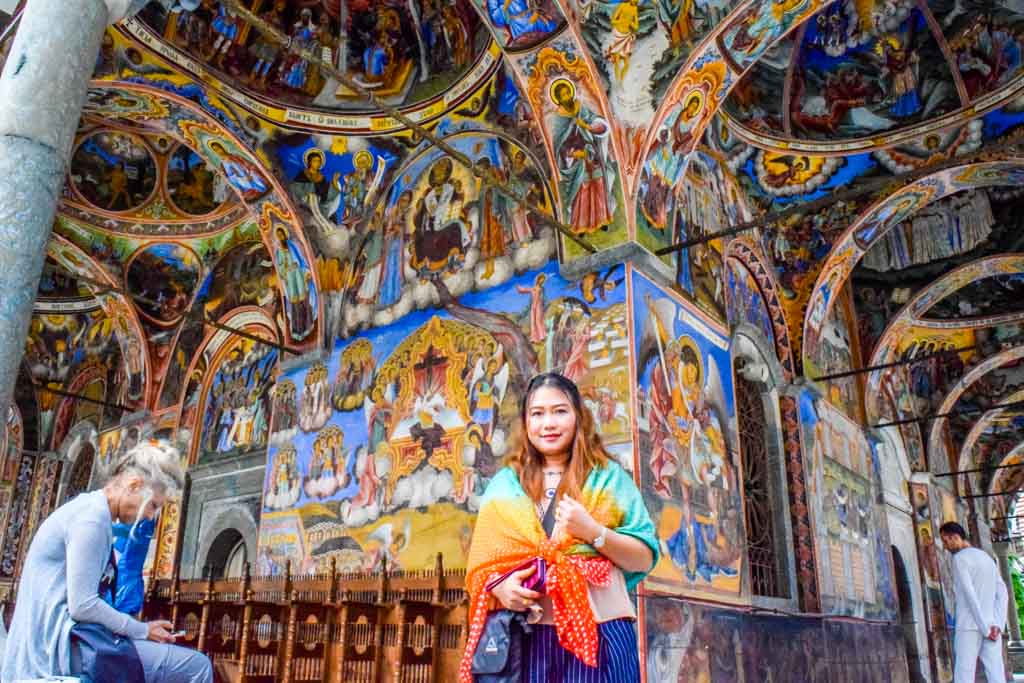
Inside with a loaned shawl

The Rila Monastery Tour

We had 2 hours at Rila Monastery. The first 30 minutes was a guided tour, with our knowledgeable tour operator giving us a tour of the magnificent frescos on the outside of the monastery. As it turns out, these depict the stories of the bible and were used for religious education during the Ottoman occupation, when books were banned.

Next was a guided tour inside the church. If you think the outside is amazing, the inside is absolutely mind blowing. Not only is it magnificent in every sense of the word, and it also holds tremendous religious significance, holding many religious relics.

Sofia to Rila Monastery 100 first look
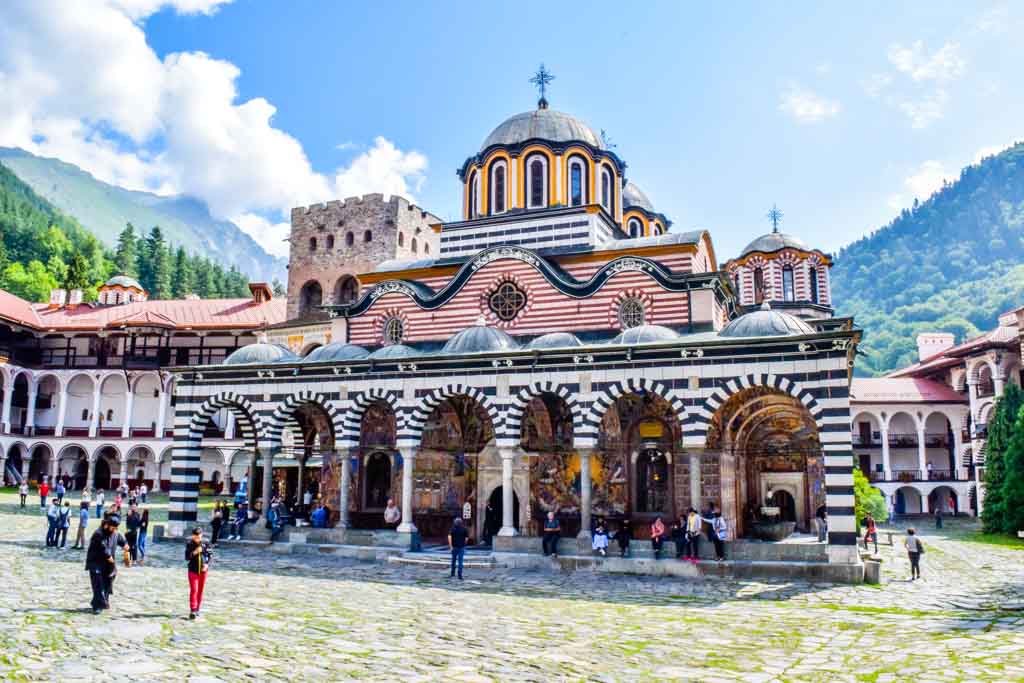
The view as you walk through the front entrance

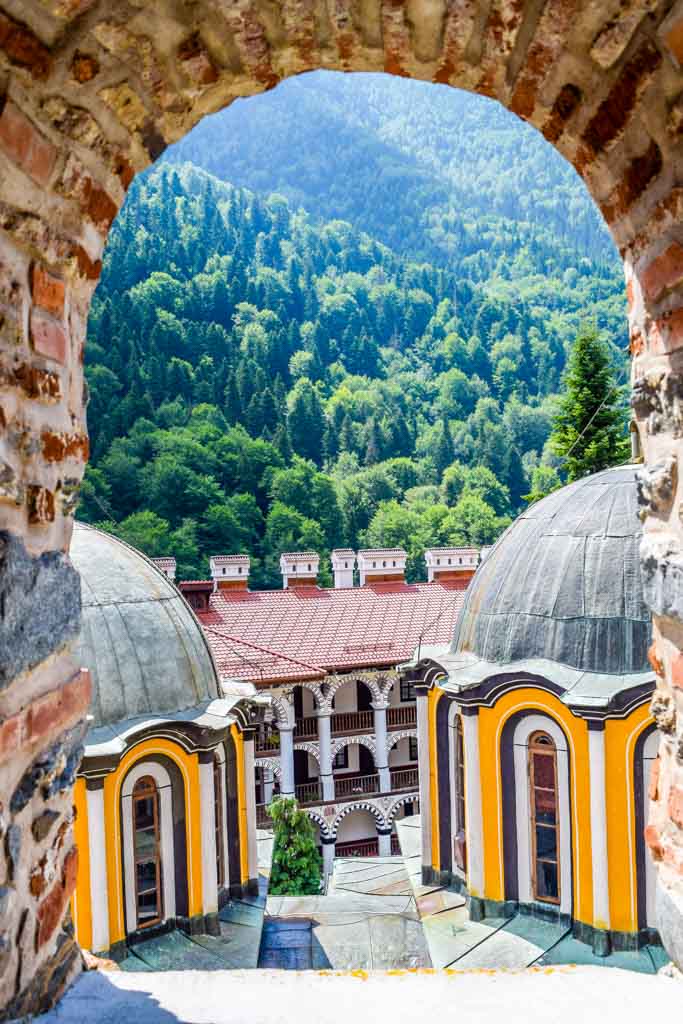
After our guided tour we were free to wander the grounds or pay to enter the museum. Our chosen activity was to climb the 14th-century tower, the oldest structure on the site. The entrance fee was 5 lev per person. Once at the top we were afforded to spectacular views of the monastery, Rila mountains, and the surrounding countryside.

Sofia to Rila Monastery 100 view from tower
View from the top of the tower

Souvenir Shopping

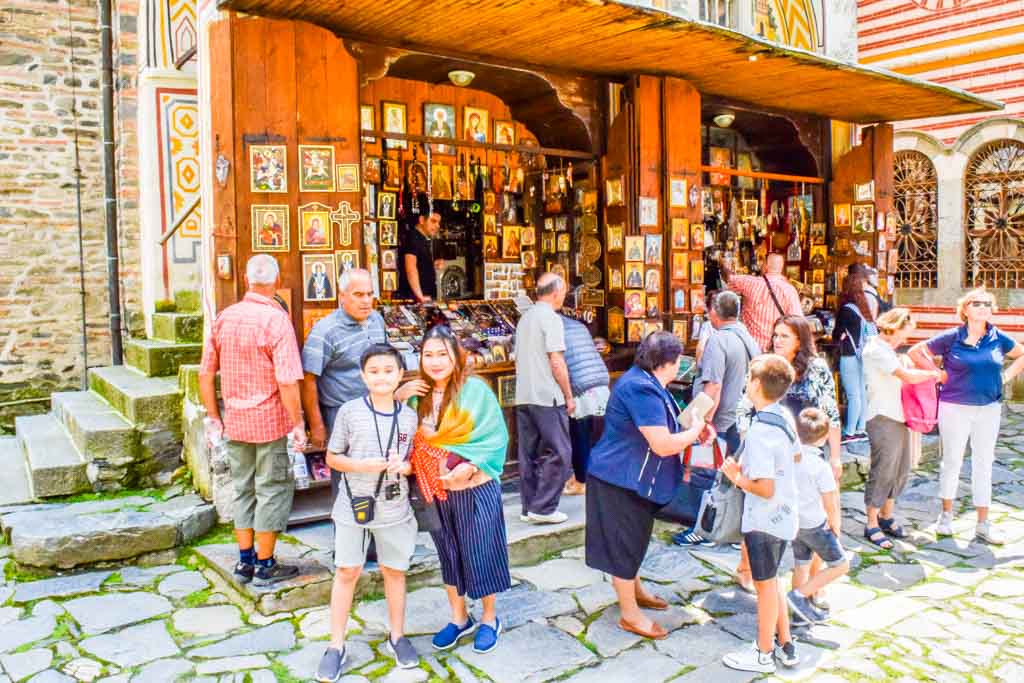
At the base of the tower there is a souvenir shop. The souvenirs are all religious, mostly pictures or statues of saints of the Bulgarian Orthodox religion. They are quite reasonably priced and the range is large and varied. Overall it’s a very impressive souvenir shop if you are into that kind of thing.

There is another entrance to the complex at the rear of the courtyard. If you exit here you will find a cluster of smaller private souvenir shops with much the same thing. There is probably more opportunity to bargain and get some cheap souvenirs there.

Sofia to Rila Monastery 100 souvenirs
Souvenir shop in the tower base

Lunch Stop

Our tour included a complimentary lunch. For this, we were back on the bus to a small restaurant about 5 minutes drive up the road. The lunch was tasty and traditional, with a steak, beans and potato dish being served.

There is another opportunity here to purchase more souvenirs. It’s also your opportunity to grab a drink or two.

Boyana Church

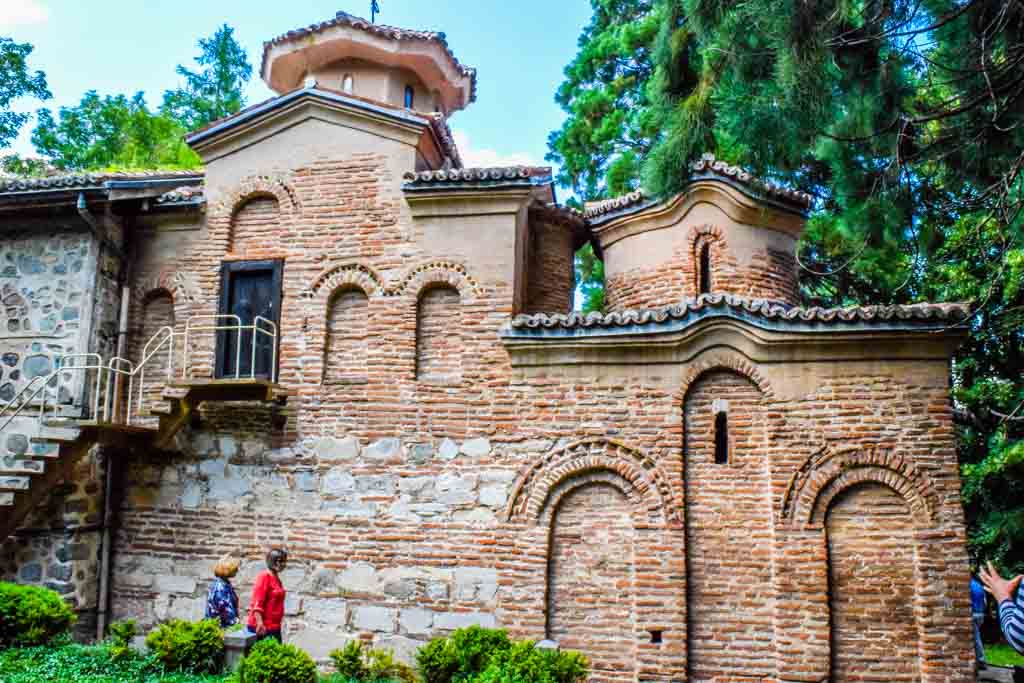
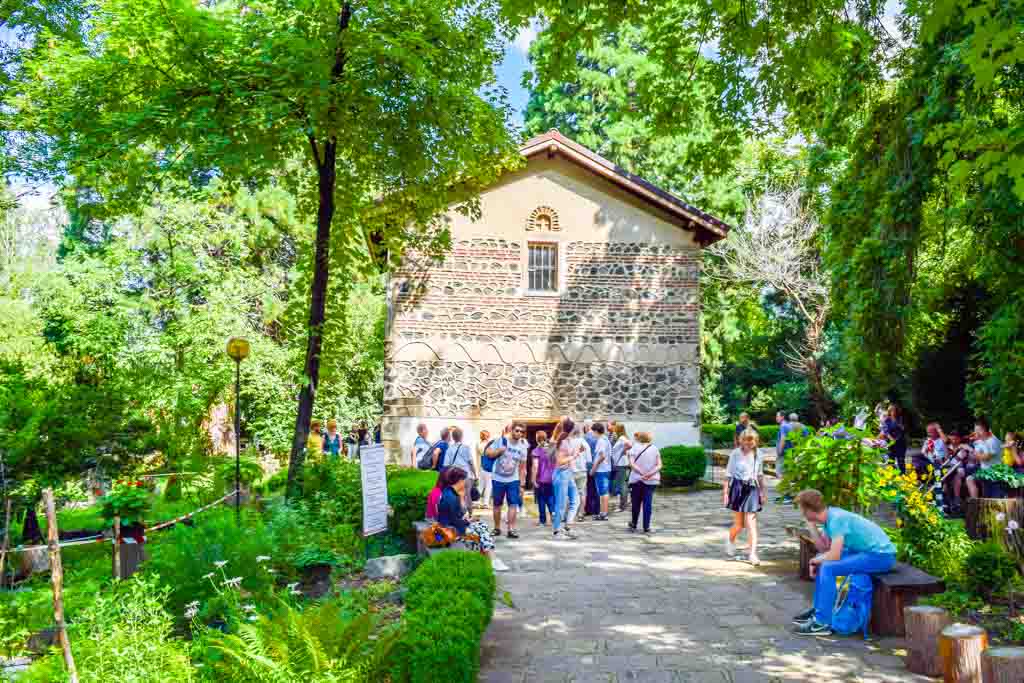
Just before reaching Sofia, the bus heads off into the mountain-side to Boyana Church. This would be quite a difficult place to find on your own, and there aren’t many signs to guide you. Once there you would not know that a UNESCO World Heritage site awaits. It is hidden behind a thick forest of trees.

Sofia to Rila Monastery 100 boyana front
The tiny church hidden in the forest

The main attraction at Boyana Church is the medieval paintings inside the church. After our brief guided tour outside the church, we took our allocated spot to have an 8 minute guided tour inside the church. All tours are strictly 8 minutes and heavily booked.

Because of the historic importance of this site, the tours or the interior are strictly controlled and under tight security. You are instructed to leave all cameras with the security guard, and inside photography is strictly prohibited.

Sofia to Rila Monastery 100 boyana side
Boyana Church

The outside of the church is not all that spectacular. It is a rather plain looking church similar to others seen around Sofia. And there is nothing to see except the church. Needless to say, the main attraction here is the 8-minute tour inside the church.

Driving from Rila Monastery to Sofia

The tour duration was 8 hours, and it turned out to be a very easy day. 4 hours were spent on the bus, 2 hours at Monastery Rila, 1 hour for lunch, and 1 hour at Boyana Church.

Highlights of the Tour

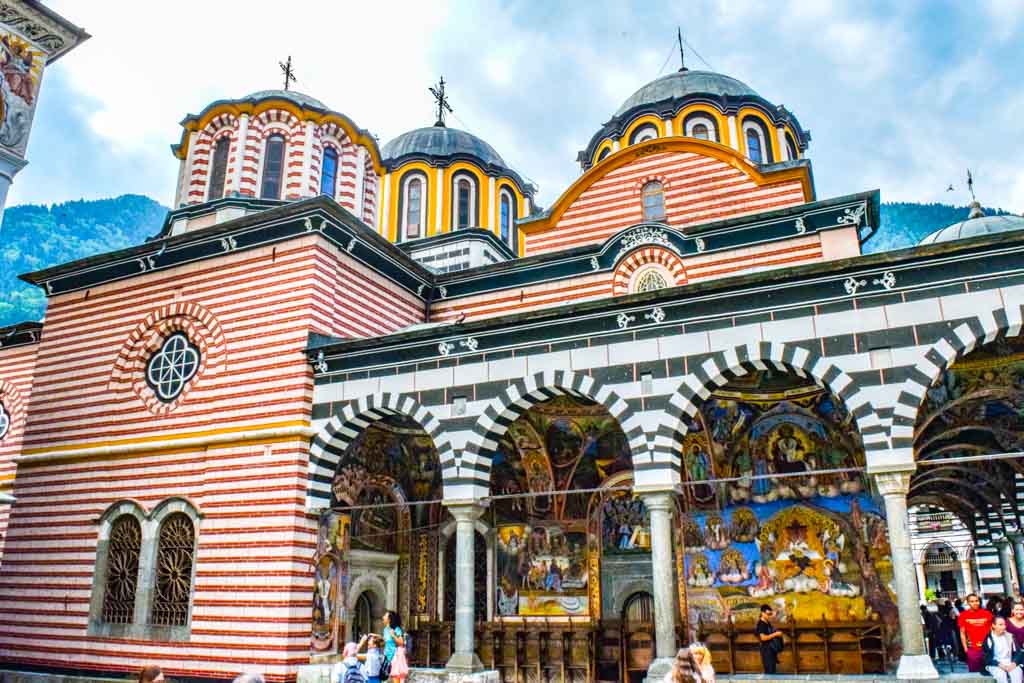
The frescos of Rila Monastery are breathtaking. The color and detail are magnificent, and the architecture is unique and interesting. Admiring the frescos of Rila Monastery is hands down the main attraction of the day.

Sofia to Rila Monastery 100 side frescos
Some of the amazing frescos

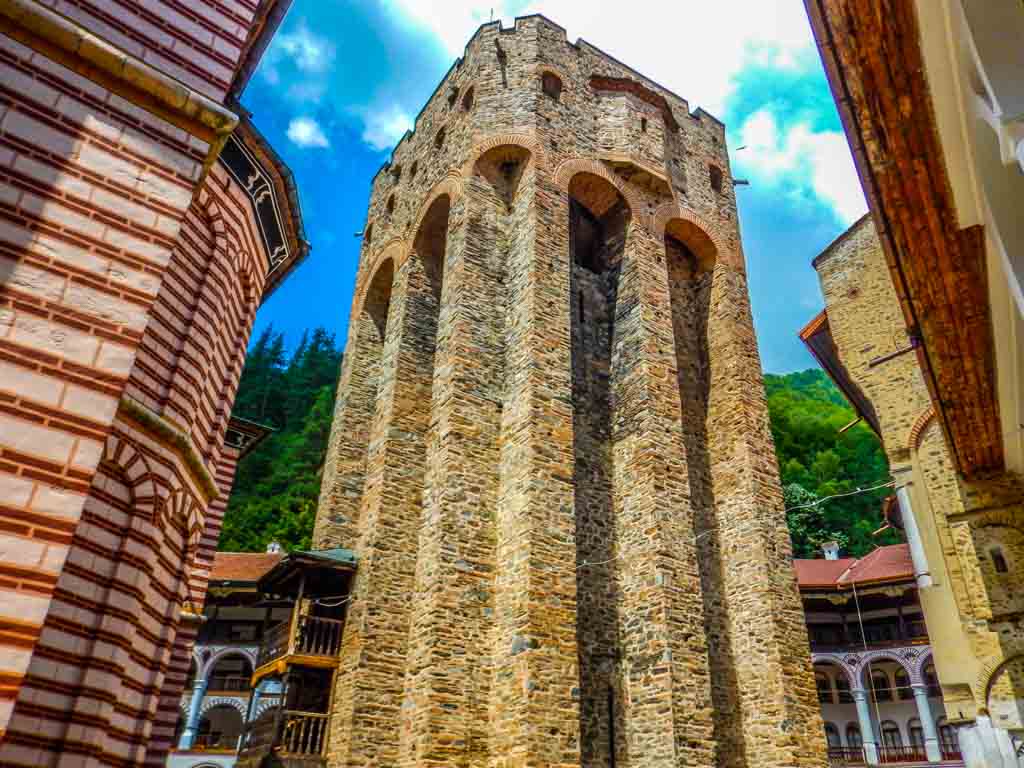
Climbing the medieval tower was my second favorite attraction for the day. I love all things medieval, and this tower is no exception. It was a fun activity, as well as a historically interesting one. The tower is full of little museum exhibitions during the climb.

Sofia to Rila Monastery 100 tower
14th century tower at Rila Monastery

Don’t Miss Rila Monastery

Don’t miss this bus tour from Sofia to Rila Monastery, it is definitely one of the best day tours you can do from Sofia. I was really looking forward to Rila Monastery as being the highlight of our trip to Bulgaria, and it did not disappoint. I’m sure you will love Rila Bulgaria just as much as we did.

Would you like a free copy of our Ultimate Bucket List?

Not sure where to travel to next? We have created the Ultimate Bucket List to help you plan your next trip. 1170 awesome travel destinations in 167 countries. And we want you to have it for FREE.


Sofia Sightseeing Walking Tours – Landmarks

0
P092 sofia sightseeing 250 LANDMARKS

If you are wondering what to do in Sofia, and want to see some of the most interesting landmarks in Bulgaria, then this 3-hour walk may be just what you’re looking for. Check out this Sofia Sightseeing walking tour, where you will see many of the major landmarks in town.

What You Will See on this Free Sofia Walking Tour

On this free Sofia walking tour, you will come to appreciate some of the most significant, grandiose and even shocking monuments dedicated to the communist period of Bulgaria. Although you could complete this tour in 2 hours, I recommend you take 3-4 hours, which should give you time to grab a bite along the way.


1: National Palace of Culture

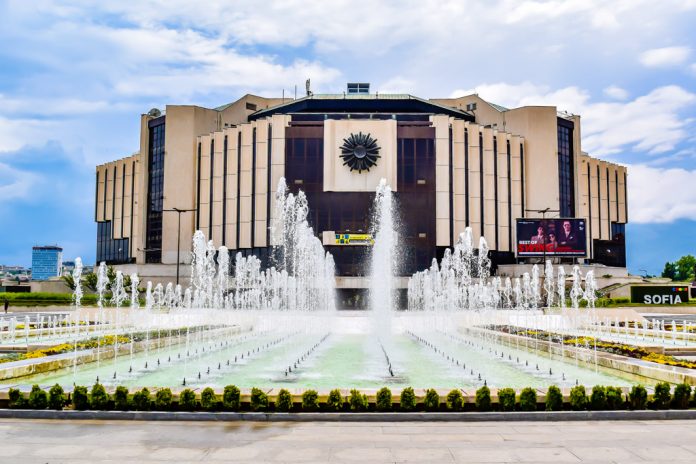
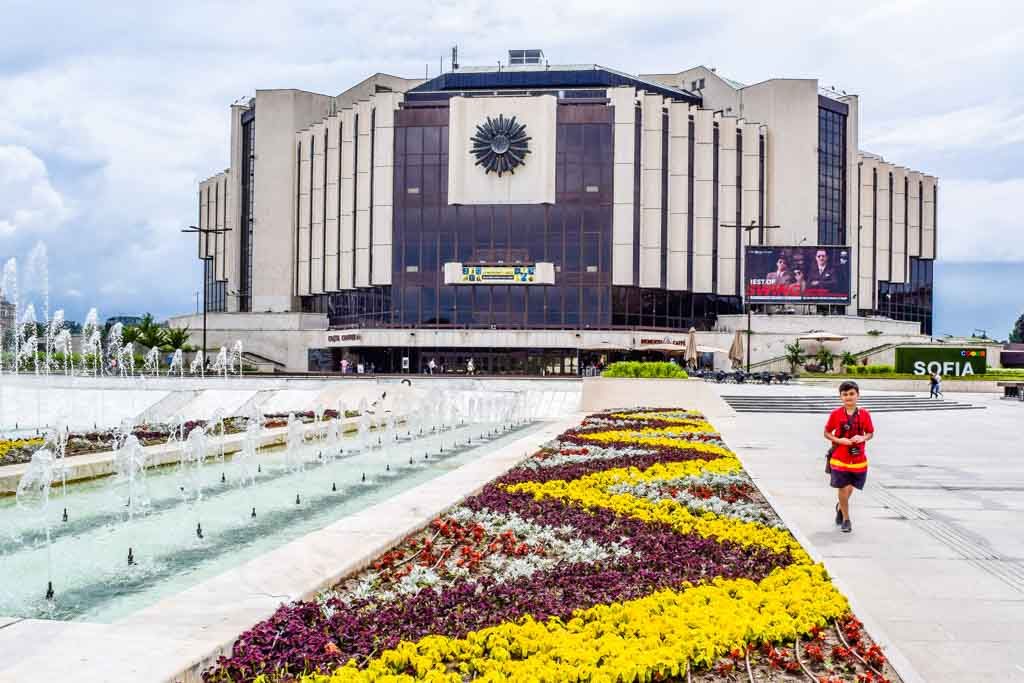
This gargantuan 1981 structure is 8 floors high, with 3 underground levels, 13 halls, and 123,000 m2 of space. It is multi-functional in that it caters for Congress, conferences, conventions and exhibitions. Out the front is a large parkland and fountain complex, which makes for a great place to chill out on a nice day.

The National Palace of Culture is not exactly one of the main Sofia attractions, but it is still well worth a look. The fountains and large parklands alone are a wonderful sight, and there are various points of interest scattered throughout the parklands.

It takes about 20 minutes to walk from the town center to the National Palace of Culture. We tried taking a taxi, which turned out to be a big mistake. Firstly the one-way streets seemed to allow the taxi driver to take about 3 times longer to get there. Secondly, the taxi driver tried to rip us off blindly. I recommend walking.

P092 sofia sightseeing 100 palace of culture
The massive National Palace of Culture

2: Memorial of Communist Victims

In the parklands of the National Palace of Culture, you will find this sad monument, dedicated to the victims of the communist struggle. There is a wall with literally thousands of names, suggesting these people all lost their lives during the struggles.

sofia sightseeing 100 communist victims
Memorial for Communist Victims

3: Tsar Liberator Monument

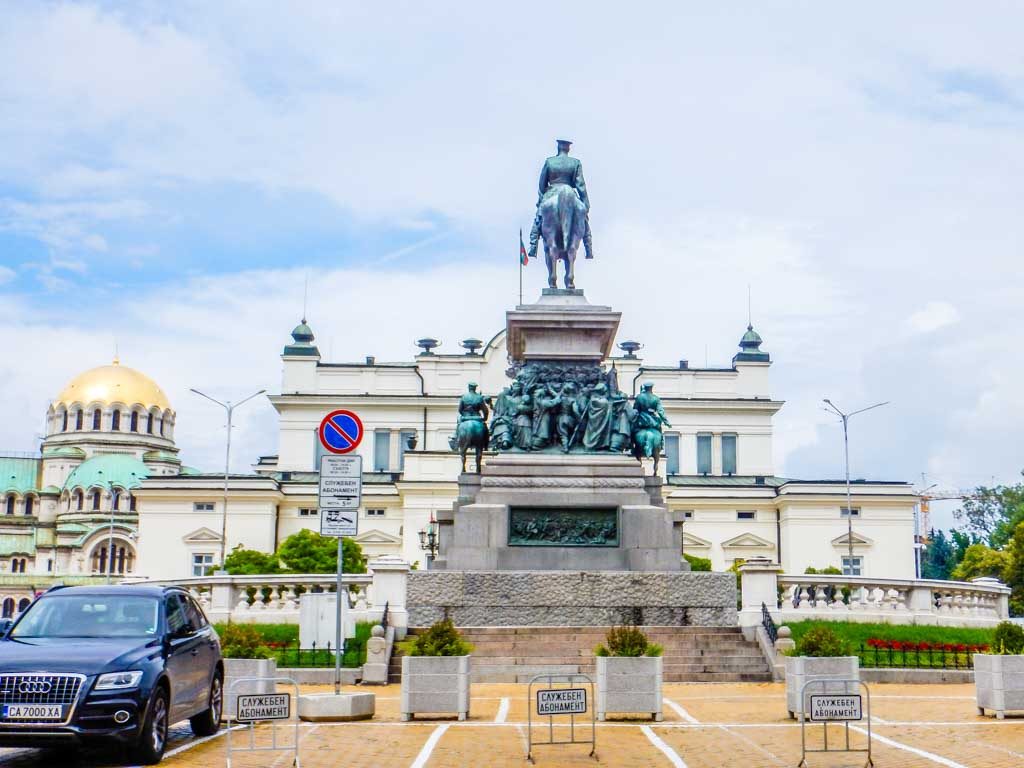
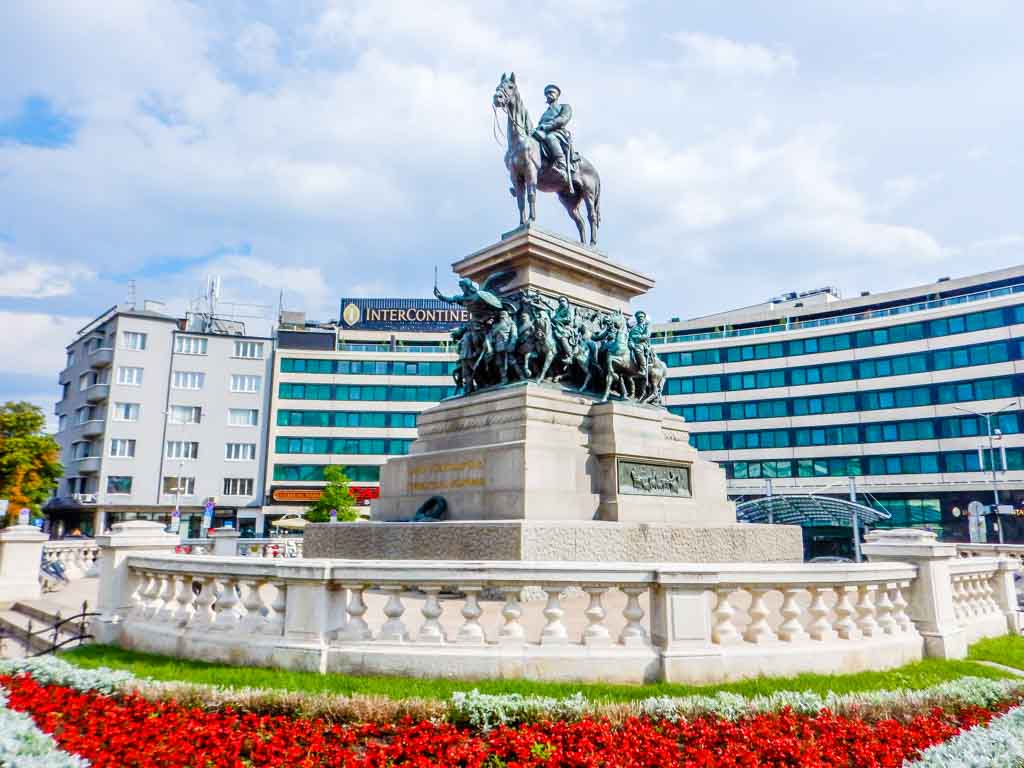
This striking monument is one of the major Sofia tourist attractions. It was built in 1901 to honour the Russian Emperor Alexander II who freed Bulgaria from the Ottoman Rule in the 1877 Russo-Turkish War. It is quite an impressive black granite monument depicting a mixture of Gods and military heros.

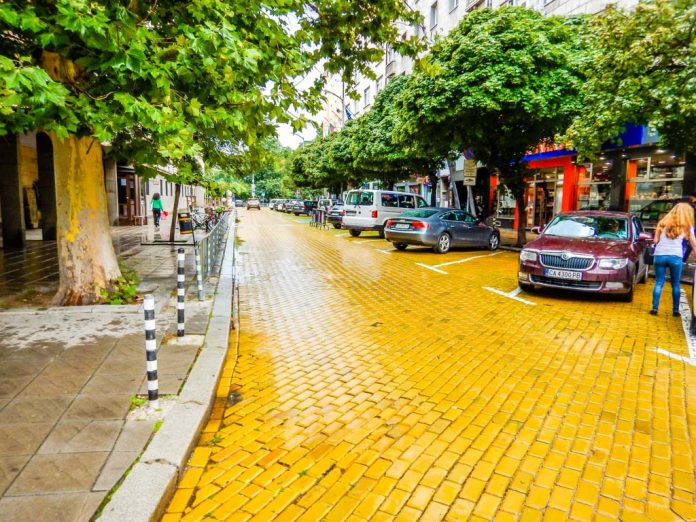
The Tzar Liberator Monument is surrounded by exquisite yellow cobblestones. In fact, this is the end of the famous Yellow Brick Road, which stretches over 1km from the National Archaeological Museum.

sofia sightseeing 100 tzar liberator
Tzar Liberator Monument

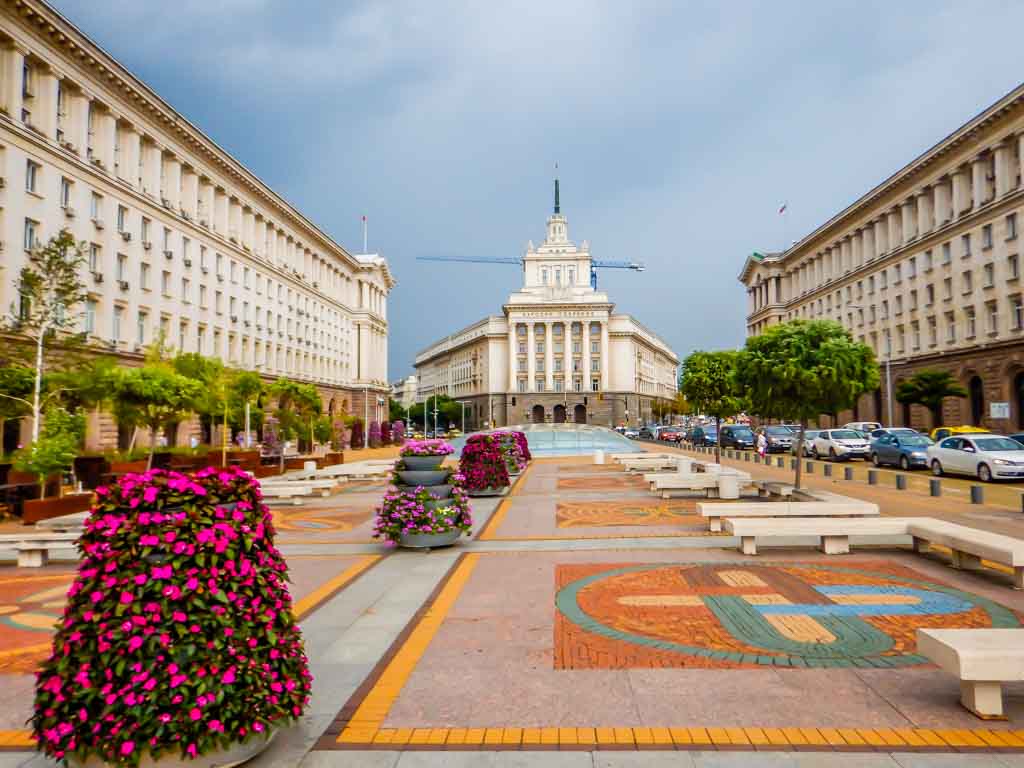
4: Bulgaria’s National Assembly Building

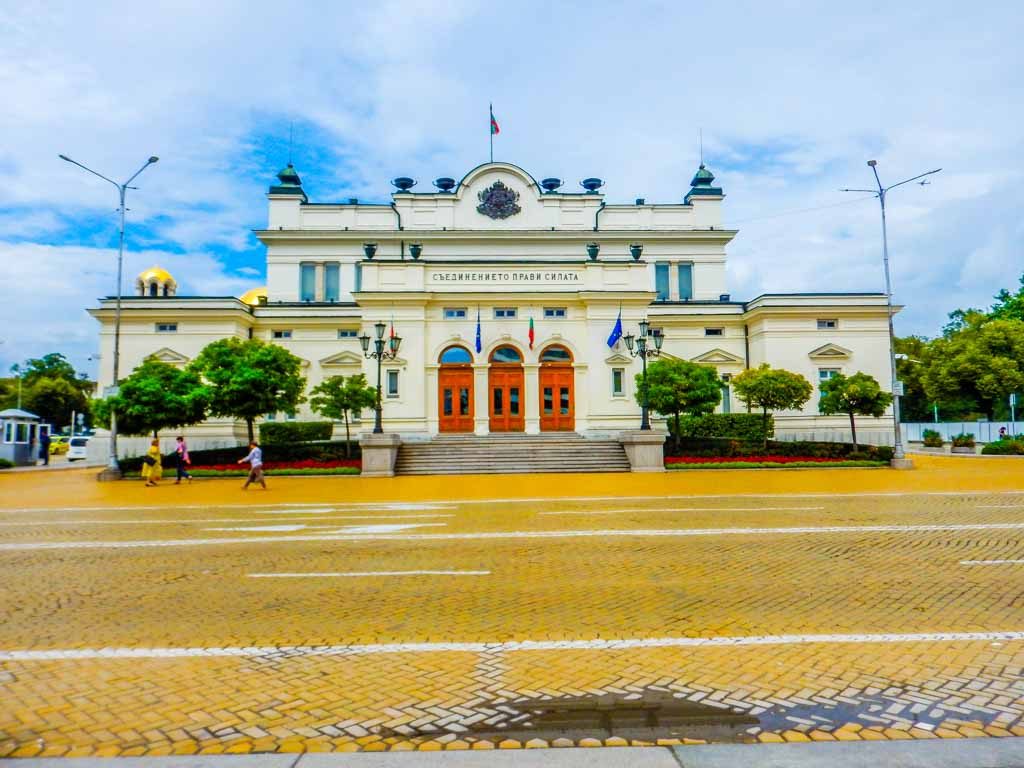
This significant building was built in 1884 and is so important that you find it on the back of older Bulgarian 20 lev bank notes. This building is now an official monument of culture due to its historic significance. It is conveniently located next to some of the biggest attraction in town, like the Alexander Nevsky Cathedral.

sofia sightseeing 100 national assembly building
National Assembly Building and the Yellow Brick Road

5. The Levski Monument

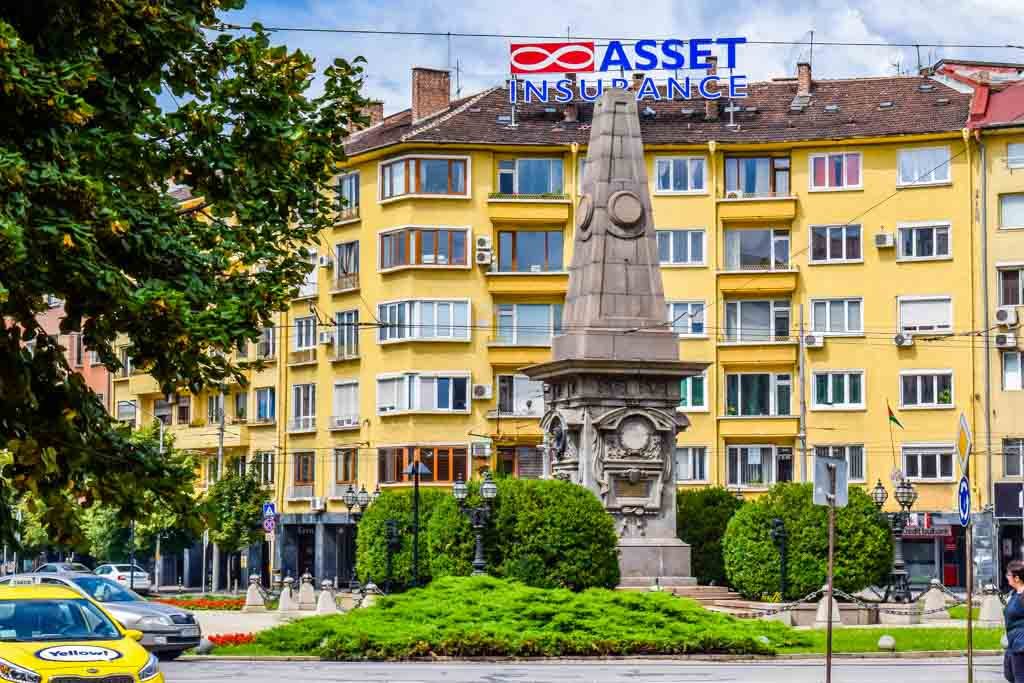
Just around the corner from the National Assembly Building is the 13 metre high Levski Monument. This is now in the middle of a roundabout on a busy intersection, and was built in 1895 to commemorate the hanging of Vasil Levski in 1873. Levski was a revolutoionary and apparently a local hero.

sofia sightseeing 100 levsky monument
The Levski Monument

6. Alexander Nevsky Cathedral

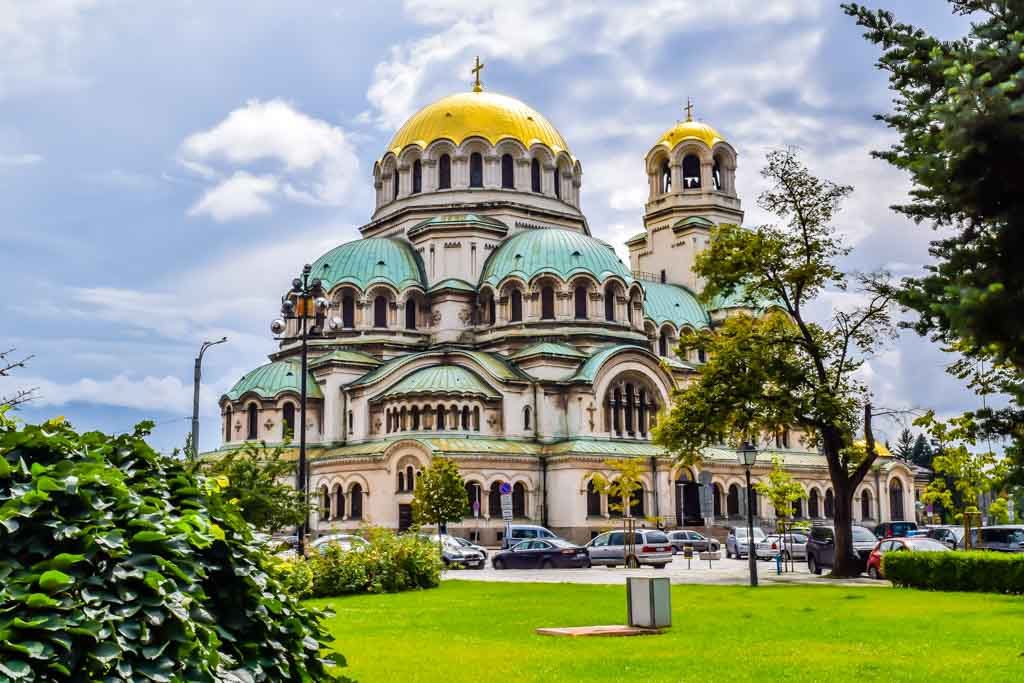
No Sofia sightseeing tour is complete without seeing this 53-meter tall cathedral. It’s the biggest attraction in town, literally. The giant Bulgarian Orthodox cathedral and is said to hold 10,000 people inside. Personally would not like to be one of those 10,000 people because my estimation is only about 2,000 people.

This is an impressive cathedral to photograph from all sides. That is actually one of the unusual features, that you can get great photos from any angle. But the real treat is to go inside and admire the massive frescos in the massive domes. Unfortunately you are not permitted to photograph the interior.

I recommend a little cafe at the front of the National Art Gallery, where you are treated to outstanding views of the cathedral. It’s a little expensive but the view is priceless, with a magnificent view of the most famous of all Sofia attractions.

sofia sightseeing 100 alexander nevsky cathedral
The Alexander Nevsky Cathedral

7. Ivan Vasov Grave

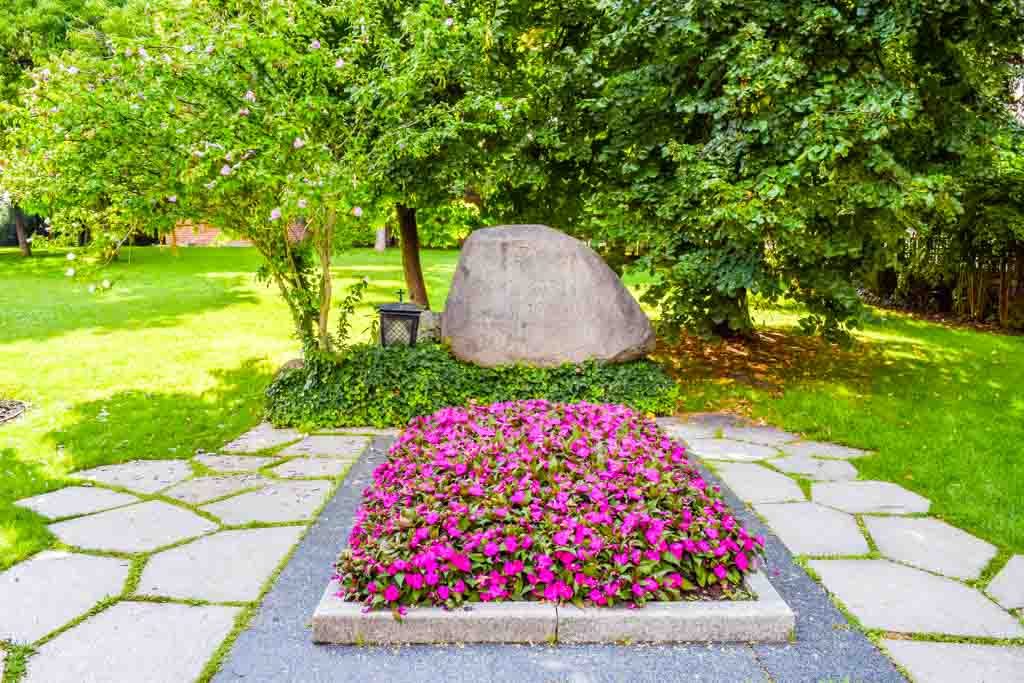
Just across the road from the Alexander Nevsky Cathedral is this ancient looking grave of Bulgaria’s most famous poet, playright and novellist Ivan Vasov. You would be forgiven for thinking this grave site is centuries old, but in fact Vasov died in 1921.

Iven Vasof Grave
Iven Vasof Grave

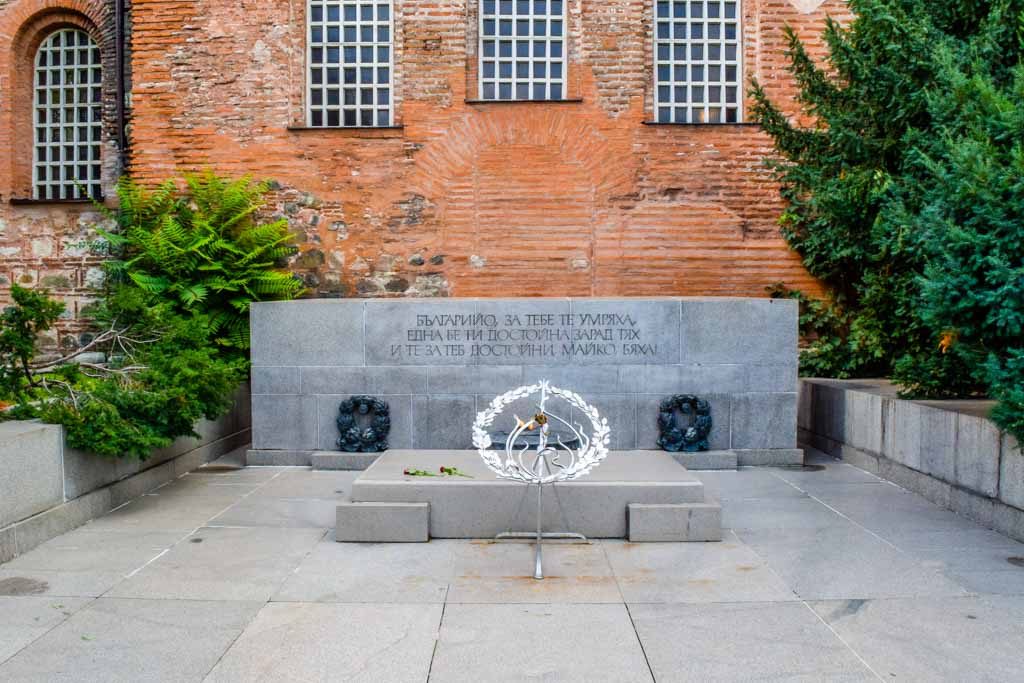
8. The Tomb of the Unknown Soldier

Located next to the Ivan Vasov Grave is this monument to honour the thousands of soldiers who died in wars over the years. It was built in 1981, which happened to be the 1300th anniversary of the Bulgarian state.

The location is actually on the exterior of the 6th century Saint Sofia church, which makes the next attraction just a hop-step-jump away.

Tomb of the Unknown Soldier

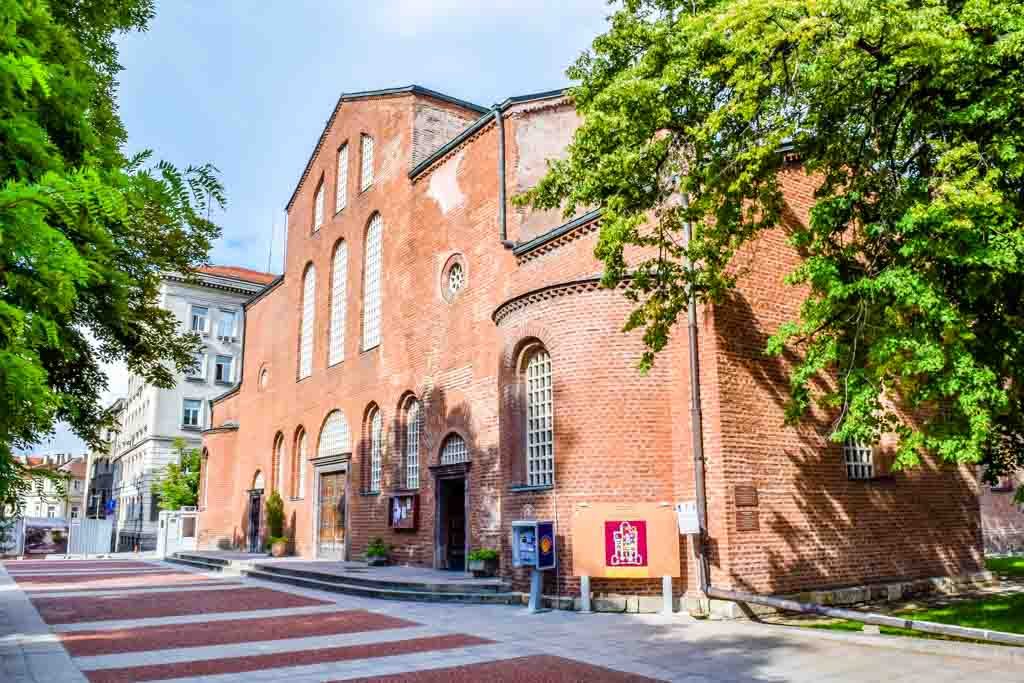
9. Saint Sofia Church

This is the second oldest church in Sofia, dating back to the 6th century. It is remarkably well preserved, with public access to a network of underground crypts. You do have to pay to go underground, and no photos are allowed even for paying visitors. Otherwise you can take a free tour inside the ground level church.

Entrance to St.Sofia Church

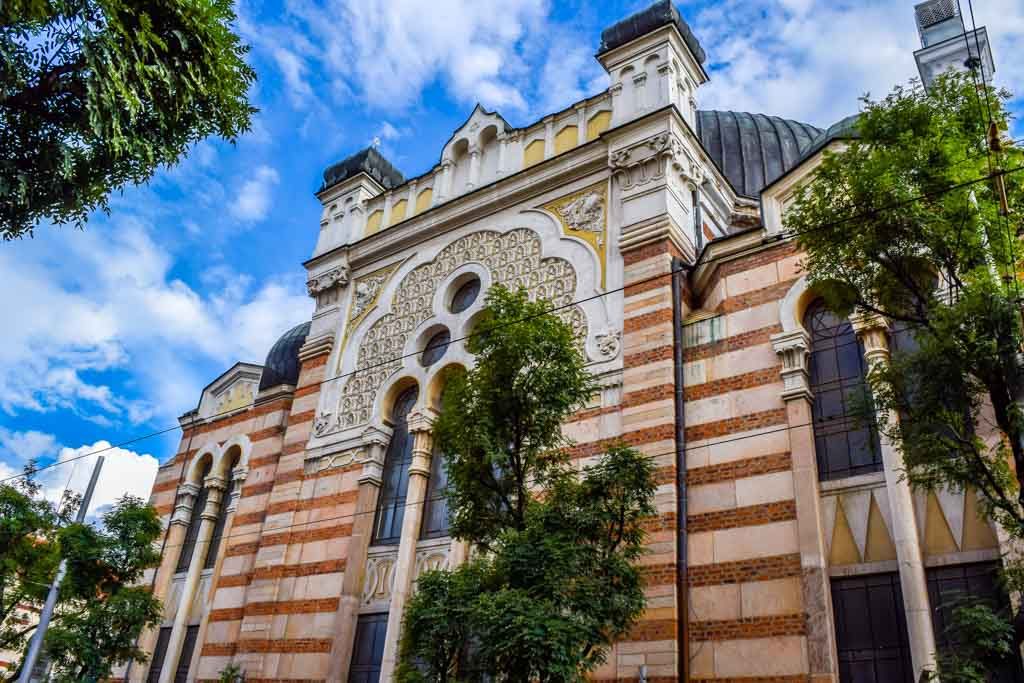
10. Sofia Synagogue

Last stop on this Sofia walking tour is the third largest synagogue in all of Europe. Opened in 1902, this 31-meter high synagogue is an imposing structure. Inside you will find Bulgaria’s largest chandelier, weighing in at 1.7 tonnes.

From here it’s just a short walk back to the city center proper, where you can find great places to chill out after your relaxing Sofia sightseeting tour.

Sofia Syanagogue
Sofia Syanagogue

Other Attractions to See in Sofia

Sofia really is a wonderful walking city, due to its compact city center, and the less than ideal public transport options. There are of course many more great places to visit in Sofia, most of which can be seen on the Yellow Brick Road walk, the City Sightseeing Walk, and the Vitosha Boulevard walk.

Did I mention what I love about these walks, other than the healthy way to spend your day? They are 100% free! It’s true that you may like to pay for an entrance fee along the way or buy something to eat. But overall you can enjoy a healthy, fascinating and free walking tour of Sofia.

Video of this Sofia Sightseeing Walking Tour

Would you like a free copy of our Ultimate Bucket List?

Not sure where to travel to next? We have created the Ultimate Bucket List to help you plan your next trip. 1170 awesome travel destinations in 167 countries. And we want you to have it for FREE.

The Best Free Walking Tour in Sofia Bulgaria – Yellow Paves

0
Free Walking Tour Sofia 250 yellow paves

Sofia the capital of Bulgaria has some really fascinating sightseeing around the city centre. This the second oldest city in Europe, and there are so many historic attractions to see. Possibly the best walking tour in Sofia Bulgaria is the Yellow Paves tour, which takes in many of the main Sofia attractions along the way.

Note: This post may contain affiliate links. Please read our disclosure policy for more information.

The Yellow Brick Road Free Walking Tour in Sofia

If you’re looking for a free walking tour, Sofia is a great place to be. And the Yellow Brick Roads walk is one of the best. The yellow bricks stretch from TZUM in the city centre out to the Tzar Liberator Monument, next to the famous Alexander Nevsky Cathedral.

Along the way, you will pass by many of the major tourist attractions of Sofia, whilst walking along those amazing yellow cobblestones. Whilst you hum the tune of Elton John’s “Goodbye Yellow Brick Road“. And here’s how to navigate this amazing free walking tour in Sofia.

What are the Sofia Yellow Paves?

These yellow cobblestones were given to King Ferdinand I as a wedding present way back in 1893. Back then Sofia was not well developed and did not even have a single paved road! The construction of these royal yellow paved roads in 1907 was intended to transform Sofia into a fashionable city, up there with the best in Europe.

And so the Yellow Brick Roads were constructed between the royal residence and the National Assembly building, a few blocks away. The yellow bricks are now famous now a symbol of Sofia city and one which is truly unique. In fact, you can only find similar Hungarian yellow bricks in Budapest and Vienna.


1: Serdika Metro Station

Begin your walking tour at the remarkable Serdika Metro Subway station. This is no ordinary subway station, for it also doubles as an archaeological museum. You will find semi-preserved ruins of a 4th century Basilica, and a collection of Roman ruins and historical objects from the same period.

Serdika is an astounding subway station to visit, as you pass under the busy roadway to your next stop. Make no mistake, you can easily spend an hour or two meandering your way through the extensive archaeological ruins and artefacts.

Free Walking Tour Sofia 100 Serdika
Roman Ruins in the Serdica Metro Station

2: Church of St.Petka of the Saddlers

Next stop is just outside the subway station, the remarkable church in the centre of Sofia. The church is Bulgarian Orthodox, is half buried, and has walls 1m thick.

Be sure to pay the small entry fee to go inside and see the mural paintings dating back to 14th, 15th, 17th and 19th centuries. You will be instantly transported back into turbulent medieval times when you enter this incredible little church.

P091 Free Walking Tour Sofia 100 St Petka
St.Petka of the Saddlers Church

3: TZUM

Right next to the Church of St.Petka of the Saddlers is the gargantuan department store TZUM. This is located in the city centre of Sofia. TZUM was built in 1955 as a massive 7 storey department store. Back in the day, it was very popular with 120,000 shoppers per day using TZUM.

After the 1989 revolution, the number of daily shoppers dropped sharply to 7,000 and is now somewhat deserted, with just a sprinkling of expensive boutique stores available. It’s still worth a peep inside, especially the lovely courtyard inside the main buildngs.

Free Walking Tour Sofia 100 TZUM
TZUM Department Store on the left.

4. Church of St. George

This is the oldest building in Sofia, built in the 4th century by the Romans. Amazingly it is still standing and is famous for its fresco paintings inside, dating back to the 12th Century.

The church is a little tricky to find, surrounded on all sides by multi-storey buildings. There is a public entrance just to the west of the National Archaeological Museum, right at the start of the yellow cobblestones. In my opinion, this is the most amazing of all Sofia sights. That’s because it carries tremendous historical significance, and it’s not really one of the well known Sofia tourist attractions.

Free Walking Tour Sofia 100 Church of St George
Church of St.George, ringed by administrative buildings

5: National Archaeological Museum

This building is a former Ottoman mosque in the heart of the city built way back in 1474. The museum was established here in 1905. If you don’t want to enter the museum, there are many ancient Roman carvings on display out the front.

Around the back of the museum, you will find a chic cafe, which happens to be open 24 hours. One of the more popular spots in Sofia for the local hipsters, and a great place to refuel for the rest of the walking tour.

The National Archaelogical Museum is also where you will encounter the first of the yellow cobblestones, as they extend east towards the Tzar Liberator monument.

Free Walking Tour Sofia 100 museum bar
24 hour cafe at the back of the museum

6: Prince Alexander of Battenberg Square

This is the largest square of Sofia, named after Prince Alexander Joseph of Battenberg, the first prince of modern day Bulgaria. Battenberg Square is also the site of the infamous coup in 1944 which transformed Bulgaria into a communist state.

The square backs onto City Park, a popular place for Sofia locals to come to relax and socialise. It has a beautiful fountain and wonderful gardens throughout the park. It also hosts the occasional open-air concert and opera. Take your time to stroll around these beautiful gardens as part or your Sofia walking tour.

Be sure to admire the “Ivan Vasoz” National theatre at the rear of City Park, one of the most beautiful structures in Sofia.

ree Walking Tour Sofia 100 battenberg
Statue in the centre of Battenberg Square

7: National Art Gallery

The former Royal Palace was transformed into Bulgaria’s National Art Gallery in 1946 after the monarchy was abolished. The palace itself was built back in 1880.

Closed on Mondays, this Art Gallery is open to the public. It is well worth a look inside, particularly if you are interested in medieval art. The gallery holds Bulgaria’s largest collection of Medieval paintings.

Free Walking Tour Sofia 100 art gallery
The National Art Gallery

8. The Russian Church

The Church of St.Nicholas the Miracle Maker is a Russian Orthodox Church with striking golden domes. This was built in 1907 in the style of 16th-century Russian churches and makes for a striking sight in the middle of the city. You are welcome to go inside and admire the magnificent artwork, just remember to remove your hat.

Note that you will need to leave the beloved yellow pavers to see this church, for it’s across on the other side of “Tsar Osvoboditel Boulevard”.

Free Walking Tour Sofia 100 Russian church
An impressive Russian Church

9. Tzar Liberator Monument

This striking monument was built in 1901 to honour the Russian Emperor Alexander II who freed Bulgaria from the Ottoman Rule in the 1877 Russo-Turkish War. It is quite an impressive black granite monument depicting a mixture of Gods and military heros.

The Tzar Liberator Monument is surrounded by the striking yellow cobblestones. In fact, this is the end of the Yellow Brick Road, which stretches over 1km from the National Archaeological Museum.

Free Walking Tour Sofia 100 Tzar liberator
The Tzar Liberator Monument

10: Best Sightseeing in Sofia

You might say that this is saving the best for last. From the Tzar Liberator Monument, if you cross the busy Tsar Osvoboditel Boulevard you will find a collection of some of the best sightseeing. If you’re still wondering what to do in Sofia, you can fill in a few hours at this group of nearby attractions. They are all within about 2-minutes walk of each other.

  • National Assembly of the Republic of Bulgaria
  • Alexander Nevsky Cathedral
  • National Academy of Arts
  • National Gallery
  • St.Sophia Church
  • Monument of Tzar Samuil
  • Monument Volunteer

I can highly recommend a small cafe at the front of the National Academy of Arts. Whilst it’s a little expensive, the food is amazing, and you are treated to million dollar views of the most impressive of all Sofia attractions – the Alexander Nevsky Cathedral. Priceless.

Free Walking Tour Sofia 100 Nevsky cafe
A cafe with million dollar views

Getting Back to the City Centre

It is about a 15-minute walk back to the city centre starting point, or you should be able to easily hail a taxi from this busy tourist district.

Alternatively, there is a subway station at the front of the Museum of Palentology (near the Alexandar Nevsky Cathedral). For a very small cost, you can easily catch a subway back 1 station to the Serdika Metro station. Just purchase a ticket at the vending machine inside the station.

I hope you get to enjoy this wonderful Sofia tour of the Yellow Brick Road. Catch this on a nice summer day and you will have one of the most delightful and memorable tours imaginable. Sofia is really so full of scenic beauty and ancient history, and this walking tour helps you to see a lot of it. Enjoy your walk!

Would you like a free copy of our Ultimate Bucket List?

Not sure where to travel to next? We have created the Ultimate Bucket List to help you plan your next trip. 1170 awesome travel destinations in 167 countries. And we want you to have it for FREE.


Ho Chi Minh Itinerary for 3 Days

0
P079 Ho Chi Minh Itinerary for 3 Days 100

If you are travelling to Ho Chi Minh City, your are in for an exciting time. This city is so vibrant, so fast paced, and so jam packed with things to do that it’s hard to fit them all into a short space of time. Here is a suggested 3 day Ho Chi Minh Itinerary.

Note: This post may contain affiliate links. Please read our disclosure policy for more information.

P079 Ho Chi Minh Itinerary for 3 Days 100
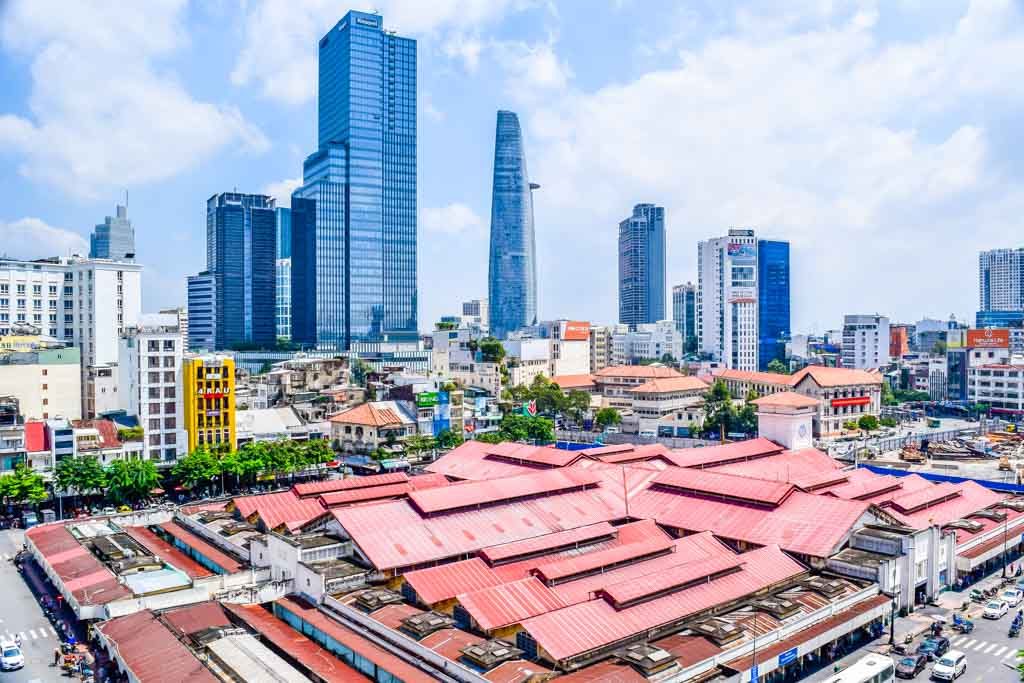
Ben Thanh Markets in District 1

Things to Know Before You Go To Ho Ch Minh City

English Speaking

In Ho Chi Minh City you won’t have too much trouble getting around using English. Most people in the hospitality and tourism industries will have some English skills, and you will find that many have studied English for 4 years at a University.

Leave the big smoke, and you will have trouble finding anybody who speaks any English. It is well worth mastering Google Translate on your smart phone, this is invaluable in the back blocks of Vietnam. In case you didn’t know, Google Translate will quickly translate anything into Vietnamese, You can then spell it and speak it to your Vietnamese friend.

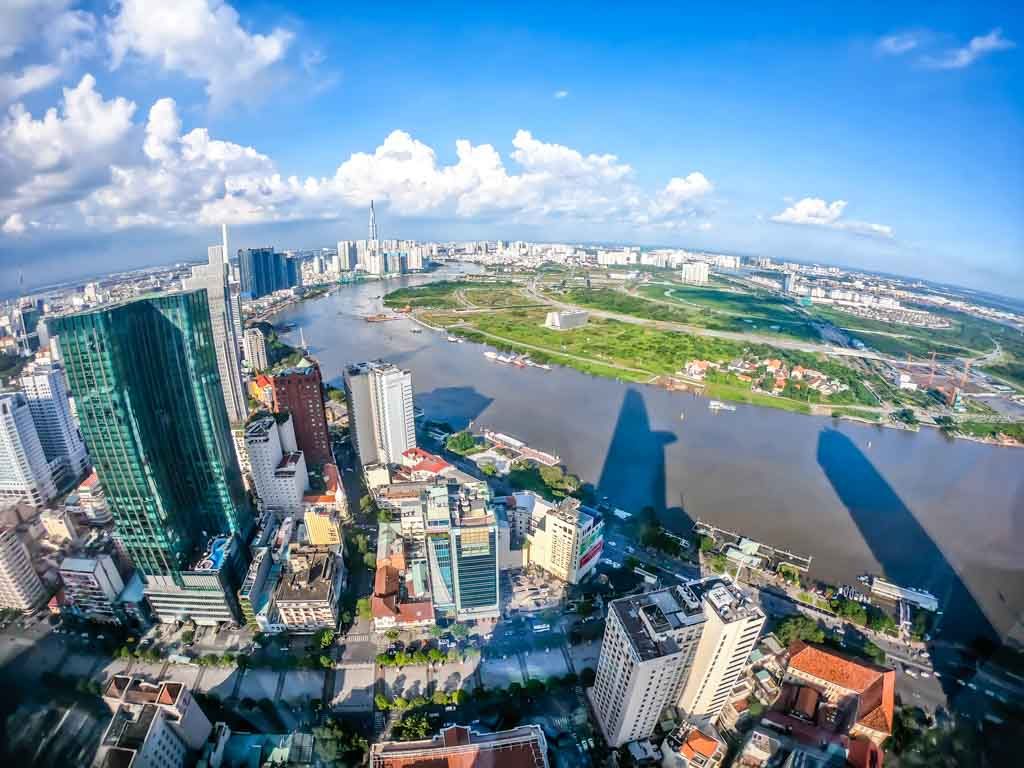
The View from the top of Saigon Skydeck

Money

It’s nice to know that you will be an instant millionaire when you go to Vietnam. That’s because 1 million Vietnamese Dong is worth around 50 US dollars. You will need to get hold of some Vietnamse Dong (VND) when you arrive.

ATM’s are simple to use in Vietnam, however the fee for using them are ridiculously high. And places like airports only let you withdraw a small amount, thus increasing the fees you need to pay. For example, an airport ATM has a maximum of 2,500,000 VND, but if you find a Citibank ATM you will be able to withdraw 8,000,000 VND. It really is worth carrying a Citibank of HSBC ATM card if you can to reduce excessive fees.

Note that US dollars are accepted widely, and many vendors will quote prices in US dollars. It’s a good idea to have a few USD tucked away. And most visa requirements will only accept USD.

Arriving in Ho Chi Minh City

Most people will arrive by air at the Ho Ch Minh City airport. This airport is in the middle of the city, and it is quite cheap to get to your hotel in the city.

There are very strict visa requirements in Vietnam, and it’s imperative that you research before you arrive. Generally for less than 15 days, many countries are allowed a free visa on arrival. For greater than 15 days you will need to pre-arrange an invitation letter and pay a fee upon arrival. And they will only accept USD. The key is to do your research and be prepared.

P079 Ho Chi Minh Itinerary for 3 Days 100
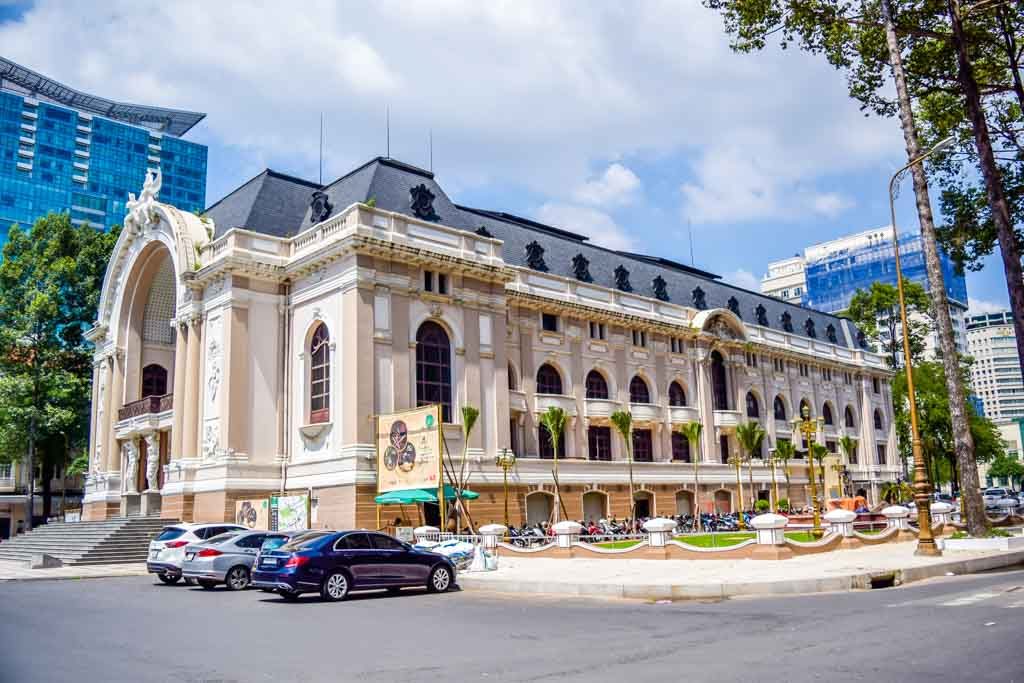
The Opera House isn’t too shabby

Getting around Ho Chi Minh City

Taxis are cheap in Ho Chi Minh City, however like most popular tourist cities you will be at the mercy of shady taxi drivers. Ho Chi Minh taxi drivers are up there with the best (or worst) of them, they know every scam in the book and aren’t afraid to use them.

Thank goodness for Grab taxi’s. Make sure you have a Grab app set up on your phone, and use Grab for each trip. With Grab in Ho Chi Minh City you can’t go wrong. These are splendidly cheap, costing around 25,000 VND for an average trip around District 1.

To get from the airport to District 1 will cost about 80,000 VND using Grab, whereas a taxi will cost 130,000 to 150,000 VND, plus whatever scam you are hit with.

P079 Ho Chi Minh Itinerary for 3 Days 100
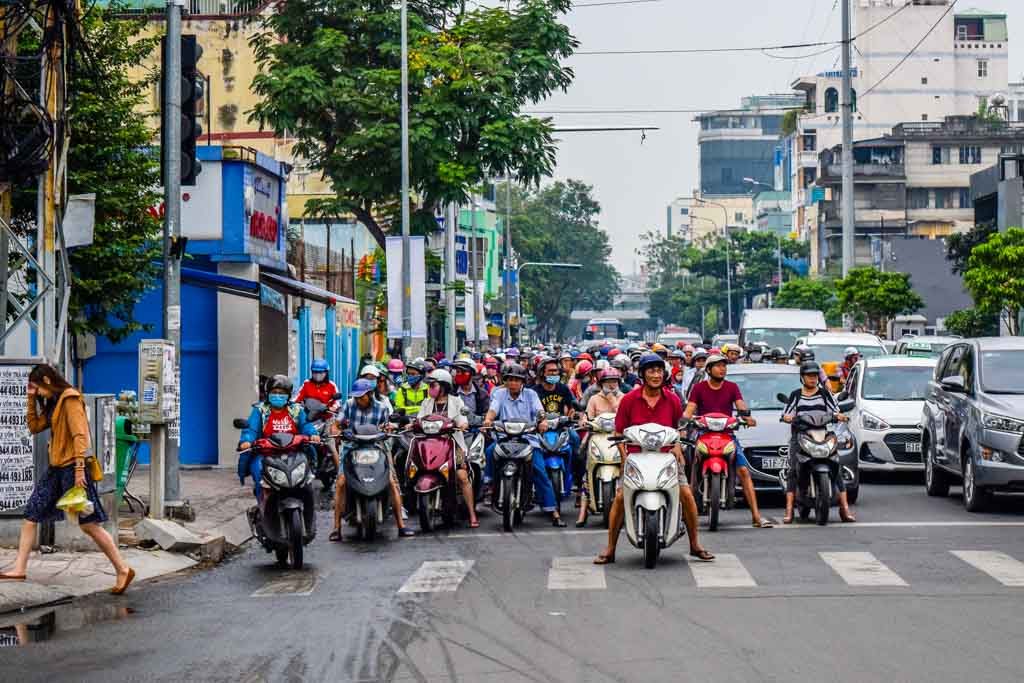
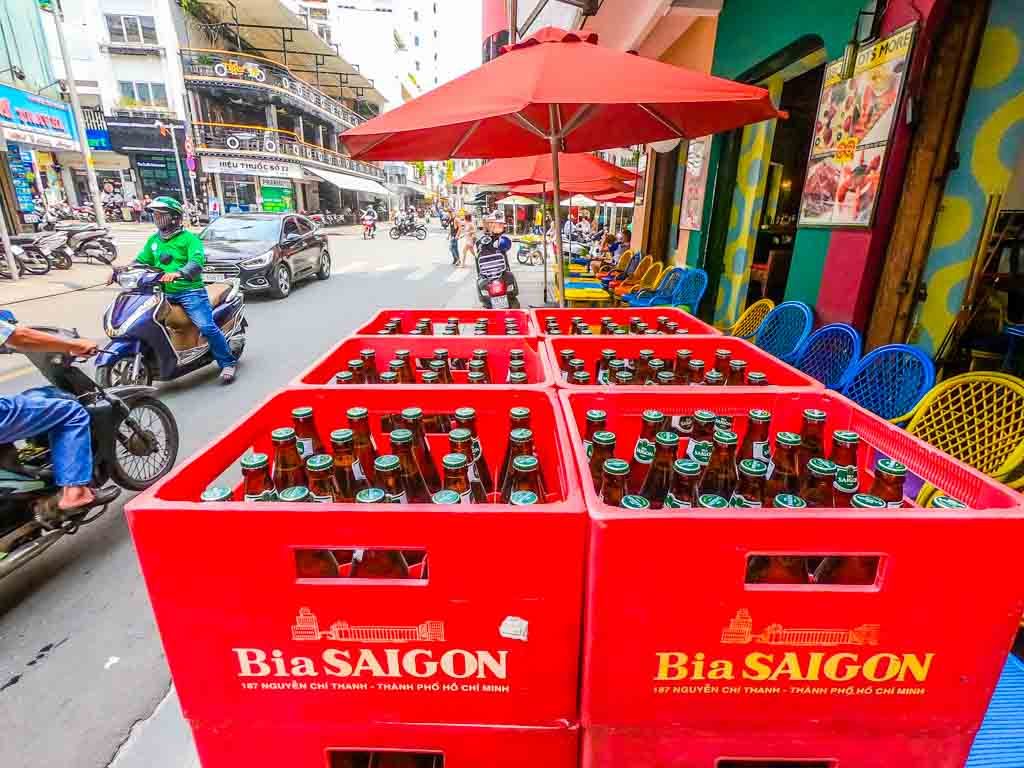
Traffic congestion in HCMC

Grab Motorbikes

Grab also let you take motorbike taxis to get around, which is cheaper yet again. Whilst I have not tried these, they are very popular and seem to be a reliable way to get around. Unless you have a suitcase, then you probably should go for a car.

Where to Stay in Ho Chi Minh City

Ho Chi Minh City is divided up into districts, and District 1 is the recommended place to stay for those looking for adventure. District 1 in Ho Chi Minh is the equivalent of the Old Quarter in Hanoi, meaning it is where most of the tourists head for. It is jam packed with restaurants, bars, cafes, hotels, hostels, tour agencies, massage parlours, markets, convenience stores, ATM’s… everything you could possibly need as a tourist.

All the major attractions in central Ho Chi Minh City are easily accessible from your Hotel in District 1. You can do a circular walking loop in about 2 hours and see the major attractions. Or you can go to any of them for 25,000 VND in a Grab taxi.

Our favourite place to stay is the Duc Vuong Hotel, which is on the edge of District 1. This hotel is great value and has an amazing rooftop restaurant and bar.

P079 Ho Chi Minh Itinerary for 3 Days 100
District 1 street scene near Duc Vuong Hotel

Our second favourite place to stay is opposite the massive Ben Thanh markets in the centre of Ho Chi Minh City, the Anpha Boutique Residence. If you want to do some shopping, just walk across the road from this hotel and you step into the markets. Amazing.

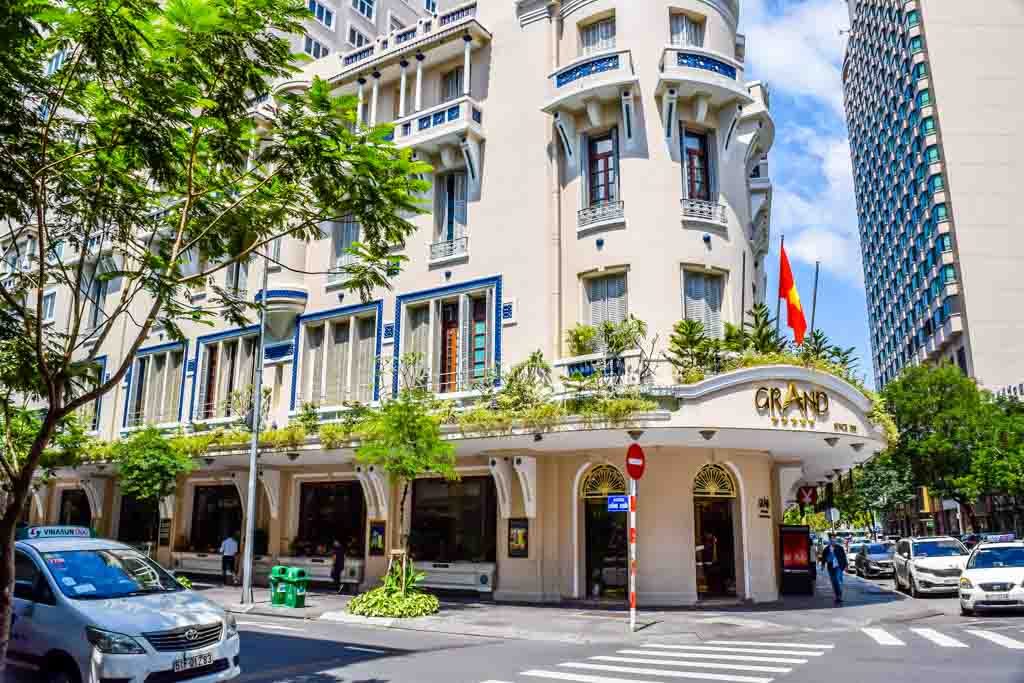
If you’re looking for luxury you can’t go past the Grand Hotel Saigon. This is a restored colonial building in a prime location near the Song Saigon River. And best of all, there are often heavily discounted rooms available online for this 5 star hotel.

Once you’re settled in to your hotel, it’s time to figure out what to do in Ho Chi Minh for 3 days. Now is a great time to pick up some tour brochures from your hotel travel desk.

Grand Hotel at the classy end of town

Best Day Trips from Ho Chi Minh City

Ho Chi Minh City has 2 main themes for the best day trips. Firstly, it played an important role in the  Vietnam – American War, and has many historic sites dedicated to the remnants of this period. Secondly, Ho Chi Minh City is located near the Mekong River Delta. There are many amazing water based communities and attractions in this wide spread area.

There are also some great day tours in Ho Chi Minh City itself. This is why our Ho Chi Minh City Itinerary covers a mixture of surrounding areas and city based attractions.

Ho Chi Minh City Itinerary Day 1 – Cu Chi Tunnels

On Day 1 you take a combined tour to the Cu Chi Tunnels, and a half day city tour. This is a popular tour which can easily be booked through your hotel or a nearby tour agency. If you really get stuck head on over to Luxury Group Tours. Cost should be around 1 million VND per adult for the day, including lunch and water.

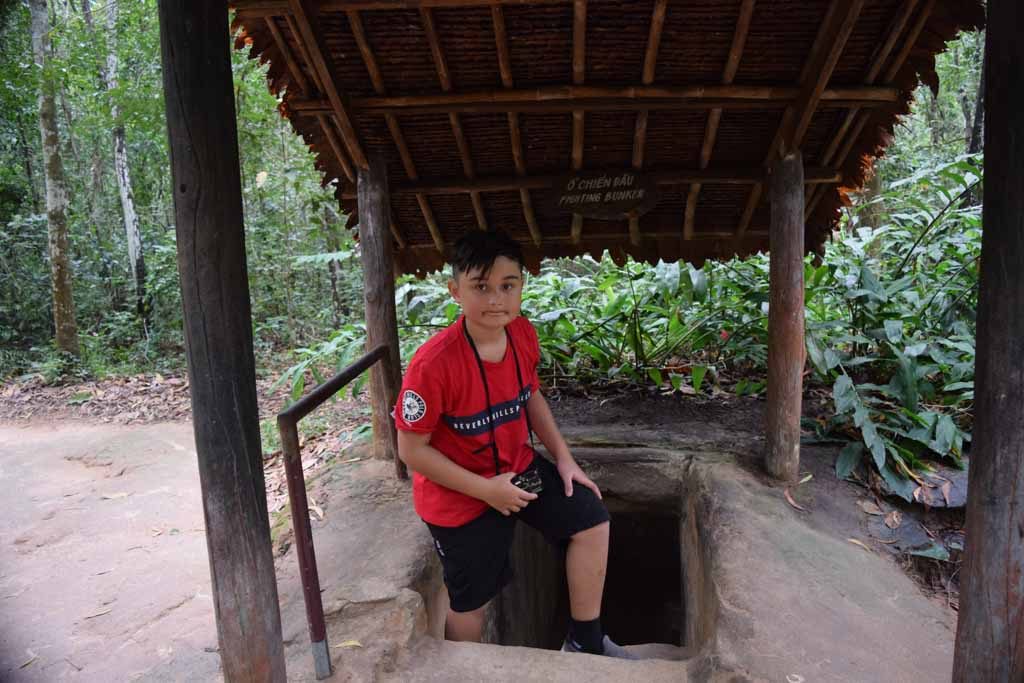
The Cu Chi Tunnel tour takes you 70 km north west of Ho Chi Minh City to the tunnel complex from the Vietnam – American War. This is at the end of the Ho Chi Minh Trail, and you will get to climb through this amazing complex of underground tunnels. You also get the chance to buy some bullets and shoot some massive military guns on the firing range.

P079 Ho Chi Minh Itinerary for 3 Days 100
Exploring the Cu Chi Tunnels

The Ho Chi Minh travel itinerary in the afternoon will take you to the biggest attractions in town, and take you on guided tours through each of them. They include:

  • War Remnants Museum
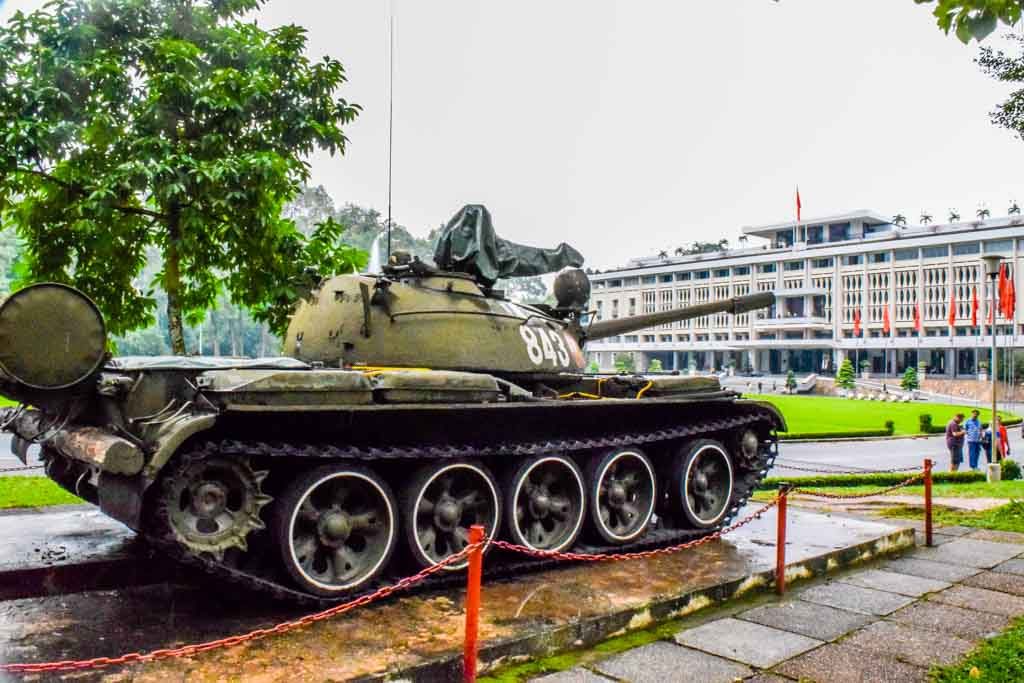
  • The Reunification Palace
  • Notre Dame Cathedral
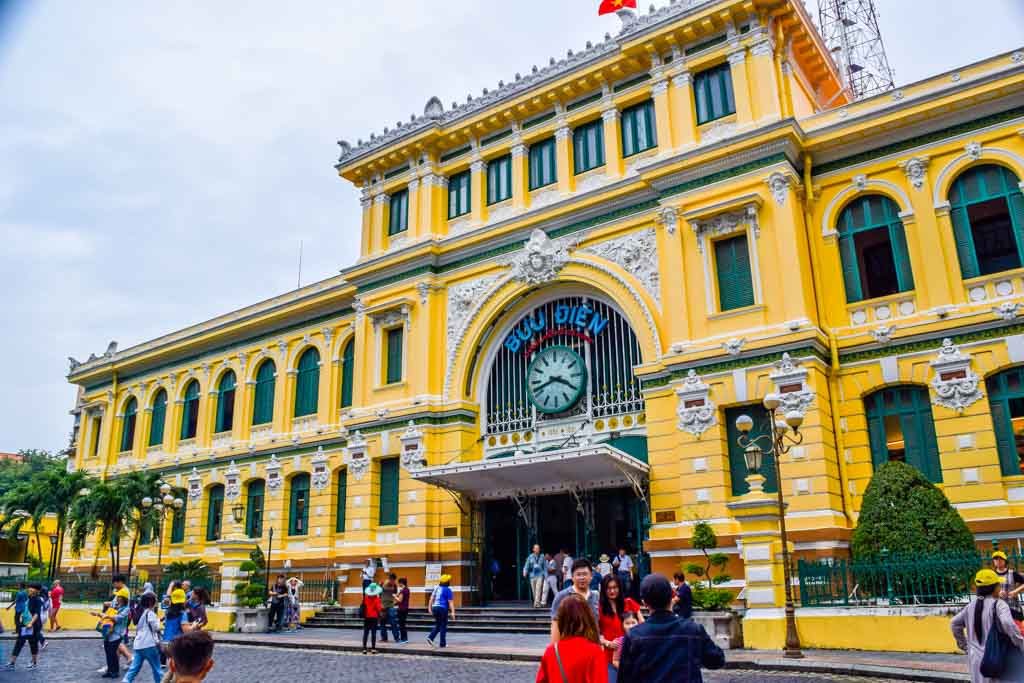
  • The Old Post Office
  • Jade Emperor Pagoda
  • Ben Thanh Market
P079 Ho Chi Minh Itinerary for 3 Days 100
Dramatic scenery at the Reunification Palace

The War Remnants Museum is in my opinion the must see attaction in Ho Chi Minh. This is rated in the top 25 museums in the world on Trip Advisor, and is a particularly moving experience. Here you will learn about the darker side of the war, particularly Agent Orange and the after effects.

Ho Chi Minh Itinerary Day 2 – Mekong Delta Tour

Take another organised tour to the Mekong Delta. There are a couple of different popular areas on the Mekong Delta to choose from.

Option 1: My Tho – Ben Tre (Four Islands Tour)

The Four Island Tour is about 90 minute drive from Ho Chi Minh City and costs around 800,000 VND per adult. This will take you on several boat trips and other interesting activities, including the following:

  • Vinh Trang Pagoda
  • Motor boat rides
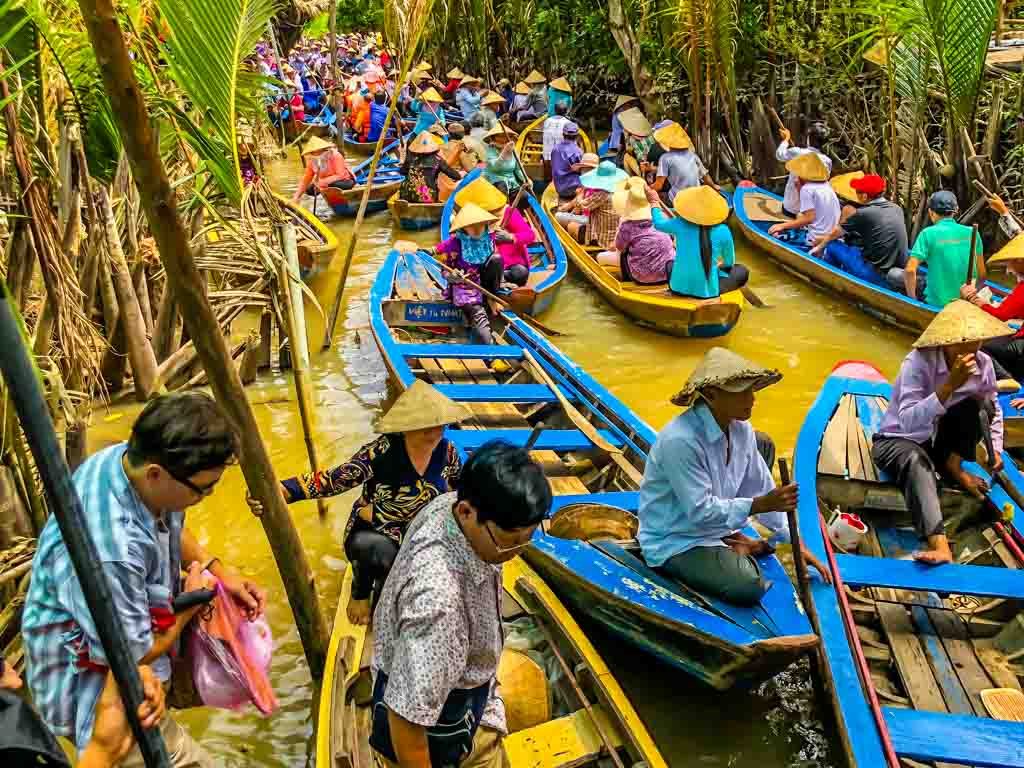
  • Hand rowing sampan rides
  • Floating fish farm visit
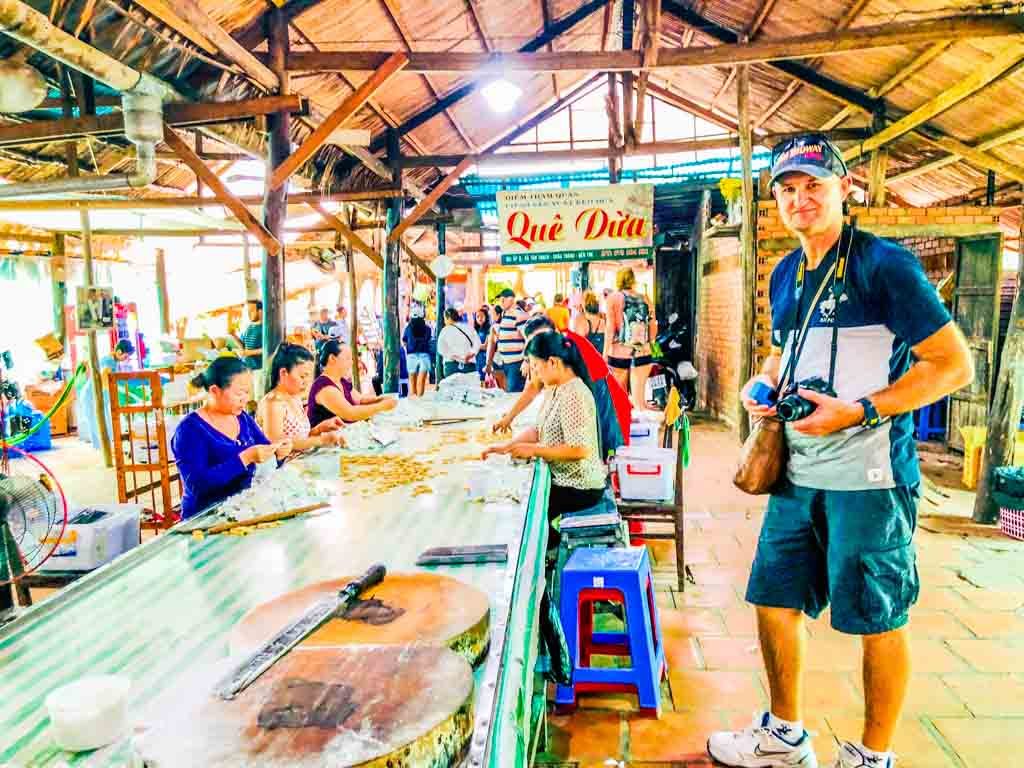
  • Coconut candy factory tour
  • Bee farm tour
  • Traditional singing demonstration
  • Bicycle Riding
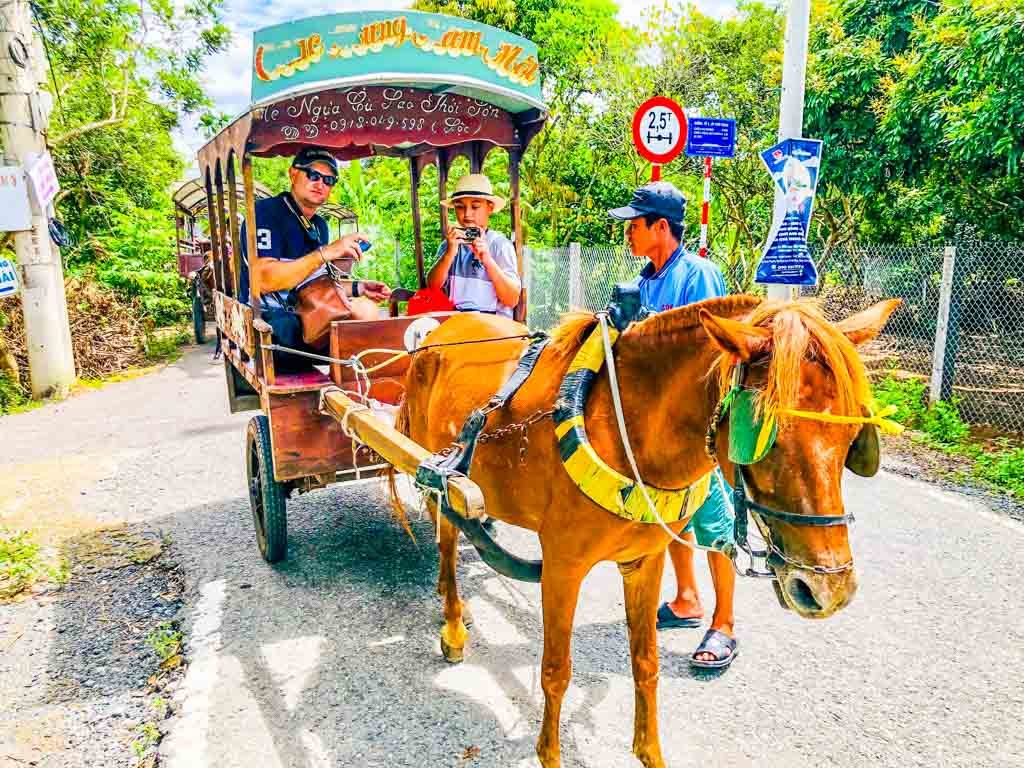
  • Horse and cart ride
  • Zoo, including crocodile fishing
  • Traditional lunch included
P079 Ho Chi Minh Itinerary for 3 Days 100
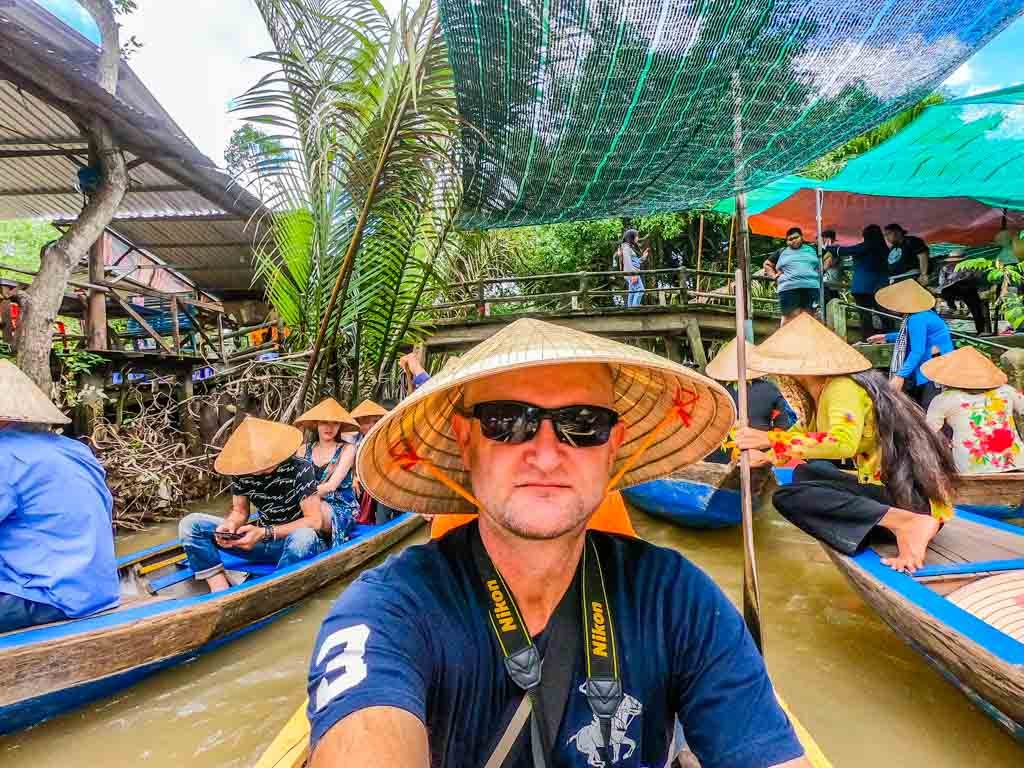
Riding a sampan at Mekong Delta

Option 2: Cai Be – Vinh Long (Floating Market Tour)

The Floating Market Tour is about 2 hours drive, and costs around 1,000,000 VND per adult. Activities include:

  • Motorboat rides
  • Stop on a local houseboat for fresh fruits
  • Rowing Sampan ride
  • Cycle around the village
  • Cooking demonstrations in a local house
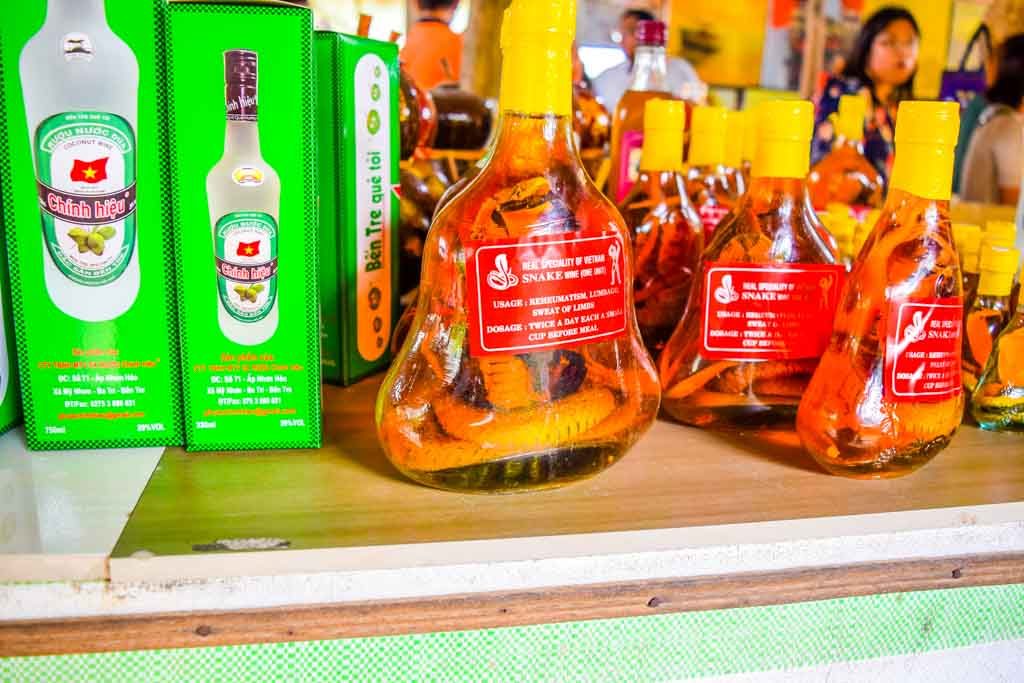
  • Traditional workshops – Fresh fruits, snake wine, rice paper, coconut candy, pop rice.

That’s about it for day trips from Ho Chi Minh City. 2 consecutive tour days are fairly tiring, especially if the weather is hot and humid. Have a good rest for a busy day exploring Saigon tomorrow.

Day 3 – Motorbike Tour around Ho Chi Minh City

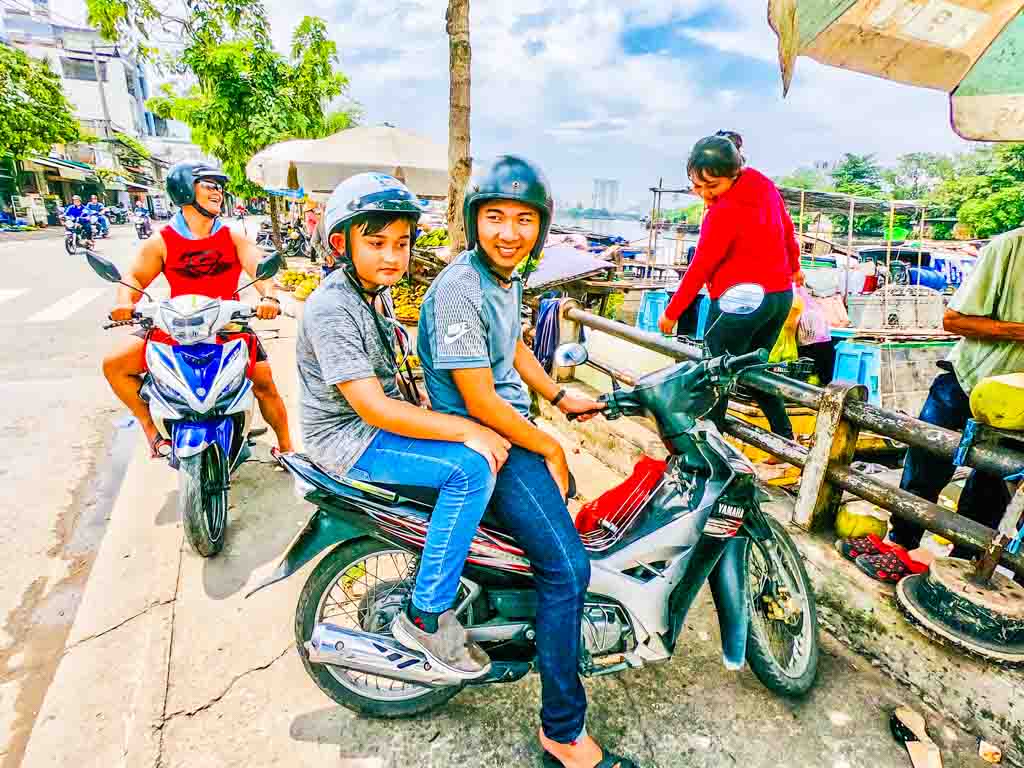
Take a 4 hour motorbike tour around Ho Ch Minh City to see some ‘off the beaten track’ sights. This will take you out of District 1 and into some of the other districts. This is a great tour for kids as well!

In the afternoon, take a trip to the markets. The day markets finish about 5pm, when the night markets take over. Try your skills at bargaining for some cheap souvenirs.

P079 Ho Chi Minh Itinerary for 3 Days 100
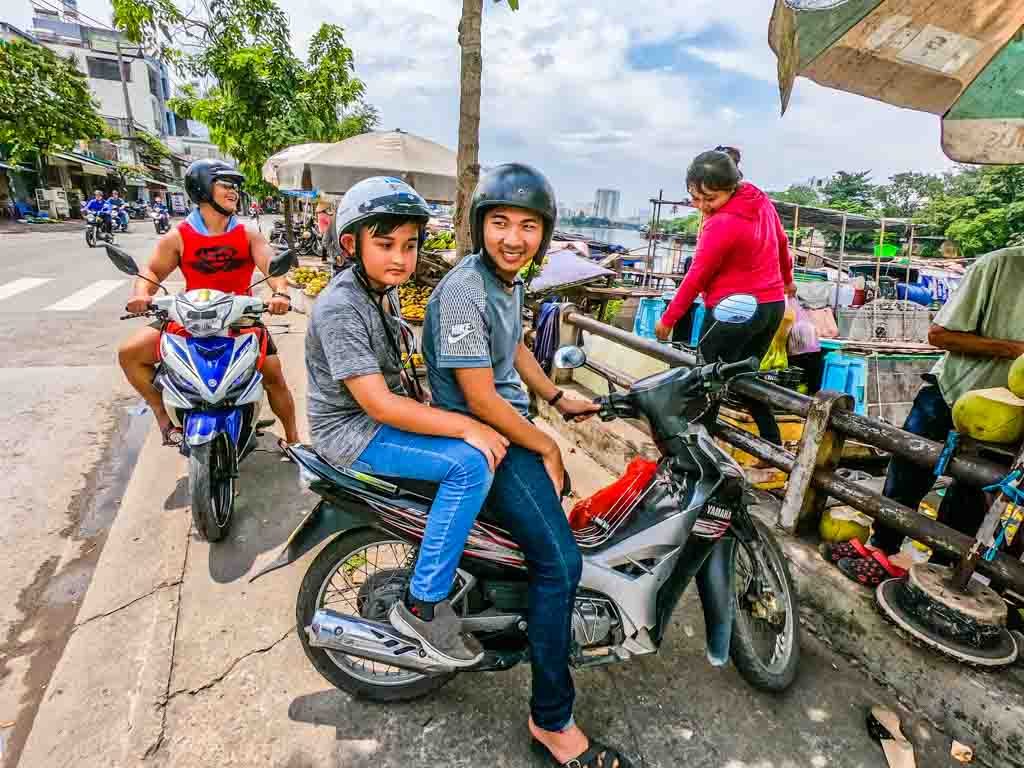
Seeing the other side of HCMC on a motorbike tour

Skydeck

Late in the afternoon go to the sky deck. In fact get there for the sunset if you can, you will get amazing views of the pandemonium below, and of the entire city centre.

Things To Do as Time Permits

Here are a few things to tick off your Ho Chi Minh City bucket list. Do these whenever you get around to them, just make sure you tick them off your list before you leave

P079 Ho Chi Minh Itinerary for 3 Days 100
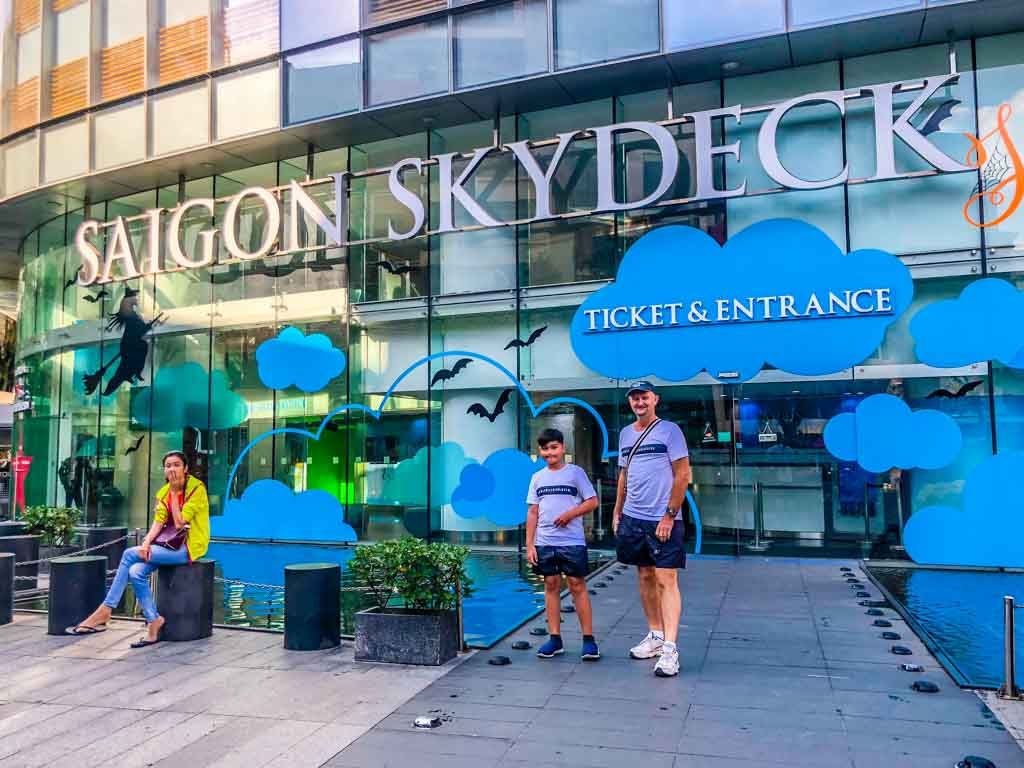
Saigon Skydeck

Eat a Vietnamese Pho

Pho is very much the national dish of Vietnam. This is a mixture of noodles, herbs and spices mixed into a noodle soup. Most commonly served with beef or chicken. These make for a great breakfast, but can be eaten for any meal. I try to eat at least on per day in Vietnam, Pho is definitely my favourite dish.

Eat a Banh Mi

This is a Vietnamese Baguette filled with chicken, herbs and spices. Normally you’d find lettuce and cucumber in there as well. These are best purchased from street vendors, but you can find them in many fast food or convenience stores as well.

Drink a Vietnamese Coffee

Vietnamese coffee is distinctive mainly because use the Robusta variety of cofee beans, rather than the usual Arabica. A traditional coffee is served with a small filter over your cup, and is sweetended with condensed milk. Careful, these are very addictive. And powerful.

Grab a Bargain at the Markets

The markets are definitely a tourist trap, and prices don’t seem all that cheap. Unless you practice your bargaining skills. You can probably get the normal price reduced by around 60-70% and score a great bargain. Our favourite are the Ben Thanh markets, the biggest markets in town.

P079 Ho Chi Minh Itinerary for 3 Days 100
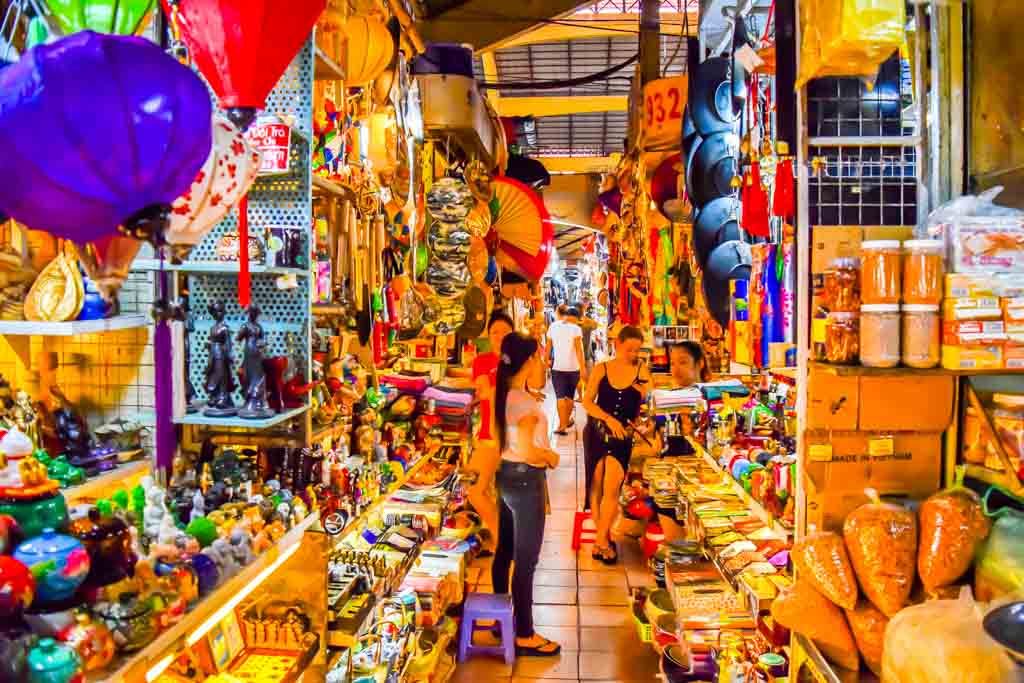
Shopping galore at Ben Thanh markets

Cross a Busy Street

This can be a scary experience for the faint hearted, but is memorable experience in Ho Chi Minh City nevertheless. If you find a local and walk right behind them you should be right. The trick is apparently to keep on walking (nice and slowly), and the traffic will go around you! In theory.

Top Attractions Ho Chi Minh City

After your whirlwind tour of Ho Chi Minh City, you cannot possible see all the top attractions in Ho Chi Minh City. Best to leave some time to go exploring at the end of each day, and do whatever takes your fancy.

If you only have 2 days in Ho Chi Minh City, you could just remove one of the day tours in surrounding areas. But 3 days in Ho Chi Minh gives you a much better feel for all this amazing part of Vietnam has to offer.
I hope you enjoy Ho Chi Minh City as much as we do. It has a completely different feel to Hanoi and the rest of Vietnam. In fact you haven’t experienced all that Vietnam has to offer until you visit Ho Chi Minh City.

P079 Ho Chi Minh Itinerary for 3 Days 100
The old Post Office downtown is major attraction

Do Your Research

You can never do enough research for a trip of a lifetime. Here are some great hand picked books to help you along your way.

Would you like a free copy of our Ultimate Bucket List?

Not sure where to travel to next? We have created the Ultimate Bucket List to help you plan your next trip. 1170 awesome travel destinations in 167 countries. And we want you to have it for FREE.

Insider Guide to Saigon Motorbike Tours

0
Saigon Motorbike Tours

If you are travelling to Saigon, there are loads of great tours to see all the main attractions in town. But if you want to see the real Saigon you need to check out Saigon Motorbike Tours. Read on to find out what they’re like.

Note: This post may contain affiliate links. Please read our disclosure policy for more information.

Saigon Motorbike Tours
Not your average tourist tour

How to Book Saigon Motorbike Tours

District 1 in Saigon (Ho Chi Minh City) is the main tourist area in town. It is where most tourists will gravitate to when it comes to accommodation and activities. District 1 in Saigon also has the highest concentration of Tour Booking Agencies.

Just walk into any tour booking agency and ask for a Saigon Motorbike Tour and they will instantly know what you are asking for. This is one of the most popular tours in Saigon. There are several companies to choose from, and the range is around $29 for a 4 hour tour of Saigon on motorbike.

Another great alternative is to go to the tour desk at your hotel. Our favourite hotel by far in Ho Chi Minh City is the Duc Vuong Hotel, and they have a wonderful tour booking desk. Normally these will offer the same price as the tour booking agency.

Vespa Tours

Actually I had heard about Vespa tours in Saigon, and that they are highly recommended. I asked at the tour agency and they said they cost $75 per person. Sure enough, I checked the Vespa Tours website and verified these tours cost $75 per person.

These 4-5 hours look like loads of fun, and you will definitely tour Saigon in style on these lovely vintage Vespa’s. But I’m sorry, I can’t recommend these tours for roughly double the cost of a regular tour, on a standard Japanese motorcycle. The itinerary is roughly the same, as is the fun factor.

Saigon Unseen Tour

The best motorbike tour Saigon has to offer, and one that we highly recommend, is the “Saigon on Motorbike” tour. These are widely available at tour booking agencies, and there are a wide range of tour options available.

The tour that we went on is wall the Saigon Unseen Tour, and costs $27 per person on the company website. We paid $29 per person at the tour booking agency.

Saigon Motorbike Tours
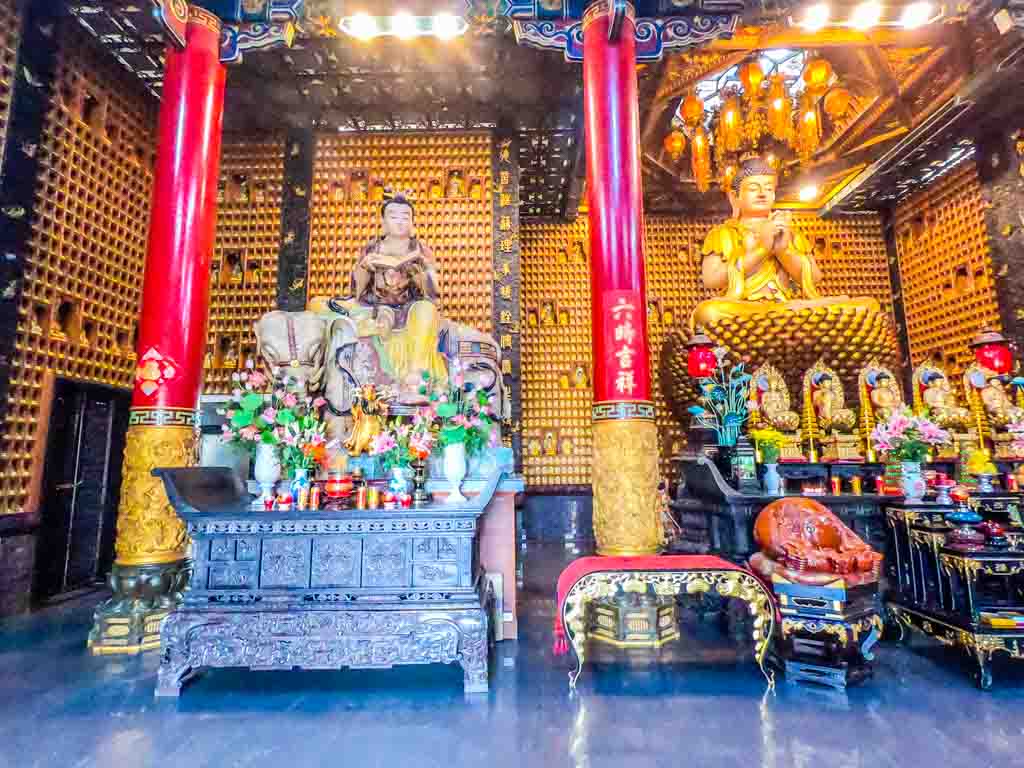
The temple of 10,000 Buddhas was included in our tour

Saigon Unseen Tour Itinerary

The tour advertises 8:00am to 12:00am. However we had an exclusive tour with just my son and I. Thus we requested a 9:00am start. No problems, since we were the only people on this tour. We left our Anpha Boutique Hotel in District 1 of Ho Chi Minh City.

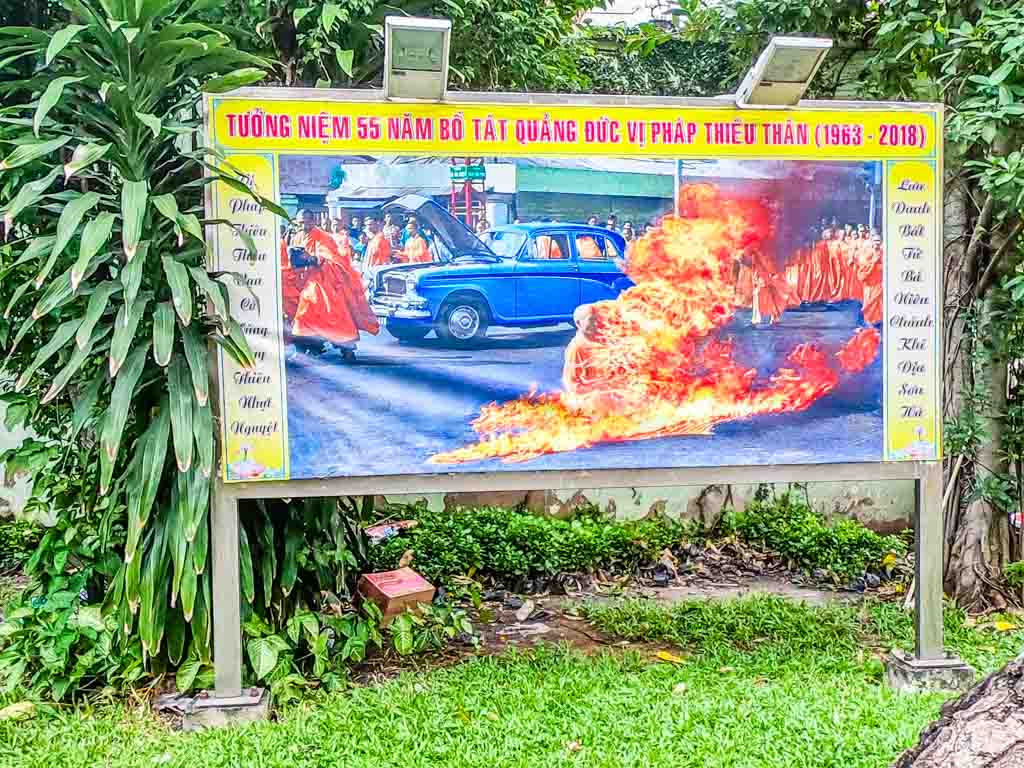
Thich Quang Duc Statue

First stop was in District 3 Thich Quang Duc. This is a monument dedicated to a Buddhist Monk who burnt himself alive in 1963 in protest. A very sad site, you can see the burning on YouTube.

Saigon Motorbike Tours
The disturbing pictures at the burning monk shrine

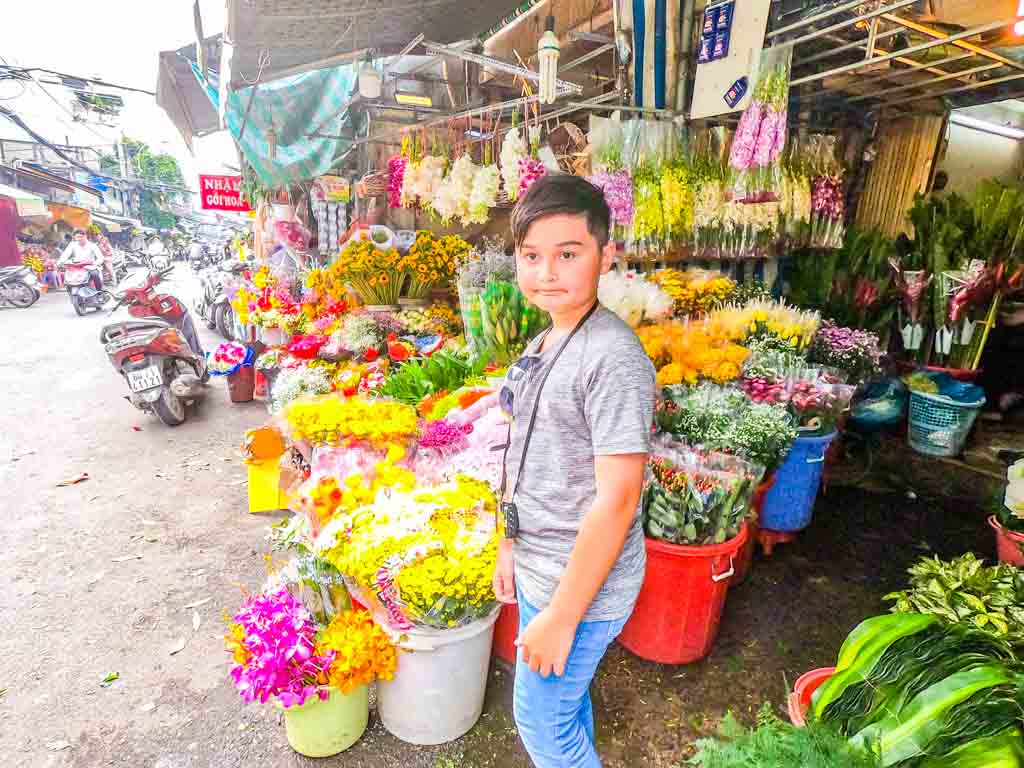
Flower Market

Next stop was the flower market in District 10, surely one of the most colourful sights in Saigon. This market is a 24 hour market, at it’s liveliest at 11pm when the new flowers arrive each night. But it’s still great during the day.

Saigon Motorbike Tours
They say the flower markets are much better at night

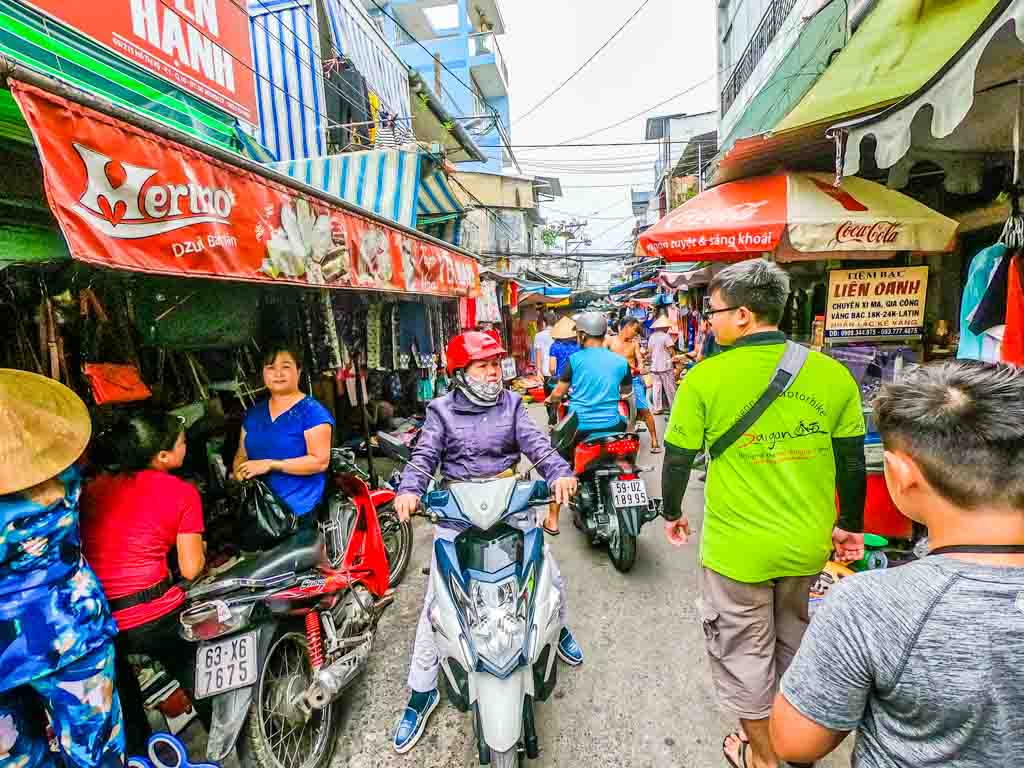
Cambodian Market

Then we went through the Cambodian market, a melting pot of food and cheap shopping. Watch out as motorbikes whiz through the busy pedestrian streets of these markets.

Saigon Motorbike Tours
Watch out for the traffic in the Cambodian Markets

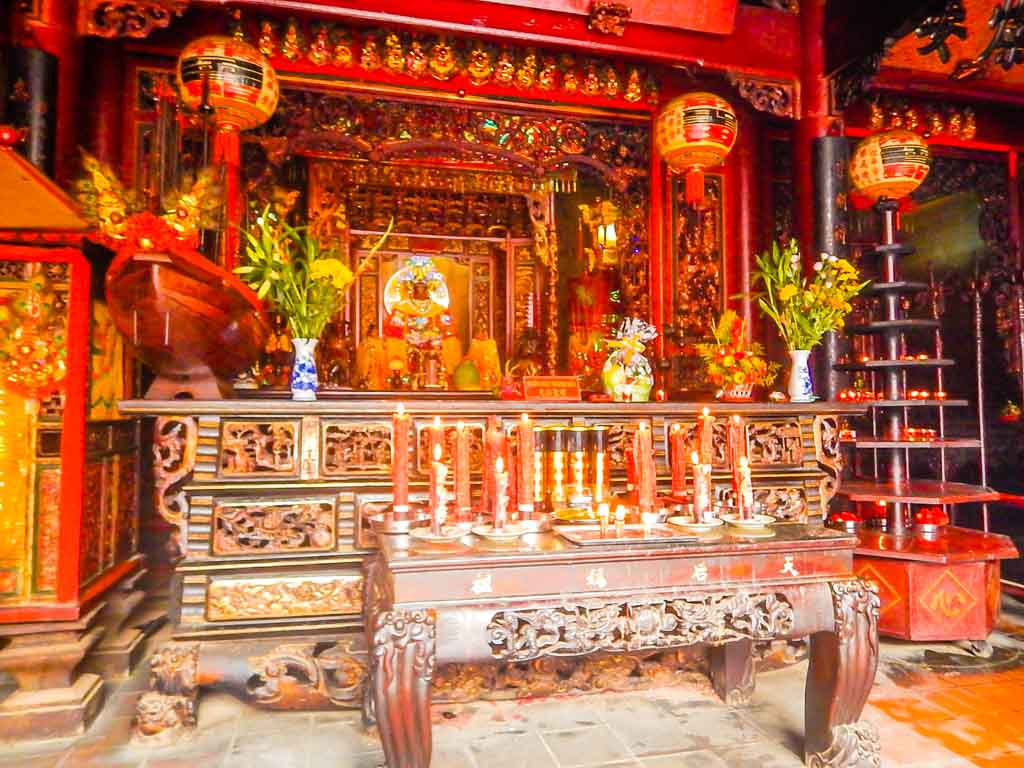
Chinese Temple #1

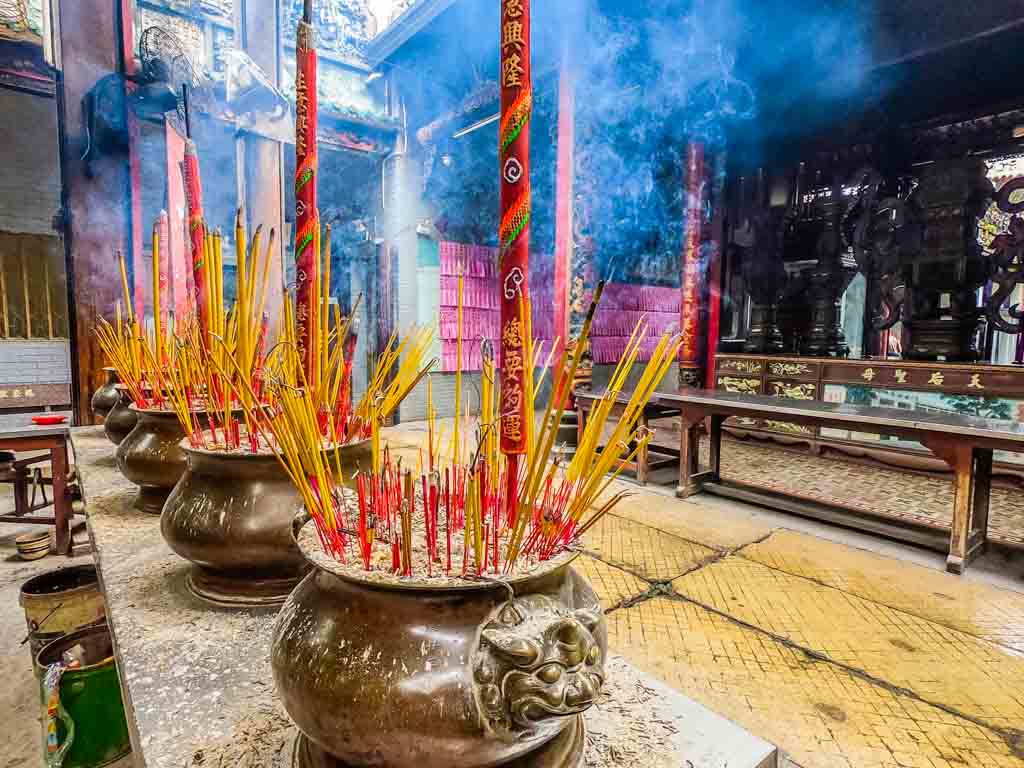
We stopped an old Chinese temple.There is ample opportunity to take photos inside the Chinese temple, and admire the incense burning rituals all around you.

Saigon Motorbike Tours
One of the beautiful Chinese temples on our tour

Chines Temple #2 – The Thien Hau temple

After the first temple, then we stopped at another important Chinese Temple, The Thien Hau temple. This on is bigger than the first, and about 300 years old. You even have the opportunity to have some fortune telling done.

Saigon Motorbike Tours
A very smokey Chinese temple

Chinese Markets

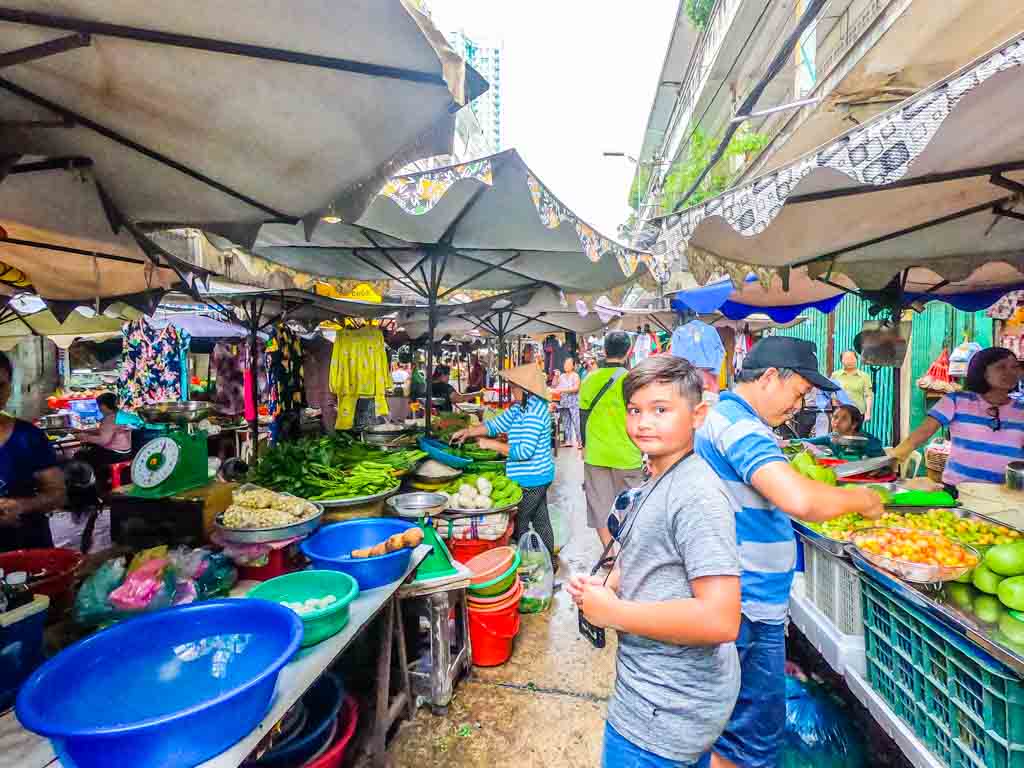
Then it’s off to the Chinese traditional medicine markets, in the heart of China Town in District 5. This is also a wet market, and you see an endless array of mysterious produce on sale. You can see the hustle and bustle up close as you walk through this market, you really feel like you’re part of the action.

Saigon Motorbike Tours
Making our way through the Chinese markets

Chinese Tea

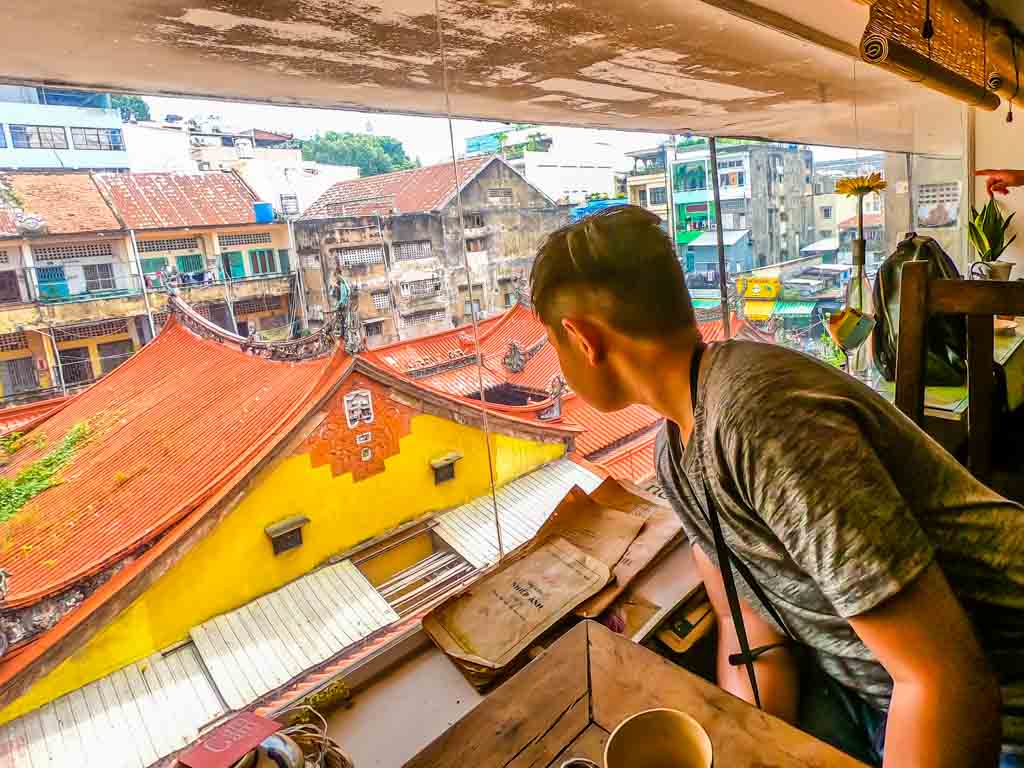
After weaving our way through the China Town market, up some alley ways and up some flights of stairs we made it to a Chinese Tea shop above the temple. Here we enjoyed some Chinese tea and some traditional sweets made from coconut and lotus flowers.
Saigon Motorbike Tours
Great view from our Vietnamese tea room

Ghost Apartments

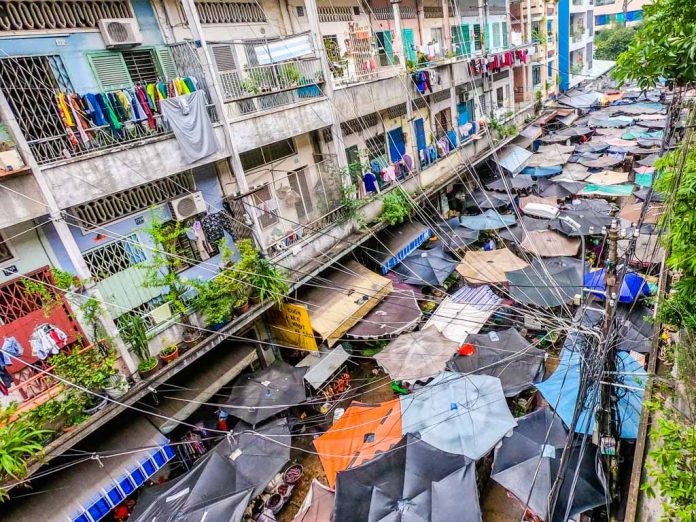
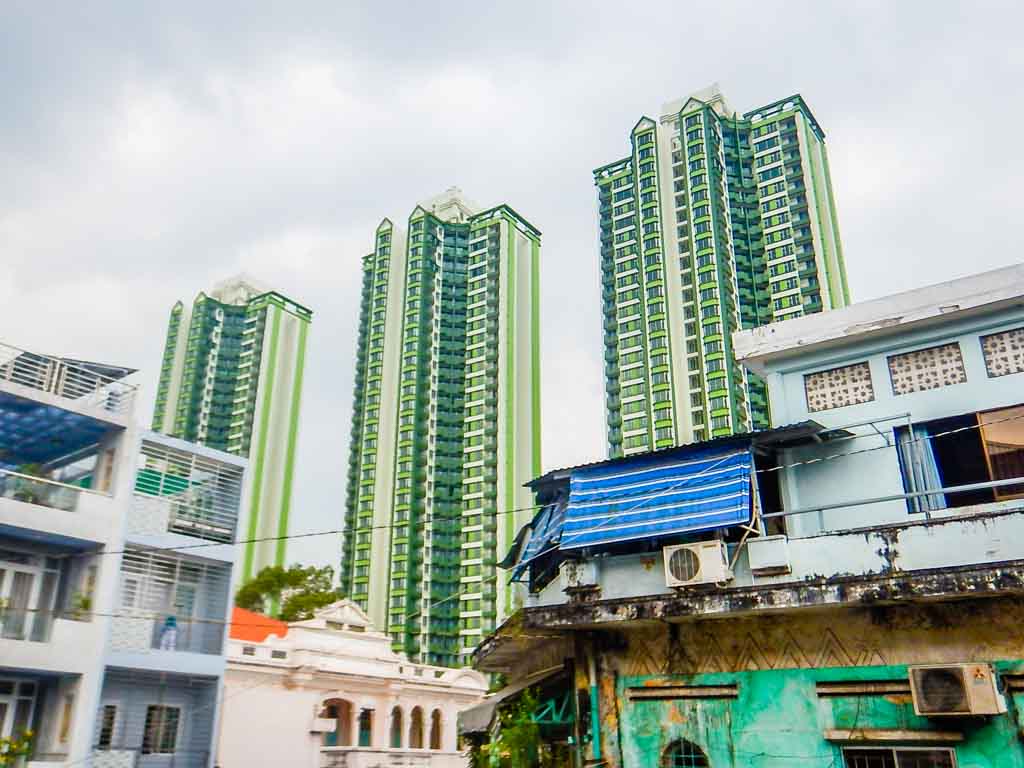
On the way to the tea shop, you get up close to 3 high rise apartment blocks in Chinatown, which look to be fairly new. These are built in strict accordance with Chinese superstitions… 3 in a line, tallest one in the centre.

Apparently a mother and her daughter went missing and were never found soon after these were built. Consequently they were deserted due to superstitious fear of spirits, and to this day these giant ghost apartments remain empty. Except for some homeless people.

Saigon Motorbike Tours
3 creepy ghost apartment blocks stand abandoned

Temple of 10,000 Buddhas

Next stop was a bonus stop, the temple of 10,000 Buddhas. Up on the 4th floor there is a special room with a giant Buddha statue, surrounded by 10,000 smaller Buddha statues. Although this is not in the official tour itinerary, I’m sure if you ask the tour operator nicely they will take you there.

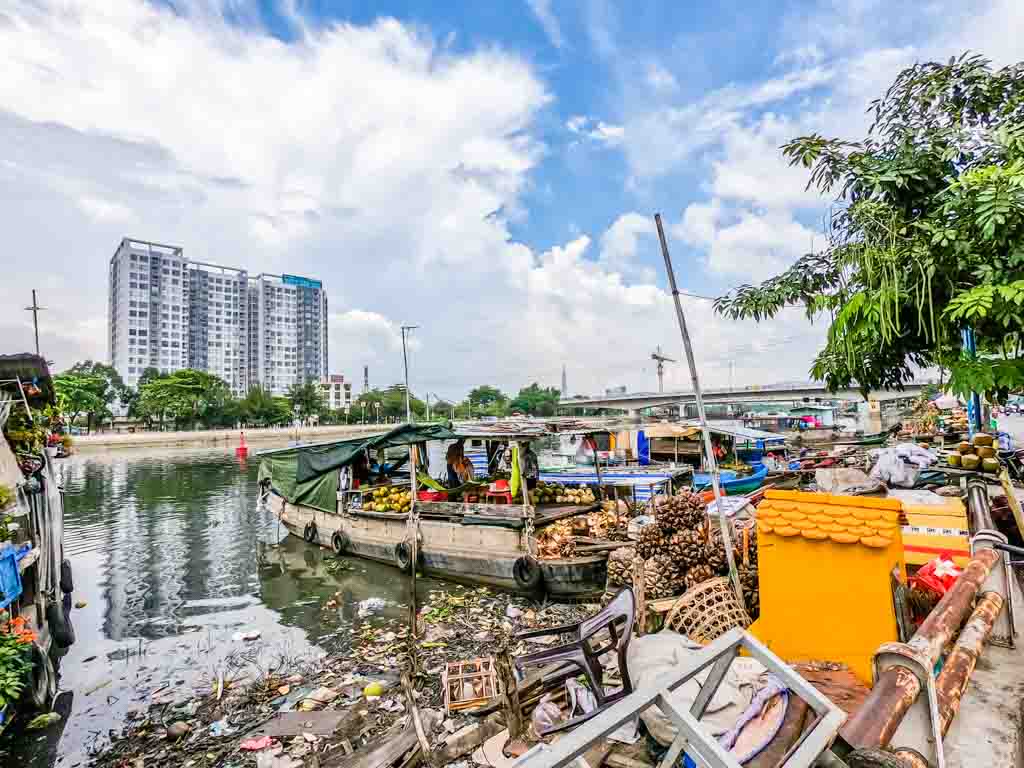
Floating Market

The next stop was at the little floating market along the river in District 4, where fresh produce is bright in daily from the Mekong Delta. Here we were treated to a refreshing coconut drink straight off the boat. Near this market are some of the Saigon slum areas, where you can see how the poorest people live.

Saigon Motorbike Tours
A floating pile of rubbish surrounds the floating markets.

Vietnamese Pho Restaurant

Final stop was at a Vietnamese Pho restaurant, to have a delicious Pho for lunch. If you have never eaten Pho, this is the main dish of Vietnam and the one dish you absolutely have to try before you leave.

Tour Options

These tours can be modified to suit you. Instead of Chinese Tea you can go to a Vietnamese coffee house. Instead of Vietnamese Pho you could go to a different restaurant. It’s all up to you.

Saigon Motorbike Tours
This tour is suitable for kids too

Other Popular Motorbike Tours of Saigon

If you are interested in food tours Saigon Motorbike Tours are perfect. Tours are available during daytime or nighttime to sample all the different foods in Saigon. You can even combine food tours and Saigon Unseen tours.

If you are interested in city tours Saigon Motorbike Tours are still a great option. You can take a tour around all the major attractions in Saigon like the War Remnants Museum, Reunification Palace, Central Post Office, City Hall, Opera House, Notre Dame Cathedral and Jade Emperor Pagoda. I am sure you can modify these tours as you like for your perfect tour in Saigon.

Saigon Motorbike Tours
You get plenty of city sights on the tour

Make Sure You See Saigon on Motorbike

A Ho Chi Minh motorbike tour is not to be missed when you visit this amazing city. Sure you can see this city on foot, by grab taxi, by cyclo, or by some organised bus tour. But to truly see the real Saigon you really can’t go past these motorbike tours.

There are several companies offering these tours, and I suspect they all offer great tour packages. Read some reviews online and make up your own mind which is the right tour for you. But I can thoroughly recommend the Saigon Unseen Tour, it promises to be the best thing you ever did in Saigon.

Here’s a video of the Saigon Unseen Tour which we went on.

Would you like a free copy of our Ultimate Bucket List?

Not sure where to travel to next? We have created the Ultimate Bucket List to help you plan your next trip. 1170 awesome travel destinations in 167 countries. And we want you to have it for FREE.

Research Before You Visit Saigon

It always pays to do some research before you go on holidays, especially in Saigon because it is such a complicated and confusing city. Here are a some useful Lonely Planet travel guides to get your started.
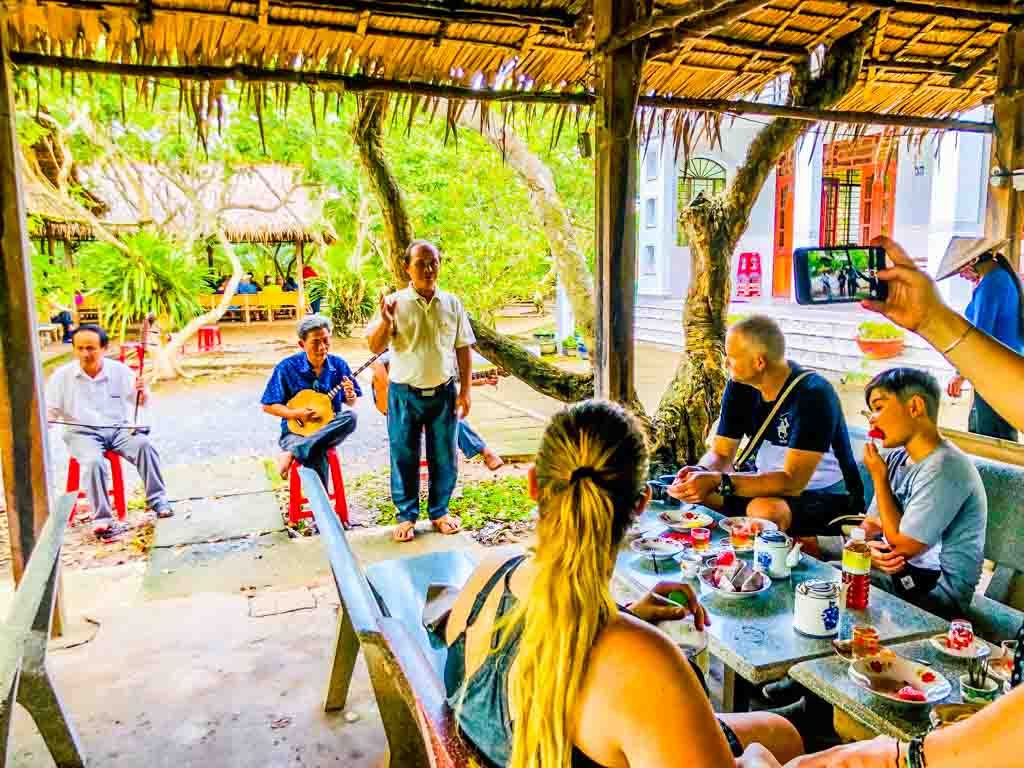
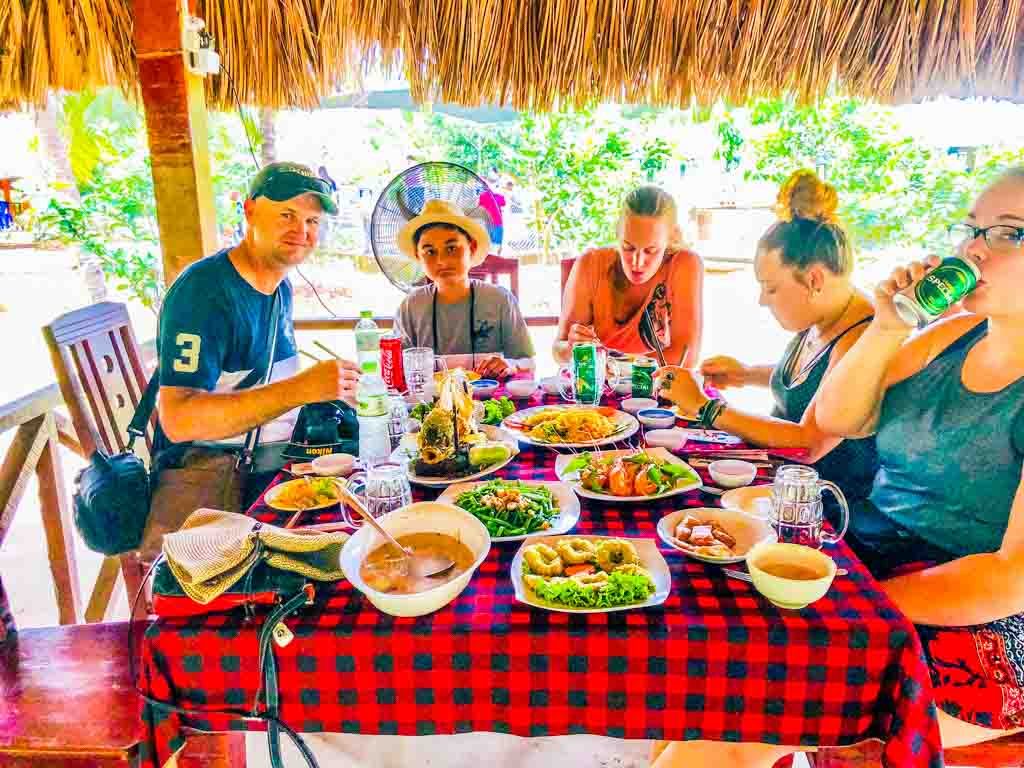
 

Amazing Mekong Delta Tour at Ben Tre Vietnam

0
Mekong Delta Tour at Ben Tre Vietnam 250 sanpan

If you are heading to Ho Chi Minh City for a holiday there are a handful of must see attractions. And one of them is an amazing Mekong Delta Tour at Ben Tre Vietnam. We’ll show you how to find this 1 day Mekong Delta tour, and what you will see.

Note: This post may contain affiliate links. Please read our disclosure policy for more information.

Where is the Mekong Delta and Ben Tre Vietnam?

Ben Tre is a coastal province in Vietnam, just to the south of the capital Ho Chi Minh City. Actually Ben Tre is connected to the mainland by a bridge at the busy market town of My Tho. Ben Tre is at the heart of the Mekong Delta.

To get to the island of Ben Tre, it’s about a 70 km / 1.5 hour drive south from Ho Chi Minh City. When you get to My Tho you can either drive across the bridge, or stop at the ferry terminal to catch a ferry across. The majority of tours will catch the ferry across to Ben Tre Island.

Mekong Delta Tour at Ben Tre Vietnam 100 sanpan hats
Getting into the Vietnamese spirit on a Mekong sampan

How to Get to the Mekong Delta and Ben Tre

The simplest way to get to Ben Tre is to take an organised tour. This is one of the most popular Mekong Delta tours from Ho Chi Minh City. Virtually every tour booking agency or hotel booking desk can book this tour for you.

All you need to do is tell the tour agent you would like to do the best Mekong Delta Tour, and you will be presented with a range of options. The most popular Mekong Delta tour 1 day itinerary options are:

My Tho – Ben Tre – Mekong Delta Four Islands Tour

This is a 9 hour tour leaving from District 1 in Ho Chi Minh City. Cost is normally around 800,000 Vietnamese Dong per adult. This tour takes in a Pagoda, several motorboat and sampan rides, as well as some traditional workshops and lunch.

Mekong Delta – Cai Be – Vinh Long (Little Floating Market) Tour.

This is a 10-11 hour tour leaving from District 1 in Ho Chi Minh City. Cost is normally around 1,100,000 Vietnamese Dong per adult. This Mekong tour travels to the floating markets, and includes several motorboat and sampan rides, as well as some traditional workshops and lunch.

Which Mekong Delta Tour to Book

We booked a Luxury Group Tours / Kim Travel Mekong Delta Tour through our tour booking desk at our hotel, the Duc Vuong Hotel. They have a wonderful tour desk. You can check out the Luxury Group Tours / Kim Travel website for more information.

Whilst you could contact the travel company directly, I don’t recommend doing this unless your spoken Vietnamese is good. The tour company should provide an excellent English speaking tour guide for the actual tour, however during the booking process may run into language difficulties.

That’s why it’s better to book your Mekong tour through and English speaking agent, such as the hotel tour desk.

Mekong Delta and Ben Tre Tour Itinerary

Pick up at Hotel

The Luxury tour van picked us up at our Duc Vuong Hotel at 8:00 am. A quick meet and greet with our English speaking tour guide, and Vietnamese speaking bus driver. Then the start of our 1.5 hour drive to Ben Tre.

Our bus had our little party of 3 people, and 3 other tourists on board. This is a nice size group, and gives you a chance to mingle with the other tourists.

Mekong Delta Tour at Ben Tre Vietnam 100 bus stop
Waiting for our tour bus outside the Duc Vuong Hotel

Vinh Trang Pagoda

First stop was about half way to Ben Tre, at the Vinh Trang Pagoda. This was built in 1849, and has some spectacular giant 20m high Buddha statues. The main pagoda is in  renaissance style, and has some outstanding displays of traditional Vietnamese artwork.

Mekong Delta Tour at Ben Tre Vietnam 100 temple
Admiring Pagodas, Buddhas and Temples

My Tho Ferry Terminal

The tour continues onto My Tho, where you board a motor boat to cross the Mekong River to Ben Tre Island. This is a bustling ferry terminal with what seems like hundreds of tour buses heading for the same place. You get the feeling this is the most popular tour in town.

Crossing the Mekong River is only about a 10 minute journey, and along the way you will start to see all manner of Vietnamese life. Fishermen netting their catch. Merchants ferrying their goods up to Ho Chi Minh for sail. And fleets of boats from much larger businesses.

Mekong Delta Tour at Ben Tre Vietnam 100 ferry port
Entering the busy ferry terminal

Unicorn Island Bee Farm

The first traditional workshop is a trip to the local bee farm. These bees don’t sting, and you get to put your hand into a swarm of bees to scrape out a dollop of honey, and then eat it. There is also a quick demonstration of how the whole bee to honey thing works.

Next is a sample of some delicious honey tea and snacks. You are offered to purchase some honey for 100,000 Vietnamese Dong per bottle, or some honey lotion for about 250,000 Dong per tub.

Mekong Delta Tour at Ben Tre Vietnam 100 bees
Ahh so that’s where honey comes from

Hand Rowing Sanpan

The Hand Rowing Sanpan may not be the idyllic experience you were hoping for. There are literally hundreds of these sanpans jammed into tiny canals, ferrying tourists to various destinations. Whilst it is a wonderful experience, peak hour is definitely an amusing spectacle.

Mekong Delta Tour at Ben Tre Vietnam 100 sanpan traffic
A Sanpan traffic jam

Horse and Buggy

Somewhere along the way you will be treated to a short ride on a horse and buggy. Fear not, this is along smooth roads and is quite comfortable. I guess this is a glimpse at traditional life, before motorbikes dominated the landscape.

Mekong Delta Tour at Ben Tre Vietnam 100 horse cart
I think we enjoyed it more than the horse did

Ben Tre Home Made Coconut Candy Workshop

Next there is a tour through a coconut candy factory. This factory is set up purely for the tourists, and does not sell to shops. You will see how the coconuts are scraped, then blended and cooked, then moulded and cut into candy. Also how the edible rice paper wrappers are produced.

Mekong Delta Tour at Ben Tre Vietnam 100 coconut candy factory
Coconut candy production line in full swing

After the demo visitors are encouraged to purchase some packets of candy for 30,000 Vietnamese Dong each. It’s hard to resist your own packet of these delicious coconut treats. You can also purchase some snake wine, if that’s your thing.

Mekong Delta Tour at Ben Tre Vietnam 100 snake wine
Hey this wine has a snake in it

Tropical Fruits and Traditional Singing

There is another boat ride to a tropical fruit farm on Unicorn Island, where visitors are offered complimentary fruit platter and Vietnamese tea. Not special fruits, just the standard pineapple, watermelon, papaya and dragon fruits.

Then a small band of traditional singers will come and sing you a half dozen or so Traditional Southern songs, using traditional stringed instruments. Very entertaining to listen to, after which visitors are encouraged to leave a voluntary donation. About 10,000 Vietnamese Dong is all that’s required here.

Mekong Delta Tour at Ben Tre Vietnam 100 music
Local band performing for our tour group

Lunch and Zoo

Next stop is the 5 course lunch. You can purchase a beer, soft drink or water with you lunch if you like. The lunch is of course in Vietnamese style, and is mainly seafood based.

The lunch break lasts for about an hour, and is in a zoo type of a setup. There are very few animals – mainly porcupines, frogs and fish. We also saw a pigeon and a squirrel.

Mekong Delta Tour at Ben Tre Vietnam 100 lunch
Not a bad spread for lunch

The main attraction however is a pit full of crocodiles. Visitors can pay 10,000 dong for a fishing rod, baited with a live fish to feed to the crocodiles. Whilst I’m sure this is cruel in some ways, and western countries would certainly frown upon it, it is still an entertaining spectacle. Our son would probably rate this as the highlight of his trip.

Mekong Delta Tour at Ben Tre Vietnam 100 crocodiles
Crocodile feeding with a difference

Boating around the Mekong Delta Four Islands

Along the way there are several motorboat and hand rowing sanpan rides, as you criss-cross the maze of channels to the different islands. The islands we visited were Dragon Island, Turtle Island, Phoenix Island and Unicorn Island.

On the final boat trip you get to have a fresh coconut drink along the way. Ours were young, sweet coconuts… delicious.

Things We Missed Out On

2 attractions advertised on our tour which didn’t eventuate are:

  • Floating Fish Farm – apparently villagers cultivate fish and shrimp in wire baskets under their houses. Our tour didn’t see any of these.
  • Bicycle Riding through the villages – our tour guide promised a 20 minute bicycle ride, but it didn’t eventuate. I suspect we ran out of time.

Is This Mekong Tour Suitable for Kids?

There are quite a few tricky place to get on and off boats. I would not recommend this 1 day Mekong Delta tour for kids under 5 years old, or anybody with mobility issues. Gang planks, handrails, and safe access platforms are virtually non existent, you are instead asked to rely on your own balance and hopping skills.

Mekong Delta Tour at Ben Tre Vietnam 100 ferry unloading
A typical boat exiting manouvre

The walking is easy enough, mainly along flat trails. Some of them would become quite muddy in the wet season, so covered shoes would be a good idea. And there are a couple of narrow coconut log bridges to cross, which would be tricky for small kids or elderly people.

Mekong Delta Tour at Ben Tre Vietnam 100 bridge
The most difficult bridge of the day

Overall Rating of the Vietnam Ben Tre Tour

This My Tho Ben Tre tour is one of the most popular in Saigon, and for good reason. It is quite inexpensive for a luxury tour, and is quite a busy tour. You do cram quite a lot of attractions into 1 day.

I thoroughly recommend you to tour Mekong Delta on your trip to Saigon, it is an intriguing look into Vietnamese culture. The exact tour you take is up to you, there are loads of different options to choose from. However we were very happy with our choice to tour Ben Tre Vietnam, and would happily give this tour a big thumbs up.

Plan Your Mekong Delta Trip

You can never do too much planning, and here are some useful resources to help you on your journey.

Would you like a free copy of our Ultimate Bucket List?

Not sure where to travel to next? We have created the Ultimate Bucket List to help you plan your next trip. 1170 awesome travel destinations in 167 countries. And we want you to have it for FREE.

Getting from Bucharest to Sofia Bulgaria by Bus

0
Sofia by bus

When traveling from Bucharest to Sofia Bulgaria, Flix Bus is a comfortable and inexpensive option. We took this 7 hour journey and had some unexpected surprises along the way.

Booking Bus Tickets to Sofia Bulgaria

We booked our tickets directly on the Flix Bus website, and found it to be obscenely cheap. The cost was just 10 euros each for the bus fare. Then there’s an option to pay another 4 euros each to book your seats, which I did.

I was very happy to find that 2 front seats were available, so I booked 2 front seats and 1 in the second row. This is a great seat if you want to take any video, which I was hoping to do for YouTube clip.

The bus departure point is Autogara Militaria Bus Station in Bucharest. This is about 7 km to the west of our Bucharest Old City apartment. We used an Uber to get to the bus station, which incidentally are great value in Bucharest. The trip took 28 minutes and cost us 23 Romanian Lei.

Autogara Militaria Bus Station in Bucharest

It’s a fairly standard Bus Station, with a variety of different bus carriers is using it. There are about a dozen different bus parking bays, and each one has a permanent sign above it showing which buses use the bay each day.

Flix bus has an office in the Autogara Militaria bus terminal, where you can purchase tickets. There’s also a well equipped convenience store inside the Flix Bus terminal, where you can stock up on drinks and snacks.

Departing Bucharest Romania

When we boarded the bus, the bus driver had a different idea about our pre-booked seats. He tried to push us back further into the second and third rows. It seems that the front seat was better suited for the bus drivers to use for their storage area. Actually both the bus driver seemed interested in having one side of the front of the bus each, and us paying passengers were supposed to move backwards into the bus.

After some debate we finally convinced the drivers to let us sit in the front seat. The driver side front seat was for the relief bus driver, and us passengers were on the other side. So it was a happy ending, but it took a solid 10 minutes of negotiating with the bus drivers.

Bucharest to the Bulgarian Border

The bus was very comfortable, new and modern. There is no entertainment system, no phone charging USB ports, and no Wi-Fi. But for the price we were satisfied with a no-frills bus trip. Anyway the seats were comfortable and clean, and as an added bonus they were  reclining.

Usually on a bus trip you see some interesting things along the way. Maybe a castle or two, maybe some beautiful mountains and rivers. So from Bucharest to the Bulgarian border I was eagerly looking out for something interesting.

All I saw was sunflowers. Millions of them, field after field. I didn’t see any other point of interest along the way. Sunflower fields are nice and they’re pretty to look at, but that’s all you get to look at. This is not really the route to take if you’re looking for interesting scenery.

Breaks Along the Way

The seven hour bus trip had 2 breaks along the way, both in Bulgaria. The first break was at a Bulgarian service station, about the half way mark. The second break was when the drivers decided to swap over, about 2/3 of the way into the trip. Of course you have to pay at the service station to use the toilets, which is standard practice throughout Romania and Bulgaria. The cost is normally one Romanian Lei.

Border Crossing into Bulgaria

The border crossing into Bulgaria took around 30 minutes in total. The bus stopped at the passport control station, then a Passport Control Officer control person came on the bus and collected everybody’s passport.

They take the passports away into a nearby Passport Control Office and take care of the passport stamping. Then they come back and give the passports to the bus driver who re-issues them to all the passengers. It all seems to go without a hitch, and best of all you don’t have to leave your comfortable bus seats.

Scenery in Bulgaria

After you cross the border into Bulgaria the scenery is… you guessed it… all sunflowers and cornfields. But it’s prettier than Romanian farmland. In southern Romania the countryside is very flat, at least in Bulgaria it’s rolling hills. It’s very pretty to see on a sunny summer day, especially with the millions of sunflowers in full bloom.

About two hours before you reach Sophia Bulgaria, you start driving through some seriously big mountains. The bus starts going through several long tunnels through the mountains, and across some extremely high bridges. This part of the drive is extremely scenic, travelling through forested mountain country interspersed with quaint Bulgarian villages.

Arriving at Serdika Bus Station, Sofia

After the mountains the bus descends onto some flat country and arrives in Sofia Bulgaria. This is a city nestled on a a flat plateau with tall mountains all the way around it. Once again the bus station in Sofia was fairly standard, if not a little confusing.

The three things we wanted to take care of as soon as possible we arrived were.

  1. An ATM for some local currency
  2. SIM card so we could call our accommodation contact person to obtain the key
  3. A taxi to get to our accommodation.

A quick look around the Serdika bus terminal and I could find none of these three essential things. After enquiring at the small Flix Bus office, I learned there is a supermarket behind the bus terminal which has an ATM inside. So I walked across the road and sure enough the ATM was in the supermarket, and I stocked up with some local currency.

Also outside the supermarket is a taxi rank, about 200m from the bus terminal. It seems like the taxi serves the supermarket rather than the bus terminal, which I found a little unusual. I did not see any way to pick up a SIM card, that had to wait.

And we got our first taste of taxi drivers in Sofia Bulgaria. It was pouring rain and we did not want to walk 200 metres to the taxi rank, so we enquired with a nearby hire car. The driver refused to operate his taxi meter, but give us a flat rate instead. After some arguing in the rain, we accepted this inflated deal. I’m fairly sure we were charge triple the going rate.

Review of the Flix Bus to Sofia

Here’s my ratings of the facilities and conditions on board the Flix Bus from Bucharest to Sofia Bulgaria:

  • Wi-fi: 0/10, non existent.
  • Phone Charging: 0/10, non existent.
  • Entertainment System: 0/10, non existent.
  • Bus Noise: 10/10, the bus was quiet and relaxing.
  • Toilet: 9/10, a small but fully functional toilet on board.
  • Cleanliness: 10/10, the seats were immaculately clean.
  • Baggage storage: 10/10, big bags under the bus and small overhead bag rack.
  • Seat comfort: 8/10, they were quite comfortable and even reclined!
  • Driving Safety: 10/10, the bus drivers drove safely for the entire journey.
  • Passport Control: 9/10, it was fast and smooth.
  • Sticking to Schedule: 10/10, the bus departed and arrived right on time.
  • Value for Money: 10/10, so cheap.

We found this journey to be overall pleasant and not too tiring. It’s certainly a no frills bus trip, but the bus is clean and comfortable. Consequently we can highly recommend the trip from Bucharest to Sofia Bulgaria on Flix Bus, if you just want to get from point A to point B.

Would you like a free copy of our Ultimate Bucket List?

Not sure where to travel to next? We have created the Ultimate Bucket List to help you plan your next trip. 1170 awesome travel destinations in 167 countries. And we want you to have it for FREE.

Send Me the Ultimate Bucket List


WEATHER

Melbourne
clear sky
24.5 ° C
26.1 °
23.4 °
89 %
2.1kmh
0 %
Sun
33 °
Mon
30 °
Tue
27 °
Wed
28 °
Thu
26 °

POPULAR ARTICLES