Go Pro Modes sound simple enough – swap between Photos, Videos, and Time Lapse modes, but they still hold a few secrets. Here are 5 Simple Ways to Change Your GoPro Modes.
How To Switch Between Modes
#1 Swipe GoPro Rear Screen
Whenever the GoPro rear screen is showing a live view, you can swipe left or right to switch between Video, Photo, and Time Lapse modes.
#2 Using The Camera Mode Button
With the camera on, you can press the Mode button (on the side of the camera body) to switch modes.
#3 Using Voice Commands
You can switch modes on the fly using the GoPro Voice Commands. If you just recorded a video, just say “GoPro Take a Photo”, and it will switch modes to Photo Mode, and take a photo.
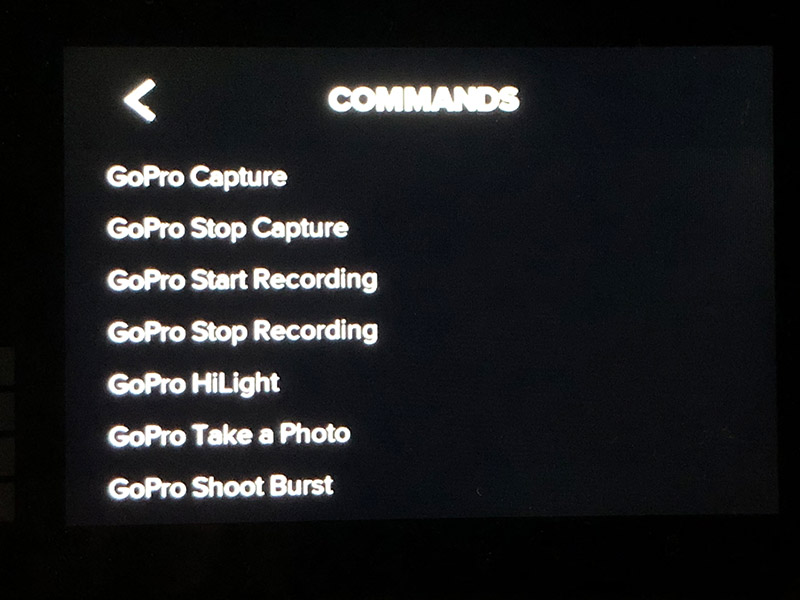
Here is the list of Action Commands which are relevant. You can read more about GoPro Commands Here.
GoPro, start recording
GoPro, HiLight
GoPro, stop recording
GoPro, take a photo
GoPro, shoot burst
GoPro, start time-lapse,
GoPro, stop time-lapse
GoPro, turn off
#4 Using the Volta Handgrip
The Volta Handgrip is a battery hand grip, remote control, and tripod all in one. It comes with a Mode button, which can be pressed to switch between Video, Photo, and Time Lapse modes.
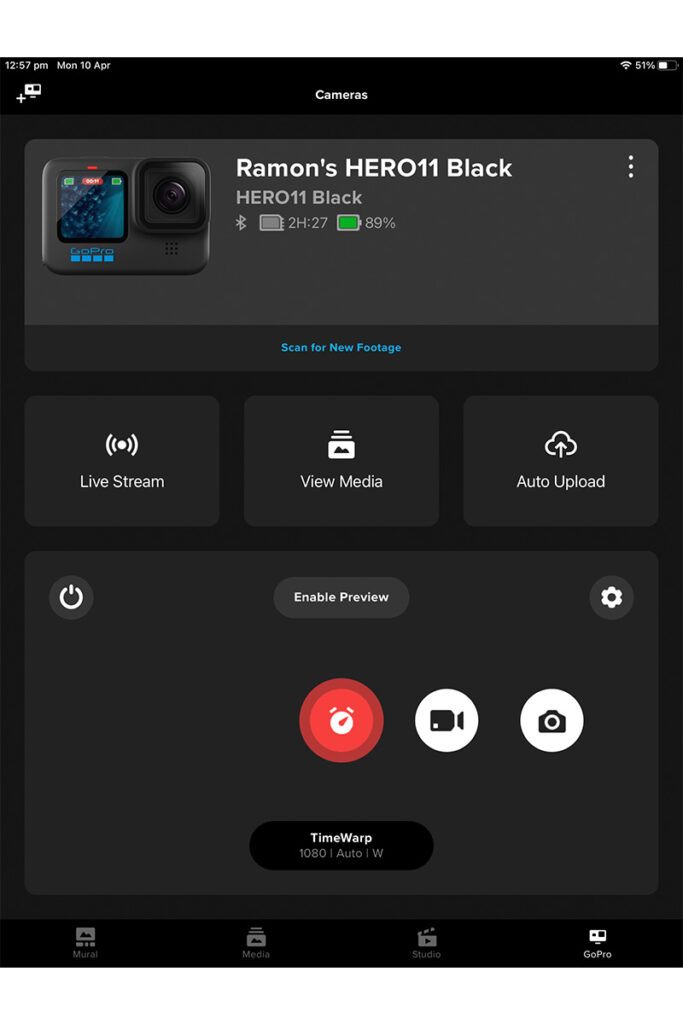
Click the Camera menu on the bottom of the screen to access the Cameras screen of the app.
Ensure the correct camera is selected.
On the bottom window, you will see 3 modes – Time Warp, Video, and Photo. Toggle Between these as required (shown as a red button on below screen shot of the Quik App).
The World’s Most Versatile Camera
These just highlight that the GoPro is the World’s Most Versatile Action Camera. There are many ways to perform many functions, so you can tailor the way you use the camera to your situation. Amazing!
GoPro Quik is a GoPro App that allows you to load all your footage into the cloud, then make amazing edits. But the app has many secrets and can be a little frustrating to figure out. We will tell you 13 Secret Tricks for your GoPro Quik App, to help you get the most from this useful app.
What Can You Do With the GoPro Quik App?
Import Footage
Quik allows you to easily import all your footage from your GoPro to keep it all in one place. You can even import from other cameras!
Unlimited Cloud Backup
Your footage is safe and sound, stored at full quality in the cloud, and handled automatically using the GoPro Appn (so long as you have the GoPro Subscription).
Automatic Highlights
Add automatic highlights quickly and easily. (A highlight adds a tag to an awesome moment)
Edit Your Video
Quik allows you to create stunning videos, cleverly synced to the music. You can choose from a bunch of cool themes and filters. And you can change speed easily.
Remote Control For Your GoPro
The Quik app can be used as a remote control for your GoPro, and you can see what you’re capturing on the app screen.
Simple Tips For Your GoPro Quik App
And now for the tips. Some are to avoid massive headaches, and some will just make things better using the GoPro App.
Tip #1: Turn Auto Upload Off
Auto Upload was one of the key selling points of the GoPro Hero 11 Black. “Automatically upload footage to the cloud + get a highlight video when charging”, GoPro said.
Here’s the problem with that. When you auto-upload, your GoPro Camera is disabled whilst it is uploading to the cloud. You are at the mercy of your internet speed. If you have large file sizes and slow internet, it may take anywhere from 6 to 24 hours to upload from your camera to the GoPro cloud. That means your GoPro camera cannot be used for anything else, which really sucks.
A much better way to upload your footage to the cloud is to use the following steps:
Connect your GoPro camera to the GoPro Quik App via tablet or phone.
Transfer your new GoPro footage to the Quik GoPro App on your tablet or phone.
Let the tablet or phone upload to the GoPro Cloud in the background.
Note that you will want to have plenty of spare space on your tablet or phone to make this possible.
Tip #3 Manually Upload From The Camera To The Cloud
If you wish to upload directly from your GoPro Camera to the GoPro cloud but have auto-upload turned off, follow these steps:
On the rear screen, swipe down to access the GoPro dashboard.
Swipe left to access the preferences menu.
Press the Preferences button.
Select the Auto Upload option.
Select the Manual Upload option.
Tip #4 View The App Upload Status On Your Device
Follow these steps to see the current upload status from your device to the GoPro cloud:
Click Mural on the main menu at the bottom.
Click the cloud icon at the top. It will state “Backup in Progress” if your device is still uploading to the GoPro cloud.
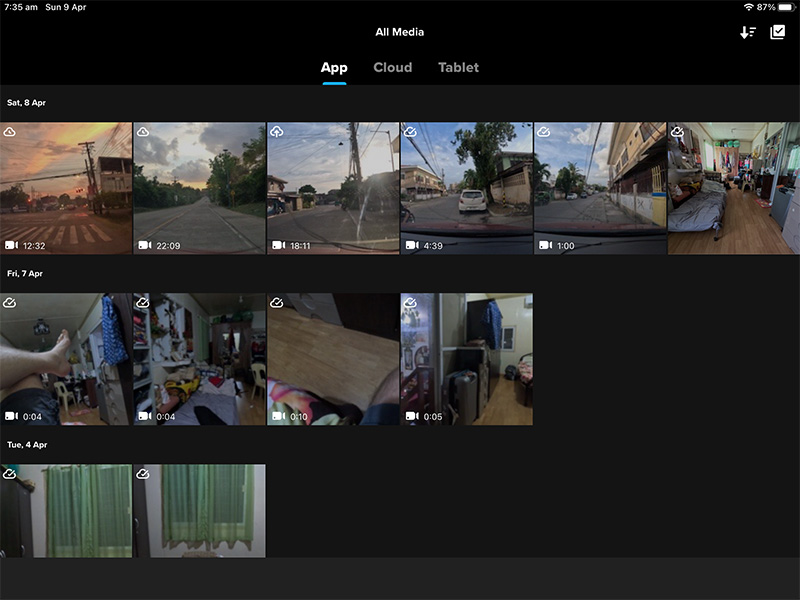
You can also see the status of individual videos on the Media >App screen on your device. There are 3 icons in the top left of each clip:
Cloud icon with clock hands – Has not yet been uploaded to the GoPro cloud.
Cloud icon with up arrow – Upload is in progress.
Cloud icon with tick – Upload to GoPro cloud is complete.
Tip #5 View the Auto Upload Status
You can also view the Auto Upload status by following these steps:
Click Mural on the main menu at the bottom.
Click the Account Settings button (human shape on the top left of the Mural screen).
Select My Account from the menu.
Select Auto Upload Status from the menu.
The Auto Upload Status from your GoPro Camera to the GoPro Cloud will be displayed.
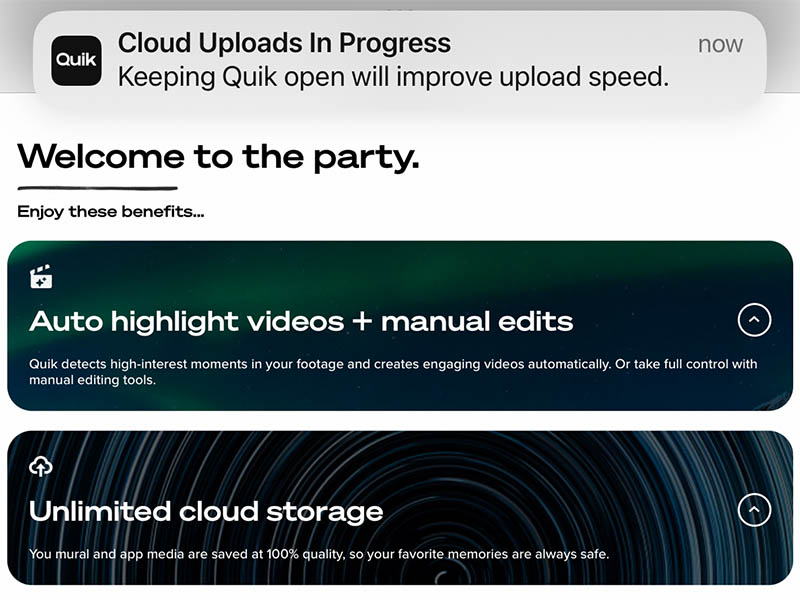
Tip #6 Leave GoPro App Open For Faster Upload
According to the GoPro Quik app, the upload to the GoPro cloud will be faster if you leave the GoPro Quick app open on your device.
Tip #7 Delete Footage From Your Device
GoPro footage can take up a lot of space, especially when you are recording in 4K. There comes a time when you need to delete footage from your phone or tablet to clear some space. First, check that your footage has been uploaded to the GoPro cloud, then you can safely delete it from your device. You can always download it again later.
Tip #8 Connecting Your GoPro
It’s important to know the steps to connect Quik GoPro App to your GoPro camera. Here are the steps for a GoPro Hero11 Black:
On the rear screen, swipe down to access the GoPro dashboard.
Swipe left to access the preferences menu.
Press the Preferences button.
Select the Wireless Connections option.
Select the Connect Device option.
Select the GoPro Quik App option.
Ensure that your GoPro is turned on and nearby, and you should be connected.
Tip #9 Download Files For Other Editing Software
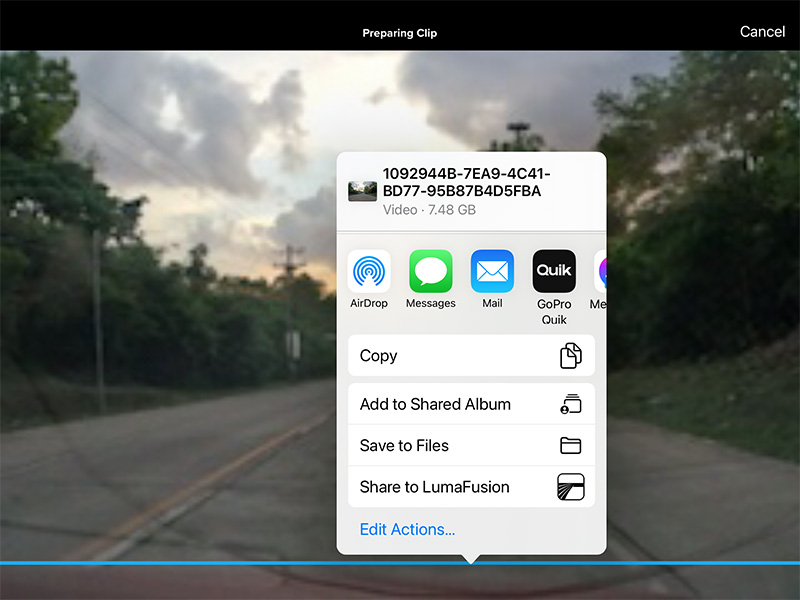
Extracting video files from the Quik App GoPro on your device is a little tricky. If you wish to edit on Final Cut Pro X, Premiere Elements, or some other software, you need to get those files out somehow. Here’s how you do it, but it is only possible for a single file.
Exporting Single Files on Mobile App
Select Media from the main menu at the bottom of the GoPro app.
Select the footage you wish to export (use the multiple-select button on the top right to select more than one).
Click the Share button a the top of the screen.
Select Share Media from the menu.
Click the Hamburger button (3 dots) from the bottom of the screen.
Select the location you wish to save to eg. Save to Files
You should now be able to export your files.
Exporting Multiple Files on Mobile App
For multiple files, on a mobile device, you will need to first save to Photos (apple devices), then share to the files app, dropbox app, or some other app. This is time-consuming but it is the fastest way on the mobile app.
Exporting Multiple Files on a Desktop or Laptop
An alternative is to log into the GoPro Site on your desktop or laptop. From there you can easily download directly from the cloud to your computer. GoPro Quik for Desktop may be a more convenient way for you to do big downloads ie. of many files.
Tip #10 Update Your Camera Firmware
Update your camera’s firmware by following these steps:
Ensure your GoPro Camera is connected to the GoPro Quik app.
Select GoPro from the main menu at the bottom.
Click the Hamburger (3 dots) on the top right of the screen.
Select Firmware on the menu to update your firmware to the latest version.
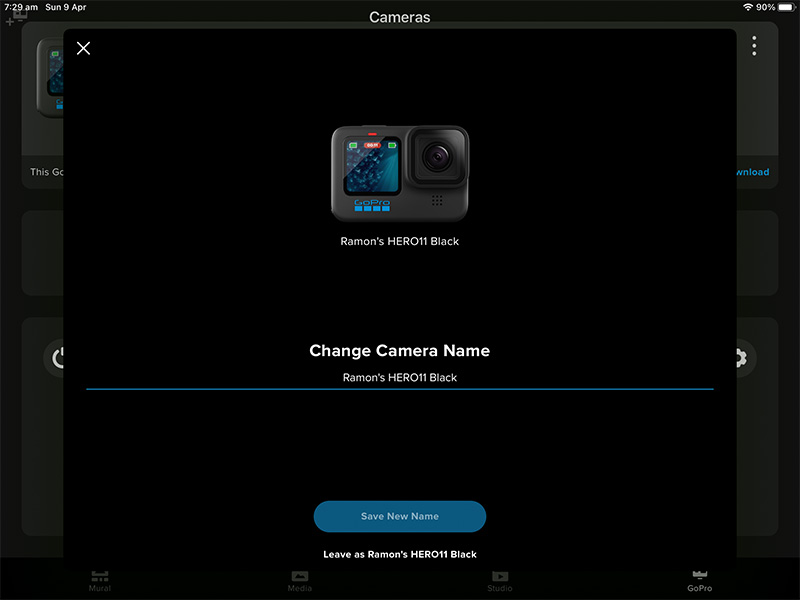
Tip #11 Update Your Camera Name
Ensure your GoPro Camera is connected to the Quik GoPro app.
Select GoPro from the main menu at the bottom.
Click the Hamburger (3 dots) on the top right of the screen.
Select Edit Camera Name from the menu.
You can now edit and save your new camera name.
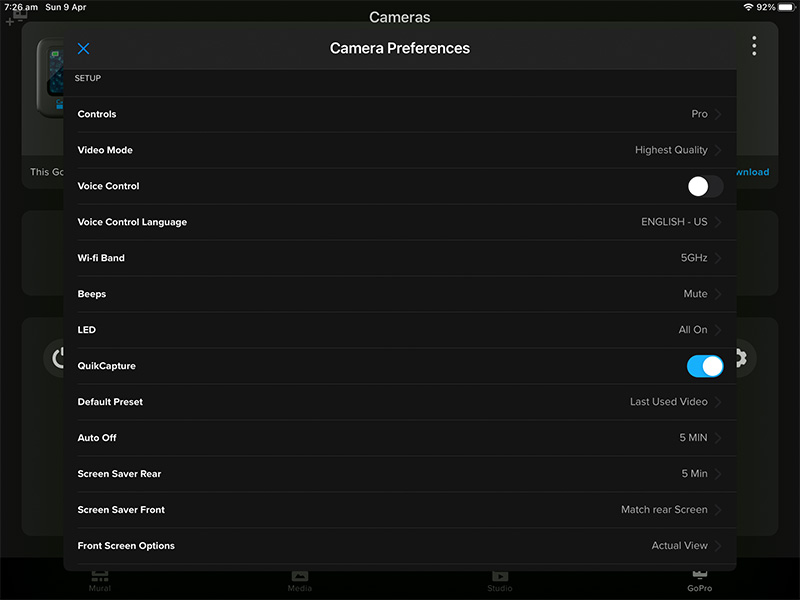
Tip #12 Change Your GoPro Camera Settings
Rather than navigate through the GoPro camera LCD screen, you can update most settings on the larger screen of your phone or tablet, by following these steps:
Ensure your GoPro Camera is connected to the GoPro Quick app.
Select GoPro from the main menu at the bottom.
Click the Gear Icon (settings).
You should now be able to edit all your settings.
GoPro uses the GoPro App subscription to sell more cameras. When I purchased my GoPro Hero 11 Black Creator Edition, GoPro was offering a 1-year free subscription when you purchased the camera.
Tip #13 Get A Great Deal
Another way to get a great deal is to purchase a GoPro Subscription first (ie. purchase 1 year’s usage of the Go Pro App), then you will get great discounts on all GoPro cameras and accessories. For instance at the time of writing, GoPro Hero11 Black cost $549.98 without a subscription or $349.98 with a subscription. The subscription costs $49.99 per year, so it is a no-brainer.
Make sure you check the current offers to get the best deal.
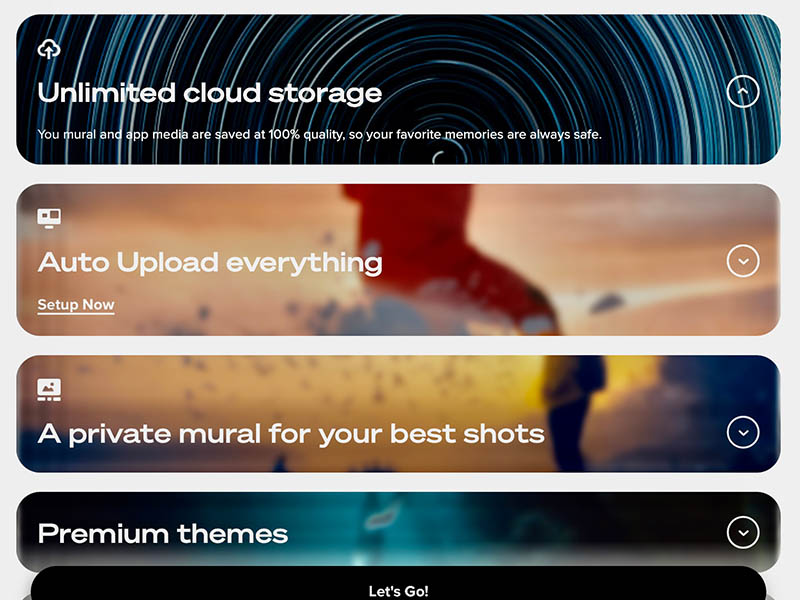
Getting The Best Value From Your GoPro App
You should know what benefits you are entitled to when you subscribe to the GoPro App. You can list your full list of benefits by doing the following:
Click Mural on the main menu at the bottom.
Click the Account Settings button (human shape on the top left of the Mural screen).
Select My Account from the menu.
Select View My Benefits from the menu.
Your full list of benefits should be displayed. Make Sure you use them for maximum value!
We hope you enjoy using your GoPro App as much as we do. There are many more tips and tricks, but we didn’t want to bore you. Now go out and have fun with your GoPro 🙂
Southeast Asia is one of the most amazing places on the planet for a Holiday. It’s relatively compact, safe, amazing, and very cheap. In fact, there is so much to see that it’s hard to know where to start planning your Southeast Asia Itinerary for 3 weeks. We’ll help you break it down into smaller chunks and get you on your way.
Why Choose Southeast Asia For Your Holiday?
This is an easy question for me because I’m an Aussie. For Australians, Southeast Asia is by far the cheapest and easiest place to go for a holiday. Airfares are cheap and plentiful. And good foreign exchange rates normally mean you will get bang for your buck.
As a matter of fact, Southeast Asia airfares are cheap and plentiful from both Europe and the USA as well. The main airport hub of this region is Suvarnabhumi International Airport in Bangkok, and you can normally find return flights there for around $500. This is a great starting point for any Southeast Asia itinerary.
There is so much diversity to see in Southeast Asia. It’s a literal melting pot of culture, religion, natural beauty and history. You can spend a lifetime traveling through this region and only scratch the surface.
If you want to see Japan that’s fine. Japan is an awesome holiday destination full of amazing history and scenery. In fact, Japan is my favorite holiday destination. However, a holiday to Japan is likely to cost you 2 to 3 times more than a holiday to Southeast Asia. And I guarantee you will have just as good a holiday down south!
How expensive is Southeast Asia?
Here’s how the countries rank by GDP, which is generally a good measure of how expensive a country is to visit. Overall Southeast Asia is a very cheap region to visit, except for Singapore. If you head to the bottom of the list (cheapest countries) you can easily afford to stay in 5-star hotels, for the same price you would stay in a budget 2-star hotel in Singapore.
So here’s the list of the cheapest countries to visit, with the most expensive country at the top, and the cheapest countries at the bottom.
Singapore
Brunei
Malaysia
Thailand
Philippines
Indonesia
East Timor
Vietnam
Laos
Myanmar
Cambodia
Super Tree Grove Singapore
Where to Start Your Holiday
Bangkok is the best place to start your Southeast Asia holiday because it is the main hub of air travel in the region. So as you would expect, the airfares are usually cheaper, with many more options available.
Thailand is a popular country in Southeast Asia for Australians to visit, second only after Bali, Indonesia. Thailand has a great mix of stunning beaches, island life, ancient culture, and modern city convenience. There is something for everyone here, and it’s very tempting to spend 2 weeks in Thailand alone.
If you’ve never been to Thailand, then it’s probably the best place for your first holiday. In fact, there’s so much to see here that there’s no need to leave Thailand at all. This country has a great mix of stunning beaches, island life, ancient culture, and modern city convenience. There is something for everyone here.
Recommended Southeast Asia Itinerary for 3 Weeks
I suggest you purchase a return airfare from your home to Bangkok. Then decide if you want to travel North, South, East, or West. And how many countries do you want to visit?
You should stay for 3 to 6 nights at each destination. Any less and you may regret missing some of the best attractions. Any more and you may feel that you missed out on seeing some other destinations. It all depends on your tolerance for FOMO. That’s fear of missing out.
Itinerary 1: North From Thailand
Laos is one of the cheapest countries you could ever visit, and also one of the most culturally intact. You can get a cheap flight to Luang Prabang or to Vientianne. I’m talking well under $100. In fact, these destinations are close enough to go overland, either by private hire car or by bus.
Bangkok, Thailand – 4 nights
Spend the first 4 nights in Bangkok, take a tour or 2. There are some great city tours to see the best temples, and also a wonderful tour of the ancient capital of Ayutthaya, just 90 minutes north of Bangkok.
Vientiane, Laos – 5 nights
You can fly, catch a bus, or take an overnight sleeper train to Vientiane. I recommend flying, it’s cheap, quick and very easy.
Vientiane is still an emerging tourist destination, with a very laid-back atmosphere. There is not a massive amount of things to see here, but enough to keep you busy for just a few days. Don’t miss Pha That Luang, a huge golden stupa built way back in 1566.
Luang Prabang, Laos – 6 nights
Time to go further into the Lao culture, and visit Luang Prabang in the north of the country. The entire town of Luang Prabang is a UNESCO World Heritage site, and an ancient royal capital until the 16th century.
Explore Thailand – 6 nights
Time to explore more of Thailand. Fly back to Bangkok, then take a connecting flight to another part of Thailand. A great Thailand itinerary is to visit the northern city of Chiang Mai or a southern resort island like Phuket or Ko Samui.
Alternatively, you could travel 150km south to the beachside city of Pattaya. Here you will find countless beachside resorts and the bar life that Thailand is famous (or infamous) for.
When you’re done simply travel back to Bangkok for your connecting flight home.
Itinerary 2: South from Thailand
One of our favorite trips is Bangkok to Kuala Lumpur, which has the cheapest flights you will ever find, about US $30. Kuala Lumpur is another very cheap city to visit, and similar to Bangkok you will find a modern city with all the modern conveniences.
Bangkok, Thailand – 4 nights
4 nights in Bangkok is a great way to break the ice in Southeast Asia. Check out some of the amazing shopping malls like Siam Paragon. Visit the local temples on a cheap day tour. Or take a day-trip north to the ancient capital of Ayutthaya.
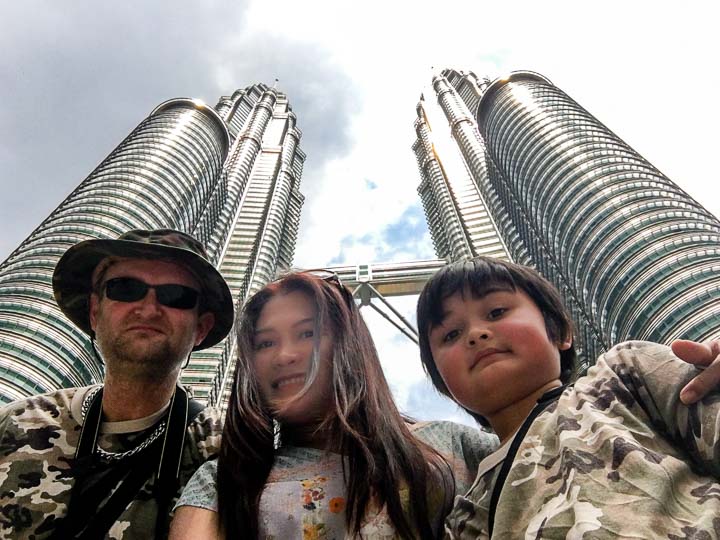
Kuala Lumpur, Malaysia – 6 nights
Home of the famous Petronis Towers, KL is a wonderful choice to spend a few nights. This city is bursting with shopping malls and has it’s fair share of modern theme parks as well. Or you could check out the nearby Batu Caves for an easy culture trip.
Getting to KL is easy from Bangkok, you can take a plane, bus or train. And getting to Singapore is even easier, with the same options available. I recommend catching a bus for a convenient and comfortable trip to Singapore.
Singapore – 6 nights
In stark contrast to Kuala Lumpur, Singapore is an expensive city to visit. In fact, this is the most expensive city in Southeast Asia. Here you need to book your accommodation well in advance to secure a good rate.
Sightseeing is amazing in Singapore. Be sure to check out the amazing Gardens by the Bay, the Supertree Grove, and Marina Sands. Singapore also has one of the best zoos in the world. Our tip is to catch the light and water show at night beneath the Marina Sands complex.
Explore Thailand – 5 nights
From Singapore it’s very easy to catch a cheap flight back the starting point, Bangkok. Once again, you should pay well under $100 for a ticket, probably closer to $50.
Time to catch some more of Thailand. Your Thailand itinerary should take you out of the capital to see some of the natural beauty of Thailand. You can’t go wrong with one of the magnificent islands in the Gulf of Thailand, like Ko Samui.
Kuala Lumpur Petronis Towers
Itinerary 3: East from Thailand
This is a tough one because Cambodia, Vietnam, and the Philippines are all to the east of Thailand. There is so much to see in the Philippines that we feel that is better off left to a separate trip. In fact, for a good Philippines itinerary, 3 weeks is required in that country alone.
For this trip, we’ll focus on a Thailand, Vietnam, and Cambodia itinerary. This is a great Southeast Asia backpacking route because it can be done on a shoestring budget. It’s quite easy to see Vietnam and Cambodia in 2 weeks, as long as you just focus on the South and center of Vietnam.
Bangkok, Thailand – 4 Nights
When you arrive in Bangkok, it’s time to acclimatize with Thailand. Check out the crazy modern shopping malls like Siam Paragon. Try some day tours through some of the city’s amazing temples. Take a day tour to the Bridge on the River Kwai, or the ancient city of Ayutthaya. It’s easy to fill in 4 days in Bangkok.
Angkor Wat, Cambodia – 2 Nights
Take a short flight of 7-hour bus trip from Bangkok to Angkor Wat in Cambodia. This is one of the finalists of the New 7 wonders of the World. Find your Indiana Jones at this incredible series of ancient temples.
There is literally nothing else to see or do at the nearby town of Siam Reap, so there’s no need to spend too long here.
Phnom Penh, Cambodia – 4 nights
Time to get a little crazy in the capital of Cambodia, Phnom Penh. You can catch another 7-hour bus trip from Angkor Wat, or simply fly. At Phnom Penh, you will find the true cultural essence of Southeast Asia.
Ho Chi Minh City, Vietnam – 5 nights
Next, you’re up for a 6-hour bus ride, or a short flight to the capital of Vietnam, Ho Chi Minh City. This is a little like Pnomh Penh but more developed. Stay in District 1 the tourist hub of the city, and take a couple of days tours to Cu Chi Tunnels or the Mekong Delta.
The View from the top of Saigon Skydeck
Explore Vietnam – 6 nights
Make a choice to go north or south. In the north take a flight to Da Nang, then explore Hoi Anh the most beautiful part of the central Vietnam Coast.
Alternatively, travel to Hanoi in the north of Vietnam, the second largest city in Vietnam. Here you will have access to the magnificent Halong Bay.
If you prefer to head south then take a short flight to Phu Quoc Island on the southern coast of Vietnam. Here you will find dozens of gorgeous beach resorts, fine white sandy beaches, and great snorkeling/SCUBA diving. It is easy to spend 2 weeks in Vietnam, there’s so much to see. When you’re done, fly back to Bangkok for your flight home.
Itinerary 4: West from Thailand.
There is only one country to the west of Thailand in Southeast Asia., Myanmar has been off the tourist map thanks to the harsh military regime in that country for many years. But recently it has been opening up more and more to tourism such that now it is back on the tourist map.
Bangkok, Thailand – 4 nights
Stay in Bangkok for your first 4 nights to get your first taste of Thailand. Explore the never-ending shopping malls, and try some authentic Thai cuisine. Take a day tour to the ancient city of Ayutthaya, or the Bridge on the River Kwai.
Yangon (Rangoon), Myanmar – 5 nights
It’s remarkably cheap to fly to Myanmar, and here you will find a world of remarkable temples and beauty. This is the capital of Myanmar and is probably as adventurous as you need to get. There are great bars and loads of gorgeous temples to get your Myanmar fix.
Chiang Mai, Thailand – 7 nights
Chiang Mai is such a beautiful and fascinating city that you can happily devote a bit more time here. There is a great market scene here, but the old city is one of the main attractions. Plenty of magnificent temples to admire, and also lots of day tour options up into the nearby mountains.
Explore Thailand – 5 nights
Time to do some exploring in Thailand. After flying from Chiang Mai to Bangkok, you might like your Thailand itinerary to take you 150km to the beachside resort city of Pattaya. Or you might like to fly further south to the magnificent islands of Phuket or Ko Samui.
Thailand is so full of natural beauty that it would be easy to spend two weeks in Thailand alone. When you are done exploring Thailand, simply fly back to Bangkok to meet your connecting flight home.
Exploring Ayutthaya Thailand
Itinerary #5 – The Philippines
I would say that my personal favorite is the Philippines. It’s more fun in the Philippines, or so the national advertising campaign says. You could quite easily skip Bangkok, and fly straight to Manila instead.
There are flights from Manila to virtually every major province in the Philippines, so getting around is easy. The weather is perfect all year round, and some of the best beaches are found in the Philippines. Here are my recommended destinations, but keep in mind you have over 7,000 islands to choose from!
Palawan – 9 nights
Palawan is bigger than you might think, and it can take a long time to travel around. Think of perfect beaches and immaculate snorkeling, aka tropical paradise.
Bohol 8 nights
Bohol has some amazing attractions like Panglao Island, Chocolate Hills, and the amazing Tarsiers. You will not want to leave this island paradise, where life is a beach.
Cebu 4 nights
Cebu is a 2-hour ferry ride from Bohol and has the 2nd biggest city in the Philippines – Cebu City. Cebu Island has some amazing beaches and is home to the Oslob ‘Dive with the Whale Sharks’ experience.
How to Plan Your Trip to Southeast Asia
I recommend planning a return flight from your home to Bangkok, and using this as a starting point and a finish point. From here you can travel all over South East Asia remarkably cheaply by using budget airlines.
Just decide if you’d like to travel North, South, East or West, and how many countries you would like to see. It is a very compact region, most flights are about 1 to 1.5 hours in duration. Wherever you end up in your final destination, just grab a flight back to Bangkok for your trip home. If you have more time, simply spend 2 weeks in Thailand. You won’t regret it!
Step 1: Book Your Holidays at Work
Well it’s kind of obvious right, but you should definitely lock in those holiday dates at work. Make sure you can actually take your holidays on the chosen dates.
Step 2: Work Out Your Budget
Your budget is going to dictate which country you will go to. A big budget may allow you to go the most expensive country Singapore. Shoe string budget and you may be better off staying in the cheapest countries Cambodia and Vietnam.
Step 3: Book Your Return Airfares
Time to take the plunge and book your return airfares to Bangkok. This is very easy to do – just jump onto Skyscanner.com, and the cheapest fares available will magically appear for you. Skyscanner compares lots of different travel agents and usually saves you up to hundreds of dollars.
Don’t worry too much about a tourist visa in Bangkok, most countries are permitted to obtain a visa on arrival at the airport. These are normally valid for 1 month. By all means, check the rules for your country, but this is another good reason to start your itinerary in Bangkok.
Try to book your airfares 3-6 months out, you will generally get the best airfares.
Step 4: Decide Which Countries To Visit
I recommend limiting yourself to 2 or 3. Here are my suggested groups.
North: Thailand and Laos should do it. Add Vietnam if you’d like to visit another.
East: Thailand and Cambodia will make a great trip. Add Vietnam if you want to see more. Save the Philippines for a separate trip,
West: Thailand and Myanmar should do it.
South: Travel to Kuala Lumpur in Malaysia. Include Singapore if you have the budget. You could even keep going south to see Jakarta or Bali in Indonesia.
Step 5: Check your Visa Requirements.
Although most countries in the region are simple to obtain visas, Vietnam and Laos are communist countries and have some rather strict rules for entry. They are generally easy, but you need to do your research and follow the rules.
Myanmar also has some fairly strict visa requirements, but as long as you follow the government website guidelines you should be able to obtain a visa before you go.
Step 6: Book Your Accommodation
We like to use Booking.com or Agoda.com, but it’s your own personal choice. You will get great deals on Airbnb however these will normally be away from the main tourist areas.
Step 7: Book Flights Between Cities
Actually, first decide if you’d like to fly or catch a bus. Either way, you can go online and purchase your tickets in advance. You probably only need to do this 1 – 2 month in advance to get a great deal,
Step 8: Get Insured and Go
Yes, you should definitely take out travel insurance before you go. We like World Nomads, however, there are so many options out there that it’s easy to pick up a good deal. Just don’t leave home without it.
Enjoy Southeast Asia
We absolutely love holidaying in Southeast Asia. It has more character than any other place we’ve been, and it’s so easy to have some fun. It’s also great to be able to afford to eat out every night.
Once you sample one of these itineraries, you will definitely want to go back and try another for your next holiday. And that’s the beauty of a well-thought SouthEast Asia travel itinerary, it’s so easy to go back again and again.
The Philippines is a premier holiday vacation these days. It is well known that it is More Fun In The Philippines. Now let us tell you the truth about a Philippines Vacation.
Why Choose the Philippines For Your Vacation?
Here are some of the more obvious reasons why the Philippines is a great choice for your vacation.
It’s More Fun in the Philippines
There is an ongoing national advertising campaign claiming that it is More Fun In The Philippines. But it is really true. There is something about the laid-back atmosphere, the wonderful weather, and the pleasant funloving demeanor of the local people. Put it all together and you have a recipe for fun.
Awesome Tropical Weather
There is really only 1 cold place in the Philippines, and that is in the Baguio region, a city with a 1,470m elevation. Apart from that, the entire country is warm to hot all year round. There is no such thing as cold season, it is hot and wet, or hot and dry. Perfect Beach Weather all year round.
Sample The Real Philippines
It’s not hard to find the real Philippines. You know, where the locals live. Go to any major resort, and just up the road you will find real Filipinos living in a real neighborhood. It’s very rewarding to get out and meet real people, away from the hotels and travel guides.
Beach Life
Not only is it perfect beach weather all year round, but there are some of the best beaches on the planet in the Philippines. And it is easy to find accommodation practically right on those perfect beaches. You really can have the perfect beach vacation in the Philippines.
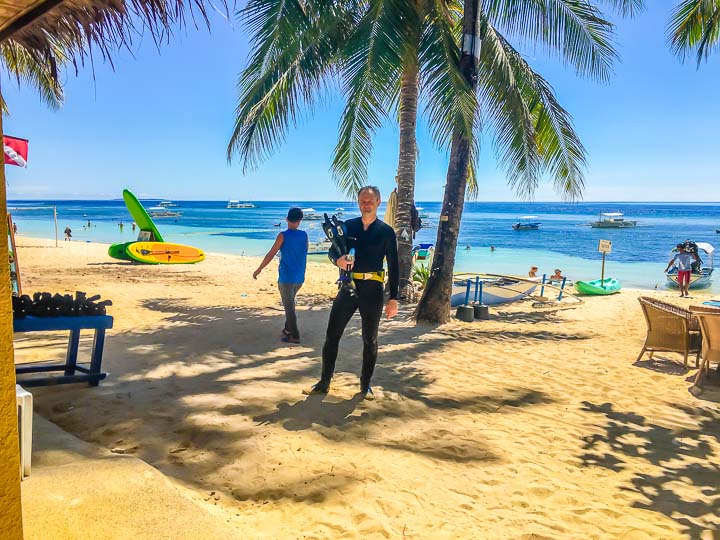
Scuba Diving and Snorkelling
It’s really easy to go diving and snorkeling in the Philippines when most islands are surrounded by magnificent coral reefs. And you can even walk to many of them straight from the beach. Otherwise, most are just a short 20-minute boat ride away.
Preparing for a shore dive at House Reef
Find Your True Love
In a world where good morals and values seem to have vanished, it’s refreshing to know that Filipinos are (generally) still very religious with high moral values. It is no wonder that many Westerners come to the Philippines to find their true love; a life partner who is genuine and true. Not to mention handsome and beautiful 🙂
Try The Local Cuisine
Filipino Cuisine is not well known in the Western World, but it does exist and it is quite amazing. And you don’t have to break the bank, because real Filipino food can be found everywhere for a good price.
It’s Easy To Get Around
Practically every major province has domestic flights from Manila. So to get from one province to another, simply fly into Manila and grab a connecting flight.
The whole country has a massive network of ocean ferries operating as well. These are safe and cheap, and a great way to go island hopping on a budget.
Tricycles in Bohol
More Bang For Your Buck
The Philippines is still a developing country, and you will get more bang for your buck than if you were to travel to a more developed country, like Japan or Singapore. Accommodation is cheaper, food is way cheaper. You can go further and stay longer for a lower budget.
What to Bring On Your Philippines Vacation
As a seasoned traveler to the Philippines, let me share some advice on things that you probably should bring with you.
Travel Documents
As of 2023, all foreign tourists are to fill out an e-travel document online before they enter the Philippines. You need to make sure you are up to the latest requirements to ensure your entry is smooth.
Preparing for a shore dive at House Reef
Visa
I have an Australian passport, and I can enter the Philippines without bothering about visas. They issue a visa on arrival which is valid for 1 month. I believe most if not all countries are the same, however, you should first check the DFA Website to be certain.
Travel Insurance
Personally, I never leave home without it. Philippines hospitals may seem inexpensive at the outset, but serious operations can quickly become super expensive. Filipino medical specialists seem to be unregulated and can charge whatever they want. And it is no secret that they tend to charge foreigners a much higher rate than locals.
Electronics
It is hard to find good Electronic Equipment in the Philippines. It’s true that you can find quality gear in the big malls of Manila, but out in the provinces, it is not so easy. For me, that means branded camera gear, batteries, and microphones.
Money
These days all you need to bring is an ATM card (better to have 2), and money is easy to access. If you know a local with a Philippines Bank Account is much better because you can then utilize a funds transfer company to get much better exchange rates and lower fees. Personally, I use World Remit, they are fast, cheap, and reliable.
Clothing
Do not bring warm clothing! You won’t need it and it will just weigh our luggage down unnecessarily.
Branded dress clothing is not as cheap as you might think, you might find them even more expensive than back home. Casual beach clothing on the other hand is cheap and readily available, no problem buying that style of clothing in the Philippines.
Snorkel and Mask
Whilst it’s easy to hire a snorkel and mask at any island resort, I always feel weird putting a hired snorkel in my mouth. And the face mask never seems to quite fit. I always prefer to bring my own.
Have Fun In The Philippines
A Philippines Vacation is perfect for somebody who just wants to have fun. You will find plenty of like-minded vacationers. Just be patient because there is a phenomenon known as “Philippines Time”, which works differently from normal time. This means that while you are having fun, you need to unwind and relax, and you will be rewarded with newfound patience.
The GoPro Volta is a super handy battery hand grip, remote control, and tripod all in one, and it is designed to work seamlessly with your GoPro Hero 9, Hero 10, and Hero 11 cameras. Let us show you how to pair your GoPro Volta permanently.
Note: This post may contain affiliate links. Please read our disclosure policy for more information.
Why Should You Pair Your Volta
When your Volta is not paired, it makes a great battery charger, hand grip, and tripod. You get what is known as Wired Control.
Wired Control Functions
Press the Battery Status button to wake Volta.
Press Volta’s Mode button to turn your GoPro ON.
Press Volta’s Mode button to select the mode that you want.
Press Volta’s Shutter button to start capturing.
To stop capturing video or time lapse, press Volta’s Shutter button again.
Press and hold Volta’s Mode button to turn your GoPro OFF.
Wireless Control Functions
When you wirelessly pair your Volta with your GoPro camera, you can detach your camera from the Volta and use it as a remote control. This allows you to use the Volta controls like the mode button and the shutter button. But you will need to first pair your GoPro Volta.
Pairing your GoPro Volta
Luckily, pairing is quite an easy thing to do when you follow these steps:
From the rear screen of the GoPro Camera, swipe down to access the GoPro Dashboard.
Swipe Left to see the Preferences Menu
Click the Preferences Button
Click Wireless Connections on the Menu
Click Connect Device
Click Volta
Hold the Bluetooth button for 4 seconds
Your GoPro Hero11 Black and Volta should now be paired.
Is the GoPro Volta Pairing Permanent?
The GoPro can only pair to one device at a time. That means if you connect to another device, like the GoPro Quik App, you will lose the pairing to the Volta.
If you do not connect your GoPro to any other device wirelessly, the pairing should be permanent.
The GoPro is such a versatile little camera. So when asked How to Turn Off GoPro Cameras – 7 ways are currently available.
Note: This post may contain affiliate links. Please read our disclosure policy for more information.
1. Powering Off Your GoPro The Normal Way
Press and hold the Mode Button on the side of the GoPro Camera for 3 seconds, and your GoPro should power off.
The red light on the rear screen will flash 5 times, and both the front and rear displays will turn off to show you the GoPro is powered off.
2. Turn Off Using Quick Capture
An even faster way to turn off your GoPro is using the Quick Capture mode. All you need to do is press the shutter button. Your GoPro will turn off AND stop recording. You should see a message on the screen stating “Powering Off”, then both the front and rear displays will turn off to show you the GoPro is turned off.
Note: to do this you must have turned on the GoPro using Quick Capture (using the shutter button).
Quick Capture is on by default, but there is a way you can deactivate this option permanently. Simply swipe down on the rear screen to access the GoPro dashboard, then press the rabbit symbol. This will deactivate Quick Capture Mode.
3. Power Off Your GoPro With Volta Mode Button
If you are lucky enough to have a Volta attached, you can turn off your GoPro by giving the Volta Mode Button a long press (3 seconds) to turn off your GoPro.
4. Turn Off Your GoPro With the Volta Shutter Button
Give the Mode Button on the Volta a long press to turn off your GoPro.Press the Shutter Button on the Volta to turn off AND stop recording (if it was turned on via Quick Capture mode).
5. Auto Power Off Feature
The GoPro will automatically turn itself off after idling for the length of time set in Preferences. This is a great battery-saving feature. To change the idle time duration for the Auto Power Off feature:
Swipe down on the rear screen to access the Dashboard.
Swipe left and tap Preferences > General > Auto Power Off.
Select how long your GoPro must be in idle mode before it turns off – 1 Min, 5 Min, 15 Min, 30 Min or Never.
6. Turn Off With GoPro Quik App
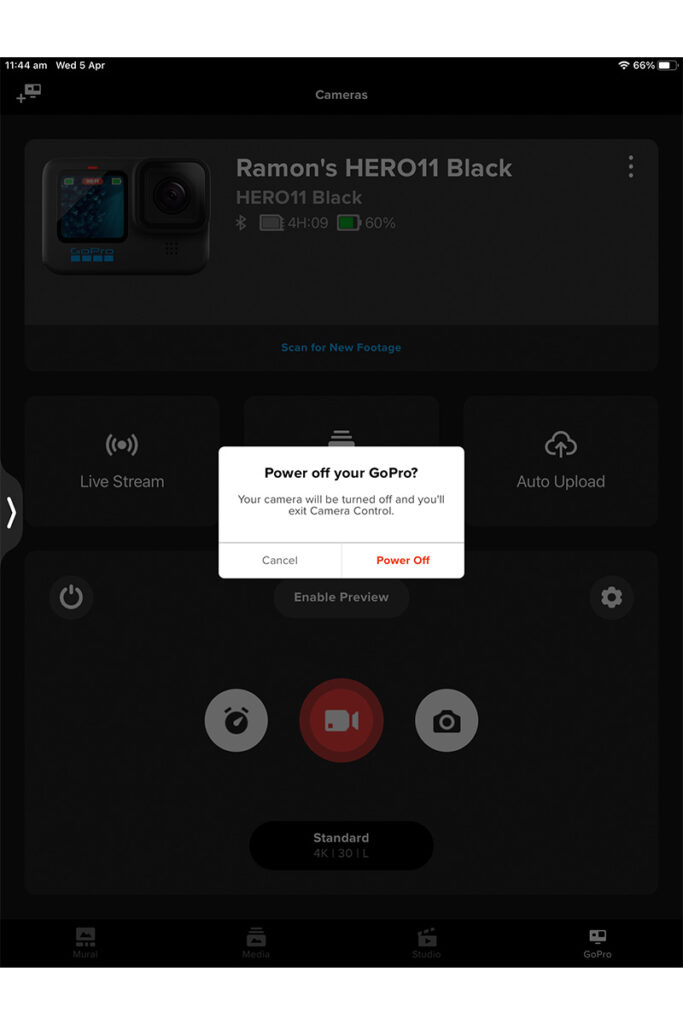
When your GoPro is connected to the GoPro Quick App, you can easily turn the power off using the App:
Click on the Camera Tab.
Click the Power Button on the bottom left of the screen.
You will get a prompt “Power off your GoPro”
Select the Power Off option.
7. Power Off Your GoPro With Your Voice
Did you know that GoPro allows you to turn off the camera just by using your voice? Just say “GoPro, Turn Off”, and your GoPro should turn itself off.
So Many Ways to Turn Off Your GoPro
So as you can see, there are many ways to stop a GoPro Hero11 Black, and most of these are relevant to different models as well. Maybe in time and software upgrades, you will be able to discover even more ways to turn off your GoPro.
The GoPro is such a simple camera to use, but there are several ways to perform many functions. And there is more than one way to turn on your GoPro. Let us show you 7 ways to turn on your GoPro Hero 11 Black camera.
Note: This post may contain affiliate links. Please read our disclosure policy for more information.
1. Powering On Your GoPro The Normal Way
Press the Mode Button on the side of the GoPro Camera.
The red light on the rear screen will flash 3 times, and both the front and rear displays will light up to show you the GoPro is turned on.
Powering Off Your GoPro The Normal Way
Press and hold the Mode Button on the side of the GoPro Camera for 3 seconds, and your GoPro should turn off.
The red light on the rear screen will flash 5 times, and both the front and rear displays will turn off to show you the GoPro is turned off.
2. Turn On Using Quick Capture
An even faster way to turn on your GoPro is using the Quick Capture mode. All you need to do is press the shutter button. Your GoPro will turn on AND start recording.
Press the shutter button again to stop recording AND turn your GoPro off. You should see a message on the screen stating “Powering Off”, then both the front and rear displays will turn off to show you the GoPro is turned off.
Quick Capture is on by default, but there is a way you can deactivate this option permanently. Simply swipe down on the rear screen to access the GoPro dashboard, then press the rabbit symbol. This will deactivate Quick Capture Mode.
Turn On Your GoPro With Your Volta
If you are lucky enough to have a Volta attached, you can turn on your GoPro using 3 more options. Make sure your GoPro is paired with your Volta first. Check out our article GoPro Volta 15 Tips and Tricks to learn how to do this.
Here are the Three Ways to turn on your GoPro with your Volta:
3. Give the Mode Button on the Volta a quick press to turn on your GoPro.
4. Press the Bluetooth Button on the Volta to wake up your device.
5. Press the Shutter Button on the Volta to turn on AND start recording (Quick Capture Mode).
Here are the Two Ways to turn off your GoPro with your Volta:
Give the Mode Button on the Volta a long press to turn off your GoPro.
Press the Shutter Button on the Volta to turn off AND stop recording (if it was turned on via Quick Capture mode).
6. Turn On Using the Scheduled Capture Mode
The GoPro Hero 9 Black was the first model to include the Scheduled Capture mode. Scheduled capture lets you set your GoPro to automatically turn itself on and capture a shot up to 24 hours in advance.
How To Set Up Scheduled Capture
Press and hold the capture settings on the capture screen to go to the settings menu.
Tap Scheduled Capture.
Choose when you want the GoPro to record your shot.
After setting the time, you can turn your GoPro off or continue using your camera’s other presets.
7. Turn On With GoPro Quik App
When your GoPro is connected to the GoPro Quick App, and your GoPro is idle for some time and shuts off automatically, you will see a pop-up on the GoPro Quik App “Tap to Power On”. Press the button and your GoPro will power on,
Turn Off Your GoPro With Your Voice
Did you know that GoPro allows you to turn off the camera just by using your voice? Just say “GoPro, Turn Off”, and your GoPro should turn itself off.
What To Do When Your GoPro Won’t Turn On
Charge Your Battery
The first thing to check is the remaining battery life. If the battery is flat, the GoPro will not turn on. Try giving your GoPro Battery a charge, then try turning the GoPro on again.
Replace Your Battery
If you have multiple batteries, try changing to another battery. This may be enough to get your GoPro to turn on.
Remove Your Battery
Sometimes the GoPro simply freezes up for some unknown reason. In this case, you should remove the battery, wait for 10 seconds, then reinsert the battery. This may be enough to entice your GoPro to turn on.
Reset Your GoPro
This is kind of the last resort, but if nothing else works then try resetting your GoPro by pressing the Mode Button for 10 seconds. This may or may not solve the problem.
Many Ways To Start A GoPro
So as you can see, there are many ways to start a GoPro Hero11 Black, and most of these are relevant to different models as well. Maybe in time and software upgrades, you will be able to discover even more ways to turn on your GoPro.
The GoPro Media Mod aims to turn your humble GoPro Camera into a production powerhouse! We have some simple tips and tricks to help you master your GoPro Media Mod.
Note: This post may contain affiliate links. Please read our disclosure policy for more information.
Tip #1 – Glue On The Windscreen
The Media Mod Removable Windscreen helps to reduce wind noise in gusts up to 20 mph. It has a very clever snap-on-pop-off design, but I have some sad news for you. You are probably going to lose your windscreen if you don’t glue it on. It pops off just a little too easily, especially when you put your camera into bags or boxes.
And purchasing a replacement GoPro Windscreen is no easy feat, they are definitely not available in the GoPro Store. In fact, I have yet to find an after-market Media Mod Windscreen to replace mine.
How your glue your Windscreen to your GoPro Media Mod is up to you, but if it was me I would use 2-3 strategically placed drops of super glue, putting them first onto the media mod, then clipping on the windscreen.
Tip #2 – Glue On The Light Mod Diffuser
The Light Mod is strictly not a part of the Media Mod, however, chances are that if you are using the Media Mod, you are also using the Light Mod. Especially since the GoPro Hero 11 Black Creator Edition comes with both the Media Mod and the Light Mod supplied.
Here’s the thing. The diffuser is a soft cover that sits over the top of the LED Light. And the diffuser comes off very easily, meaning you will most likely lose it. I glued my Light Mod Diffuser on with 2 drops of Super Glue in opposite corners, now it won’t get lost.
Tip #3 – Do Not Get The Media Mod Wet
News Flash! The Media Mod is not waterproof! If you immerse your media mod underwater, you are likely to destroy both the Media Mod and the GoPro Camera.
Tip #4 – Choose the Front or Rear Microphone in GoPro Settings
Here is the menu sequence to follow:
Tap the Video settings.
Tap edit (pencil icon) next to the preset you want to adjust.
Scroll down and tap the [Mics] setting.
Scroll through the options on the right and choose the one you want.
Front (default) selects the media mod front microphone.
Back selects the media mod back microphone.
Stereo selects the GoPro internal microphones. Only use if the wind is not a factor.
Tip #5 – Swap From Front to Rear Microphone Using Shortcuts
One of the good things about the Media Mod is that you can easily swap from the front to the rear microphone, right from the GoPro Rear Menu. Check out our full article on the Best GoPro Settings For Hero 11 Black, for a full description of how to do this.
Here’s how you do it. Simply press and hold an existing shortcut and then choose Microphones from the list on the right.
Tip #6 – Record Pro Audio At a Distance
The Audio Quality of the Media Mod Microphones is… well… not bad. But it’s not great either. If you want great-quality audio then you should attach a pro-quality external microphone to the cold shoe mount. You have 2 cold shoe mounts to choose from – on the top or on the side.
Which Microphone to Use?
When it comes to selecting a shotgun microphone, we absolutely love the Rode Brand, which are made in Australia so you know they’re great 🙂 Here are our 2 recommended Rode microphones, which will provide pro-quality audio at an affordable price.
Rode VideoMicro is a high-quality on-camera microphone that’s ideal for vlogging and filmmaking with your GoPro Camera.
Rode VideoMicro II is a professional-quality microphone that will instantly elevate the audio of your GoPro Camera.
Which GoPro Setting to Use for External Mic?
Make sure you select the best GoPro setting for your external microphone. If you are having trouble deciding which one, check the documentation which came with your external microphone. Here are your options:
Standard Mic (Default): standard non-powered mics.
Standard Mic+: Increases standard non-powered mic sensitivity by 20dB if the audio is not loud enough.
Powered Mic: for self-powered mics.
Powered Mic+: Increases standard powered mic sensitivity by 20dB if the audio is not loud enough.
Line In: Use with audio equipment other than a mic (mixer, guitar preamp, karaoke machine, etc.).
Tip #7 – Clip a Wireless Microphone To Your Media Mod
We love the Rode Wireless Go II. It is a high-tech wireless microphone that is essentially a lapel-style microphone. This will instantly give you pro-quality audio every time.,
Part A of the Rode Wireless Go II clips to your shirt or collar, and is a lapel microphone-style Sound Source. Part B of the Rode Wireless Go II is the receiver, which conveniently attaches to the cold shoe mount of your GoPro Media Mod. You simply plug the 3.5mm jack into the Media Mod 3.5mm external mic port. It couldn’t be simpler!
Tip #8 – Never Change The Battery
Changing GoPro batteries can become a bit of a chore when using your media mod. But not if you attach it to a GoPro Volta battery hand grip. The Volta pretty much triples the battery life of your GoPro, so you will rarely if ever have to change GoPro Batteries.
Tip #9 – Use Micro HDMI Out
The Micro HDMI Out port on the GoPro Media Mod allows you to play your footage directly onto any large screen that has an HDMI cable. All you need is a micro HDMI to HDMI cable, and you have convenient large-screen playback at your fingertips.
When you are a vlogger, it is super handy to have an extra display to see the recording as you go. Bring on the Display Mod. This handy 2-inch flip screen makes vlogging easy and attaches to the media mod via the cold shoe mount and the mini HDMI port. You need the media mod to attach the Display Mod.
Tip #11 – Firmware Updates
Lastly, make sure your GoPro is running the latest firmware to take full advantage of your media mod. Media Mod adds new microphones, audio input, and HDMI settings to your GoPro, but make sure your camera is using the latest software to access these settings.
2 Ways to update your firmware:
Update Your Software automatically with the GoPro Quik App, available on either the Apple or Google Play app stores.
Update Your Software manually by visiting gopro.com/update. Choose your camera from the list of cameras. Select [Update your camera manually] and follow the instructions.
Tip #12 – Transferring Your Data
The USB-C port on the Media mod is only for charging. You cannot use it for transferring data. For that, you will need to remove your micro SD card or connect wirelessly to the cloud or the Quik app.
Tip #13 – Mix and Match Your Mods
The GoPro Media Mod comes with 2 cold shoe mounts, so why not use them both? Here are some of the combinations you could try:
GoPro Media Mod Directional Microphone + Light Mod + Display Mod
GoPro Internal Stereo Microphone + Light Mod + Display Mod
Rode Shotgun Microphone + Display Mod
Rode Shotgun Microphone + Light Mod
Rode Wireless Microphone + Display Mod
Rode Wireless Microphone + Light Mod
I’ll even bet that a hardcore vlogger could attach the Light Mod and Display Mod using the 2 cold shoe mounts, then find a creative way to attach the Rode Wireless Microphone receiver.
Media Mod = Production Powerhouse
If you aspire to be a Vlogging Machine, the GoPro Media Mod is your Production Power House! One last tip is that you can get a great discount on a new GoPro if you purchase it using the Creator Edition, which comes complete with Media Mod, Light Mod, and Volta. Amongst other things. Vlog On!
The GoPro Volta is a premium battery grip and tripod designed for GoPro Hero 10, GoPro Hero 11, and even some older GoPros. But the GoPro Volta has a few surprises once you get to know it. Let us show you 15 GoPro Volta Tips and Tricks that we learned the hard way.
Note: This post may contain affiliate links. Please read our disclosure policy for more information.
Volta Tip #1 – Rotate The Head
Right out of the box, it is completely obvious how to swivel the head of a Volta. But you can grip the Volta body firmly in one hand, and rotate the GoPro 360 degrees (depending on how far the cable will allow you to rotate the GoPro). You do have to give it a little bit of force, but rest assured your GoPro will rotate with the right force applied.
Volta Tip #2 Push Button Mounting Fingers
There are two mounting fingers attached to the side of your Volta, but how do you get those darn things to top out? Easy, there is a push button right above the fingers. Push the button and the fingers will pop right out. You will need to push the button again to lock the fingers back in place.
Volta Tip #3 – Powering the GoPro Using The Volta
It took me ages to figure out how to turn on the GoPro from the Volta.
Method 1 – Just give the mode button on the Volta a short press and your GoPro should power up ready for action. Then just click the record button on the Volta to start recording.
Note: if your Volta is off, first wake up the Volta using the Bluetooth button.
Volta Tip #4 – Turning Off the GoPro Using the Volta
A short press of the Volta mode button will not turn off the GoPro. Instead, you need to give the Volta Mode Button a Long Press to turn off the GoPro, say around 3 seconds.
Volta Tip #5 – What Mode Am I In
Sometimes it’s a little difficult to see what mode you are in. Fear not, just glance at the 3 little LED lights at the top of your Volta. Left LED means Time Warp mode, Middle LED means Video Mode, and Right LED means Photo mode. Curiously, if you click the Bluetooth button, the light goes away permanently so you cannot see which mode you are in.
Volta Tip #6 – Pairing Your Volta and GoPro
Before I figured out how to power the GoPro using the Volta (Tip #3), I was having to pair the Volta and GoPro literally every time I wanted to use the Volta. It was SO ANNOYING. Actually, if you don’t turn on the GoPro via the Volta Mode button, you will probably have to repair the Volta. So use the Mode Button!
But if you do need to pair your Volta, On the GoPro Hero11 Black Rear Screen:
Swipe Down to see the Main Dashboard
Swipe Left to see the Preferences Menu
Click the Preferences Button
Click Wireless Connections on the Menu
Click Connect Device
Click Volta
Hold the Bluetooth button for 4 seconds
Your GoPro Hero11 Black and Volta should now be paired.
Phew, no wonder pairing the Volta annoyed me so much! Oh by the way, if you connect your GoPro to your Quik app on some other device, you’ll need to re-pair your GoPro and Volta. Yeah I know right!
Volta Tip #7 – Check the Battery Life
If you want to check how much battery life is in your Volta, press the battery button and the LED lights will illuminate. 5 lights and you have a full charge!
Volta Tip #8 – Remote Control
Did you know that your Volta can turn on your GoPro wirelessly from up to 30m away? So you can have your GoPro mounted on some super cool spot, and turn it on using the Volta, so long as it is paired. Hopefully, you can see the GoPro recognize if it actually turned on, to be sure.
Volta Tip #9 – No More Dangling Cables
If you do decide to detach your Volta from your GoPro, the dangling USB-C cable on the Volta can become a little annoying. An easy fix is to just plug it into the Volta USB-C charging port, to keep it nice an compact. No more dangling cables.
Volta Tip #10 – Charge Other Devices With Volta
I just finished charging my Wireless Earbuds using my Volta, because they have a USB-C socket. You can charge any USB-C device using the Volta.
Volta Tip #11 – Don’t Get Your Volta Wet
You need to know that the GoPro Volta is not waterproof! Dip it in water and you are likely to be needing to buy a new Volta because I’m pretty sure that GoPro will not replace a drowned Volta on warranty! Well, at least they are weather resistant.
Volta Tip #12 – Hard Reset
As with many GoPro products, there may come a time when it just freezes up and needs a hard reset. If you do need to do a hard reset on the Volta, simply press the mode and shutter buttons together for 8 seconds. You should not be required to repair the GoPro and Volta after a hard reset.
Volta Tip #13 – Time Lapse Video
If you want to take a super long time-lapse video, you need a super steady camera and an exceptional battery life. And the Volta excels in both of those things. That makes the Volta the perfect companion for extra-long time-lapse shots.
Volta Tip #14 – Mount To A Full-Size Tripod
Using the 1/4″ mount, it is possible to mount your Volta to Full Size Tripod as long as you purchase the correct mounting adaptor/shoe. You can pick these up for cheap from any good camera store.
Volta Tip #15 – How Many Battery Charges?
If you are wondering how many times a Volta will charge your GoPro Battery, a fully charged Volta battery will triple the battery life of a regular GoPro Hero11 Black Battery. Awesome!
The Awesome GoPro Volta
Hopefully, your Awesome GoPro Volta Battery Grip / Tripod / Remote just got even more awesome, with some Pro Tips! We are sure you can come up with even more awesome tips for your GoPro Volta, and we’d love to hear about them.
PS, check out our article on using your GoPro for Travel Videos. And maybe you can check out the GoPro Website to see how awesome this product really is!
Australia is well known for having plenty of amazing, FREE playgrounds. They are typically kept very clean and tidy and usually have ample free car-parking nearby. Most playgrounds are easily accessible by public transport, and many have good picnic facilities available including free barbecues and picnic tables.
Playground Tour of Geelong and Bellarine Peninsular
The below reviews of the best playgrounds in the beautiful Geelong and Bellarine Peninsular are meant for kids in the 3-8-year-old bracket, the ‘wonder years’ for children’s playgrounds.
Note: This post may contain affiliate links. Please read our disclosure policy for more information.
Geelong Waterfront Playground,
What Makes the Best Playground?
Playgrounds are not only great for kids, but they are also great places for parents to unwind and socialise. The things we normally look for in a good playground are:
Interesting playground equipment to stimulate the child’s curiosity.
Good condition playground equipment – not too old, not covered in graffiti, kept nice and clean.
Ample car parking nearby.
Picnic tables for the parents (and kids) to socialise.
Plenty of other kids playing – it makes for a better experience for the kids if there are other kids to play with.
Heaps of space to run around.
Clean toilet blocks nearby.
Here is our list of the best Geelong playgrounds, ranked from best at the top.
1. Eastern Beach Playground
Eastern Beach is located on the city’s waterfront and is one of the prime tourist locations in Geelong. On a nice day, this area is full of tourists strolling along the waterfront and enjoying the beautiful scenery.
There are ample walking paths, a large shark-proof sea bath, a large free swimming pool and heaps of barbecues and picnic tables. About the only drawback to this area is that you need to pay for parking if you want to park near the beach.
Eastern Beach Playground
Although Eastern Beach is a fairly small playground, it is jam-packed with modern play equipment. Some of the equipment is top of the line and you won’t find them anywhere else. Here it is all about climbing and mixing with other kids because this place is never empty.
Because Eastern Beach is one of the premier tourist attractions in Geelong, this playground is always kept spotless and in great condition by the authorities.
There are ample grassed areas to run around, and even some nice white sandy beaches nearby. It’s a great place for parents and kids alike, not to be missed, and definitely one of the best of all Geelong Playgrounds.
Location: Eastern Beach Playground, Eastern Beach, Eastern Beach Rd, Geelong VIC 3220, Australia
2. Rippleside Park Playground
This expansive playground was built by the community in 2001. It is constructed out of treated pine and is very rugged construction. Although it is getting a little old, it is still a fantastic place to take kids.
The large size of this playground is the best feature, there are lots of raised walkways, castles, towers and slides to explore. It’s a perfect place for kids to play tag, hide and seek etc. There are lots of swings and slides scattered through the play area.
Parking is plentiful, and the playground backs onto a large grassy parkland area. There are quite a few picnic areas and barbecues available and the beach is only a couple of hundred metres away. Here you can stroll along the beautiful bicycle paths and take in the splendour of the Geelong Waterfront.
Location: Rippleside Park Drive, Geelong, City of Greater Geelong, Victoria 3221 Australia
3. Barwon Valley Fun Park
This is a hidden gem, and it’s where the locals go. You never see many tourists at this playground, mainly because it’s out in the suburbs. The Barwon River is a wide river that weaves its way through the suburbs of Geelong, and the Barwon Valley playground is found on the banks of the Barwon River.
Here you will find a large spread-out playground loaded with lots of playground equipment for the more adventurous kids. It has a flying fox, a high-speed merry-go-round, and lots of other great equipment. On a hill, this is a great place for kids to do a lot of running and use up all their energy.
Barwon Valley Playground
There are some lovely picturesque picnic settings here, and a terrific bicycle path along the Barwon River just a few metres away. You will often see rowboats practising up and down the river in this section.
Location: Barwon Valley Fun Park, 132 Barrabool Rd, Belmont VIC 3216, Australia
4. Torquay Play Park
This is an expansive sandy playground right near the Torquay main beach. It’s roughly a 20-minute drive from Geelong.
Torquay front beach
This wonderful Geelong playground is often loaded with dozens of excited kids. The sandy base has loads of elevated walkways and suspended bridges, some huge slides and lots of stuff to climb on. This is a great playground for little climbers. There are even some great trees to climb on the edge of the park!
This is another good place for a picnic. One of the local traditions is to eat fish and chips by the beach, and there are a few great fish and chip shop nearby in Torquay.
You can either have a picnic right here at the playground or move on up to the main beach reserve where there are heaps of free barbecues and picnic areas.
One of the best and safest swimming beaches in the area is very close also, during summer it always has lifeguards and a flagged swimming area for safety sake.
Location: Torquay Play Park, Elephant Walk Reserve, Torquay VIC 3228, Australia
5. Botanic Gardens Play Space
Right next to the Botanic Gardens is the Geelong Play Space. This is an expensive playground that caters for kids with physical disabilities. It is jam-packed with many interesting play themes which you will not find anywhere else.
It’s especially good for kids who have a high level of curiosity and like to tinker with things and learn. Things like a musical bridge, sound machine, bamboo maze, hand pump, and loads of other curiosities.
The drawback to this playground is that you don’t see crowds of other kids playing here, so your children will probably have to play by themselves. It’s a wonderful quiet place for parents to hang out and enjoy the lovely treed surroundings.
Location: Eastern Park, Geelong – adjacent to the beautiful Geelong Botanic Gardens
6. Point Lonsdale Playground
This is a little way out of Geelong, about a half-hour drive. The location is right next to “the rip”, which is the famous entrance to Port Philip Bay where both Geelong and Melbourne are located on. The playground is situated on top of a cliff and has wonderful views of the bay, the other side of Port Phillip Bay, and the shipping channel which runs through “the rip”.
Whilst the kids are playing you can relax by watching the large ships navigating through “the rip”. It’s also very relaxing just blending in with the coastal environment. This is one of the most beautiful playgrounds the Geelong area has to offer.
Point Lonsdale Playground
This is a very pretty playground in a magnificent setting. Whilst fairly compact, there is enough climbing, swing and sliding equipment to keep most kids satisfied. It is situated right next to a busy road so you do need to keep an eye on the kids.
The good news is there are various cafes and takeaway food shops right opposite the playground, so you can buy some food and enjoy one of the many picnic tables next to the playground.
When the kids are finished playing there are some great nearby coastal walks to the Point Londsdale lighthouse and pier. This is probably my favourite playground in the whole area.
Location: 77 Point Lonsdale Rd, Point Lonsdale VIC 3225, Australia
Geelong Waterfront Playground
Down on the Geelong Waterfront, right next to the start of Cunningham Pier is another fantastic little Geelong playground. Although not packed with playground equipment this playground is on a steep little hill, thus it has some wonderful hill trails and slides. There are a few unusual pieces of equipment in this playground that you won’t find anywhere else.
When the kids have had enough playing there are some wonderful walking paths along the waterfront in both directions from this park. It is very accessible because it is right on the edge of the CBD.
Location: Western Beach Rd, Geelong VIC 3220, Australia – Adjacent Cunningham Pier
Get out and play!
So there you have some great options to get out and enjoy the sunshine in the beautiful Geelong and Surf Coast regions. There are many more great Geelong playgrounds you can try, however, these are our absolute favourites.
They are also the kid’s favourites because let’s face it, it’s all about the kids. When both the parents, kids and friends all have a wonderful day out at the playground, you’re on a winner. And trust us, all of these Geelong playgrounds are winners!
Would you like a free copy of our Ultimate Bucket List?
Not sure where to travel to next? We have created the Ultimate Bucket List to help you plan your next trip. 1170 awesome travel destinations in 167 countries. And we want you to have it for FREE.