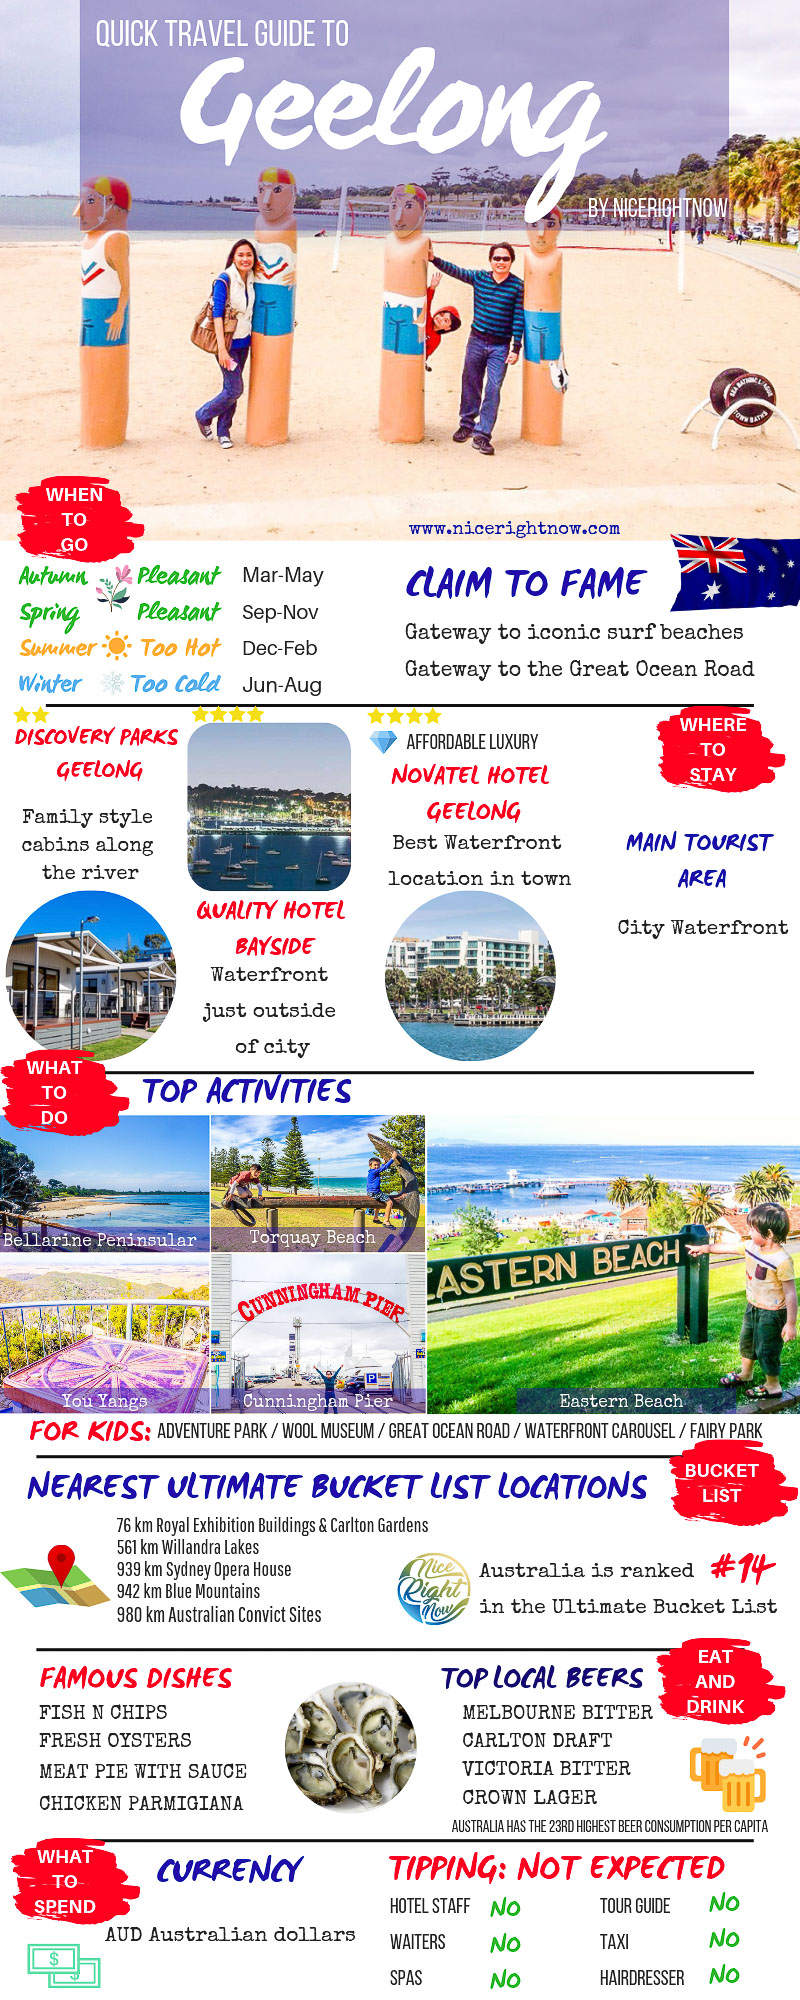
Geelong is just 1 hour away from the World’s 2nd Most Liveable City Melbourne. And it’s the gateway to the Great Ocean Road and the Surf Coast. Geelong is known by the locals as Sleepy Hollow, because of it’s relaxed coastal vibe. Before you visit check out this Quick Travel Guide to Geelong.
Note: This post may contain affiliate links. Please read our disclosure policy for more information.
Things to Do in Geelong
Being a coastal town on Port Phillip Bay (the same Bay as Melbourne), most things to do in Geelong revolve around the ocean. Here are some of our favourite things to see around Geelong.
Eastern Beach: This is the centrepiece of the waterfront precinct and the most famous of all Geelong attractions. In summer it gets super busy, partly due to the free saltwater swimming pool. Eastern beach is full of BBQs, picnic areas, swimming areas, and of course the beach. In summer there’s also a beachside Ferris wheel. Nice.
Cunningham Pier: Located at the opposite end of the Geelong Waterfront Precinct is the historic Cunningham Pier. Here you will find great dining options on an old restored wharf. But that’s only half the attraction, there is some lovely waterfront strolling and a beautifully restored carousel.
Torquay Beach: Torquay is surf culture at its best. Famous surf clothing brands such as Rip Curl and Quiksilver are orientated from this seaside resort town. Torquay is the surf capital of Australia, and hosts the world-famous Rip Curl Pro Bells Beach surf competitions, by far the biggest events Geelong has to offer.
Climb the You Yangs: Flinders Peak is a volcano just outside of Geelong which can be seen for miles around. You will go right past it on the Geelong to Melbourne train. The You Yangs and Flinders Peak are loaded with walking trails and mountain bike paths and are a 30-minute drive from Geelong.
Serendip Sanctuary: Okay so this is a local secret. It’s a wildlife sanctuary just outside of Geelong which is completely free to enter. It is loaded with iconic Australian wildlife such as Kangaroos, Wallabies and Emus. It has walking trails through an open-range zoo setting, where you can get up close to many of these animals. Sshhh, don’t tell anyone only the locals know about this place.
Day Trips from Geelong
Although it’s the second largest city in Victoria, Geelong tourism is a little on the slow side. But look just beyond the city and there is a wide variety of wonderful attractions.
Great Ocean Road: Known as one of the world’s most scenic coastal drives, no trip to Victoria is complete without driving along this magnificent stretch of coastline. There are quite a few Great Ocean Road towns along the way, with attractions of their own.
Bellarine Peninsular: This peninsular of land has many sleepy coastal holiday towns and picturesque coastal environs. From Geelong travel to the nearby seaside villages of Queenscliff, Point Lonsdale and Portarlington, famous for their food and wine scene.
Where to Stay in Geelong
Geelong is nicknamed “The City by the Bay”. The best area for tourists to stay is near the city centre along the waterfront, where you will find relaxing seaside walking trails and loads of cafes.
Cheap Accommodation in Geelong
Discovery Parks – Geelong is basically a caravan park-style accommodation in Belmont, an inner city suburb. The location is along the Barwon River with its peaceful walking trails and the awesome Barwon Valley playground for the kids. And they have some great on-site cabins for families.
Mid Range Accommodation
Just a couple of minutes’ walk from the city is the Quality Hotel Bayside. This is in a fantastic position overlooking the bay, with lovely walking and cycling paths just across the road. It’s within walking distance of the best central Geelong attractions.
Affordable Luxury
You can’t go wrong with the Novatel Hotel Geelong, in a perfect location along the waterfront in the City Centre. This hotel is surrounded by great bars, cafes and restaurants just across the road from the waterfront.
Find a Great Deal
We always recommend shopping around for great deals on accommodation, and this deals finder is a great place to start.
Would you like a free copy of our Ultimate Bucket List?
Not sure where to travel to next? We have created the Ultimate Bucket List to help you plan your next trip. 1170 awesome travel destinations in 167 countries. And we want you to have it for FREE.
So you’ve just purchased a new GoPro Hero11 Black. You will have more fun with your new GoPro Camera with the right accessories. So what are the best GoPro Accessories for your new GoPro Hero11 Black?
GoPro Creator Edition
Let me start by saying that the best accessories are contained in the GoPro Hero11 Black Creator Edition. Not only does the Creator Edition contain the best GoPro Accessories, but you also get them for a heavily discounted price.
However, if you purchased the bare-bones camera without the Creator Edition, it’s not all doom and gloom, because you can still purchase all the components separately. Here’s what you get in the GoPro Creator Edition:
Integrated buttons for controlling the GoPro camera
Wireless camera controls
Extra mounts for other camera accessories
The Volta is a fully functional and versatile hand grip/tripod combo, hard to live without once you’ve used it.
Media Mod
The Media Mod is a clever housing for your GoPro Hero Camera, which also has some clever features that will be impossible to live without once you have tried them.
Integrated shotgun microphone with forwards or backward direction.
2 hot shoes to mount an even better quality shotgun microphone if desired.
3.5 mm input port allows you to use external microphones without an adaptor.
HDMI out port to play your footage on a big screen.
Lighting Mod
The Light Mod is a small LED lighting unit with a rechargeable battery, which mounts directly to the Media Mod via a hot shoe. Now you can do low-light or nighttime videos without too much trouble.
Other GoPro Accessories
There are 3 essential families of GoPro Accessories, and GoPro has some amazing solutions for each one:
Mounting/tripods/selfie sticks
Audio
Power
Here’s what we reckon you absolutely need for your GoPro Hero11 Black.
Mounting Accessories
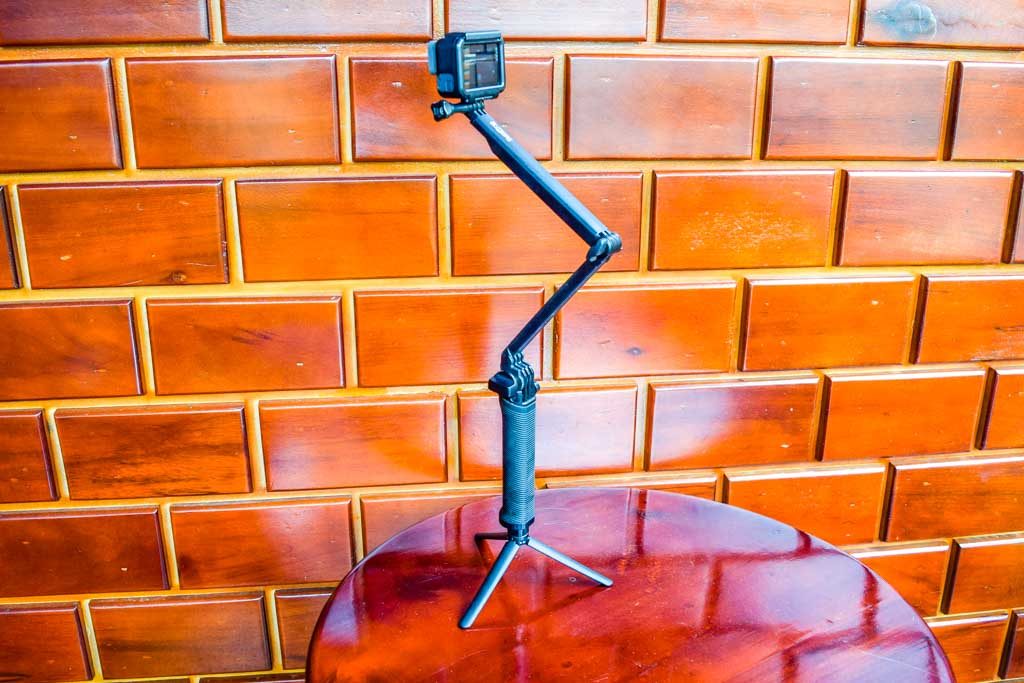
3 Way 2.0
The original 3 Way was fantastic, but a little bit limited on the head adjustment. Problem solved with 3 Way 2.0 because your camera is now mounted via a ball joint gimbal attachment, so you have full 360-degree rotation for full versatility.
3 Way 2.0 has you covered with a versatile tripod attachment as well. And you can have the tripod set up with the full 50cm extension – brilliant!
Jaws
Jaws is a super handy clamp that will attach your GoPro to virtually anything up to 5cm in thickness. And the removable Jaws neck allows you to move your GoPro Action Camera to pretty much any position that suits you.
Chest Harness
The old Chesty is a brilliant way to get POV shooting (from your perspective). Use the fantastic updated Chest Harness for hiking, riding, skiing, snowboarding, or virtually any action activity you can come up with.
Action Mounts
You should definitely add one or 2 action mounts, depending on what your chosen activities are. My love is mountain bike riding, so my GoPro Action Mounts of choice are mountain bike mounts.
Power largely depends on whether you have a Volta hand grip or not. With the Volta, you are pretty much covered for power. But even with the Volta, I believe it is still worth having one spare Enduro battery, for those times when you are not using the Volta.
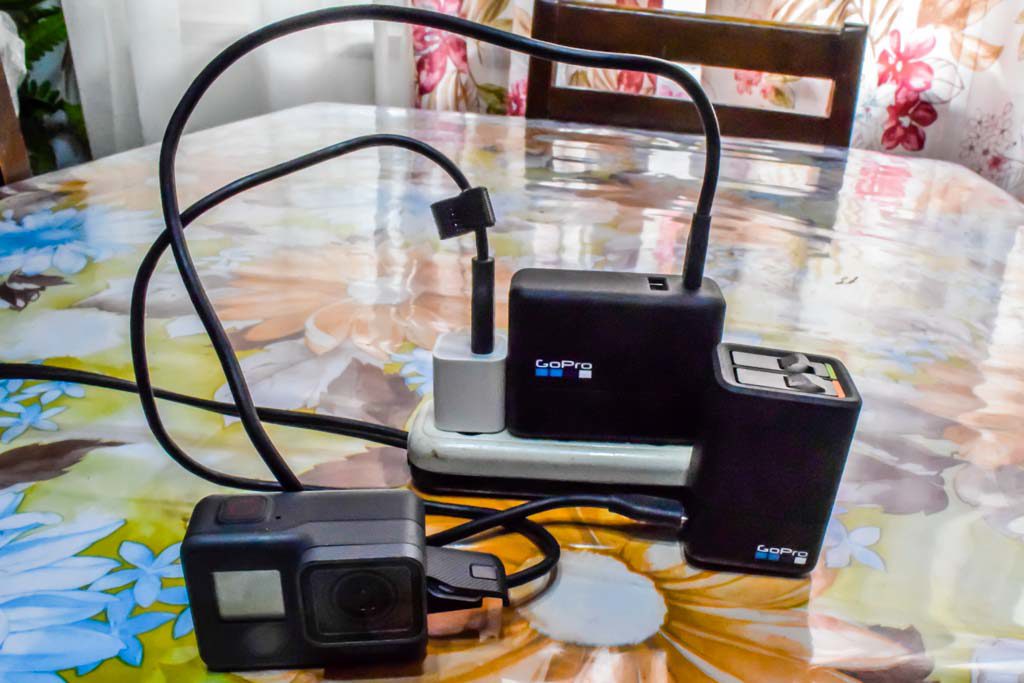
Dual Battery Charger and Enduro Batteries
The most cost-effective way to purchase a spare battery is to buy the dual battery kit with a dual charger included. And this is the most convenient and quickest way to charge your Enduro Batteries as well. Problem solved.
Other GoPro Accessories Worth Considering
You now have enough GoPro Accessories to be a serious vlogger or action cam guy. There are some other GoPro Accessories I think are worth some serious consideration. Here are some to give some serious consideration:
GoPro Subscription – Not really an accessory but will greatly enhance your ability to upload automatically from your GoPro Hero11 Black to the cloud. It can greatly enhance your video production workflow and save you a bunch of time. It also gives you full access to the GoPro Quik app to make great videos.
Sling Crossbody Bag – a.k.a. fancy fanny pack for GoPros. Actually, this is the perfect size for fitting in the GoPro Hero11 Black Creator Edition together with Volta and Media Mod. It’s made for the Travel Vlogging, and you can fit all the little extras in as well.
Sleeve and Lanyard – I love these sleeves and lanyards. You can throw your GoPro in your handbag, pocket, or wherever. It is especially useful now that GoPro Hero11 Black has the horizon lock feature, so filming with a semi-naked GoPro just got easier.
Buy All The GoPro Accessories You Will Ever Need On Special!
So when you buy your GoPro Hero11 Black (or any other GoPro Camera), it’s worth noting that you really should allow a couple of hundred dollars for extra GoPro accessories. But if you wait for a great sale and buy them all together to get free shipping and a sale price, it’s not that bad really.
Black Friday sales are great for this, but you can probably find a Christmas sale or some other sale. And don’t forget the GoPro discount codes – you can probably get a 10% discount just for signing up to a newsletter. Happy GoPro Accessory Shopping!
HDR has been around for a while now on iPhones. Now it’s even evolved into Smart HDR. But most iPhone users don’t know what HDR is, let alone when to use it. So what does HDR mean on iPhone Photos anyway? And when should you turn the HDR feature On or Off?
Note: This post may contain affiliate links. Please read our disclosure policy for more information.
What Does HDR Stand For?
HDR stands for High Dynamic Range. It’s a feature built into the camera on iPhones, iPads, and iPod touch cameras. You have the option of turning it on or off in the camera app settings.
In technical terms, High Dynamic Range Imaging is a technique used in photography to produce a greater range of luminosity (brightness) than with normal photography.
What Does High Dynamic Range Do?
Most photographers are familiar with the problem of photographing a person with a bright sky in the background. The high exposure of the sky in the background means the camera usually compensates by making the person in the foreground look dark. Or it may make the person look ok, but the sky becomes overexposed and loses all its detail.
HDR solves this problem by taking 3 photos with different exposures. Then it magically blends these 3 photos into a single photo, with the exposures of each part of the photo set to the right level. The exposure and the detail are now set to the right level in the bright and dark regions of your photo.
In short, HDR will give you perfectly exposed photos, when used in the right situation. The photo will appear crisp and vivid, the level of detail will be good in all areas of the photo.
The good news is that you no longer need a pro-HDR camera to use this feature. You can take an iPhone HDR photo by simply turning on HDR mode. This makes it incredibly useful for anything from backyard setup to a pro vlogger setup.
iPhone XS Max in fully auto Smart HDR mode
When To Turn HDR On?
HDR will not improve every single photo. It depends entirely on the scene you are capturing. Here are the scene types which will most benefit from HDR.
Outdoor and Landscape Scenes
Usually, an outdoor or landscape scene has both bright and dark areas, which means that without HDR turned on you are likely to lose detail in some of the bright or dark areas. This makes outdoors and landscapes a perfect scene to turn HDR on.
Portraits in Sunlight
Sunlight on a persons face can introduce shadows and harsh glare. It can make the subjects face look overall unflattering. HDR can even out these problems to give an overall better-looking portrait. Keep in mind that modern iPhones also come with portrait mode, which may be a better option.
Dim Lighting
In situations where the lighting is dim, HDR is very good at fixing the exposure levels to bring out better detail. HDR will allow you to take sharp photos when the light is dim. HDR won’t work well with a flash though, so make sure you turn the camera flash off.
Dim lighting with HDR OnDim lighting with HDR Off. Some loss of detail.
iPhone XS or Newer
You should leave the iPhone XS Smart HDR permanently on, unless you have a specific need to turn it off for a particular style of photo, as per the below section. As the name suggests, this HDR is much smarter than the older versions.
When To Turn HDR Off?
There are times when HDR prevents you from capturing the image you want. Here are some situations where you should leave HDR mode turned off.
Moving Objects
HDR is great for taking photos of motionless objects because it takes a little longer to take the photo. However, if there is a moving object in the photo then HDR probably won’t work so well. Turn HDR off if you have a moving object.
Silhouettes
Sometimes it is desirable to show silhouettes in your photo. For example, a silhouette of a person against a beautiful sunset backdrop. You need to turn HDR off to capture silhouettes. That’s because HDR will try to compensate exposures and give undesirable results.
Color Saturated Photos
If a scene is already very colour-saturated, like a bouquet of colourful flowers, then HDR does not work well. It tends to make the colours wishy-washy, resulting in an overall dull-looking photo. Best to leave HDR off if you want to keep high colour saturation.
iPhone XS turned HDR off for this colourful snap
High Contrast Dramatic Images
Sometimes it is desirable to show high contrast in an image to create a dramatic mood. Generally, this is when you want to keep some shadows in your photo to give a particular effect. If you want to keep dramatic shadows in your photo, keep HDR turned off.
What is Smart HDR?
The iPhone XS/ XR / XS Max have a new type of technology, the Smart HDR. Smart HDR is HDR on steroids. Smart HDR gives you better detail and better colours than regular HDR.
Using the powerful A12 Bionic chip in these newer iPhones, the camera shoots a bunch of interframes between the HDR photos and chooses the best part of each photo to merge.
That means that instead of the 3 shots taken by regular HDR, Smart HDR takes 9 shots at different exposures. In a split second the powerful A12 Bionic chip will choose the best parts of all 9 photos and merges them together for a stunning photo.
Smart HDR menu on iPhone XS Max
Do HDR Photos Consume More Memory?
The great news is with an iPhone HDR photo that it will use roughly the same amount of memory as a regular iPhone photo. If you are conscious of memory size, just make sure you don’t also save the original when using ios HDR. This is likely to double your memory space.
How to Take an HDR Photo
Taking an HDR Photo is as easy as turning on HDR mode. This depends on which iPhone model you have, and whether your model is equipped with regular or Smart HDR.
How To Turn HDR On
On iPhones older than iPhone XS, this is the way to turn ios HDR On/Off.
At the top of the camera screen, you will see an HDR symbol.
Simply tap the HDR symbol to select On, Off or Auto.
The HDR toggle on iPhone X
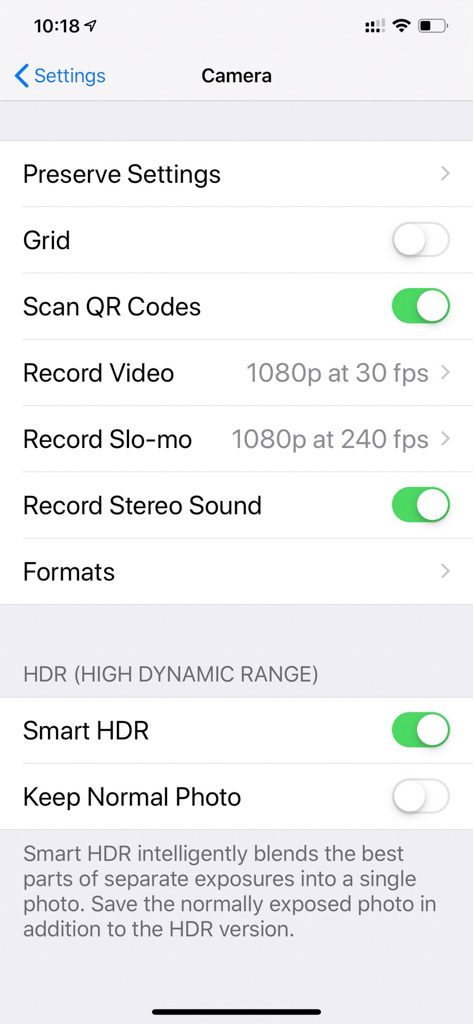
How To Turn Smart HDR On
iPhones XS and later have the Smart HDR feature. This is turned on slightly differently than the older phones.
Go to Settings, then the Camera App.
Scroll down to the HDR (High Dynamic Range) section.
Toggle the Smart HDR on. The app says “Smart HDR intelligently blends the best part of separate exposures into a single photo. Save the normally exposed photo in addition to the HDR version”
There is no longer an option to turn HDR to Off or Auto in the Camera App.
You have the option to Keep the Normal Photo. This means that if you don’t like the HDR photo you can use the original photo. Keep in mind that this will increase the photo storage size by saving 2 photos instead of 1.
iPhone XS Max has no HDR Toggle On/Off in the Camera App
iPhone 12 and HDR
The iPhone 12 takes photos in HDE by default on both the front facing and the rear camera when it is most effective. by default the iPhone 12 models also take video in stunning HDR mode. This gives you an improved quality of true-to-life colour and colour. Awesome!
iPhone HDR is a Killer Feature
If you own an iPhone and love taking photos, you really should familiarise yourself with HDR photography. This is a killer feature which will definitely give you more stunning photos, especially when you know the right times to use it. Happy High Dynamic Range iPhone photography!
Would you like a free copy of our Ultimate Bucket List?
Not sure where to travel to next? We have created the Ultimate Bucket List to help you plan your next trip. 1170 awesome travel destinations in 167 countries. And we want you to have it for FREE.
GoPros are a great little action camera. But they are not particularly cheap, especially after you go shopping for accessories. Maybe you’re considering taking the leap into the world of GoPro. But is a GoPro worth it? To help you make an informed decision, here’s my list of 10 things I hate about GoPro.
Don’t get me wrong, I love my GoPro. In fact, I’ve owned 3 GoPro’s, and I love the whole line of GoPro models. I have taken stacks of great footage, and have built some accessory combinations which are not possible on any other camera. But like any great camera, it does have some drawbacks.
Note: This post may contain affiliate links. Please read our disclosure policy for more information.
GoPro Authentic Accessories
Buying your GoPro camera is just the start of your GoPro journey. In one of the cleverest marketing ventures of all time, the range of authentic GoPro accessories is very, very long. They are all wonderfully lightweight, compact and perfect for GoPro travel.
Thanks to the versatility of this tiny action camera, you can mount it virtually anywhere on your body. You can mount it on your car, bike, surfboard, or even your flying machine. However, you will need to buy some kind of GoPro accessory to mount it to your machine.
What’s Wrong With GoPro Accessories
Like any keen GoPro user, I’ve certainly purchased my fair share of GoPro accessories over the years. My preference is definitely the genuine GoPro accessories; the quality is amazing. These things look tough enough to survive in World War 3. Naturally, they have a premium price tag to match.
3-Way Arm
My first casualty was the 3-way arm. I’ve been rather gentle to this beloved arm over the years, using it mainly for selfie videos. But the frame around the tightening screw has finally cracked, such that it can no longer be fully tightened.
Now it’s become a 3-way floppy arm, which is not so useful any more. Admittedly it survived 3 different GoPro cameras and truckloads of videos.
Sleeve & Lanyard
My second casualty was the sleeve & lanyard. This is a lightweight neoprene case that I purchased with my GoPro Hero7 Black. I love this case, it is so practical. It comes with a neck strap and is thoughtfully equipped with a quick-release catch.
Presumably, this quick release catch is designed so that if you get the neck strap caught in something, you won’t get your head ripped off.
But alas, after about 1 week the quick release catch cracked in half. Good thing I didn’t drop the GoPro down some deep canyon or something. I managed to superglue the quick release catch back together, but now I have a solid neck strap which won’t release in an emergency.
Stop! Freeze!
My number one issue with the GoPro Hero7 Black is that the camera has frozen on several occasions. That is to say, the menu freezes so that you cannot change anything, and you certainly cannot record any footage. It seems the only way to unfreeze the camera is to remove the battery for a hard reboot.
Being an action camera this problem usually occurs in some dramatic action situation. For example snorkelling on a coral reef. In this situation removing the battery for reset risks getting water into the battery compartment. Also, you need to remove the casings and mounts to access the battery, which can be difficult and stressful in some action situations.
Bad timing for a freeze
GoPro Plus Membership
I love the GoPro App and the proprietary Quik App. These are such smooth apps for getting footage off the camera and onto a computer or iPad. It’s all done magically via wi-fi, though the GoPro App. I normally copy all the footage simultaneously into the iPad Photos App and the GoPro App.
The video files upload directly from the Photos App into my Apple iCloud storage, since I’m on a 2TB plan. Then I would go into the Quik app and produce a video. After all that, I’d copy the finished video file into my Apple iCloud storage. It sounds complicated, but it’s actually very quick and easy.
One day I had a bright idea to purchase the GoPro Plus membership, which is their unlimited cloud storage monthly subscription. Supposedly this stores all the videos from the app into the GoPro cloud storage.
I found absolutely zero benefits and relinquished my membership after the first month. Since my workflow already has my footage backed up in 2 cloud storage locations, I found the GoPro plan utterly useless. Sorry GoPro, you missed out on my money for this one!
Waterproof Lens Cover
The GoPro Hero7 Black comes with a removable lens cover. It is supposed to be 100% waterproof. The first week of recording with my new GoPro involved quite a lot of underwater footage. After a while, I noticed a blurry section on my footage and figured I must have been slack with my lens cleaning.
But I discovered that some water had managed to get in behind the waterproof lens cover, and condensation was visible on the inside of the clear lens cover, causing a foggy section. Getting this lens cover off is not obvious, thankfully it’s easy to find a quick guide on YouTube. It was easily cleaned and fixed.
I have had the same issue repeat twice more over a 4 month period. It seems that the waterproof seal is a little faulty. It’s still quite usable, just annoying.
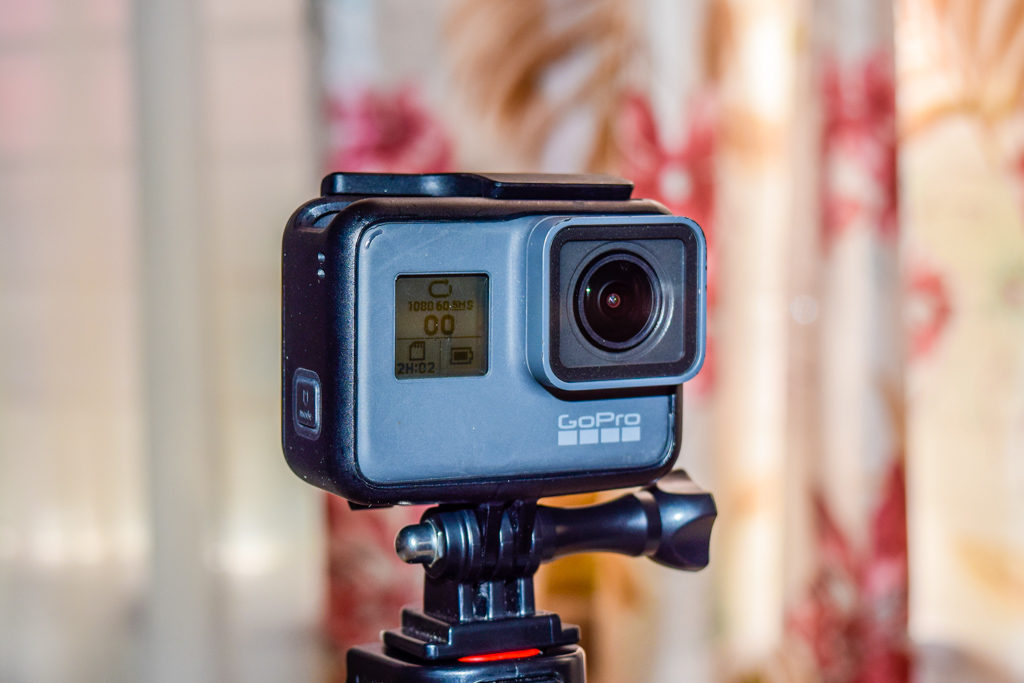
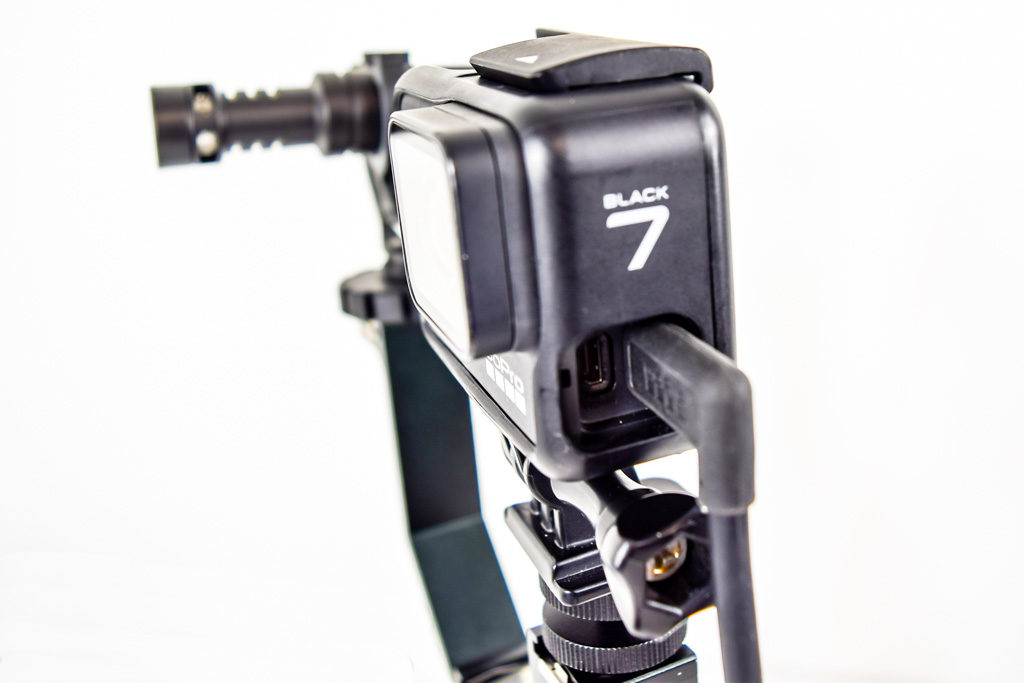
GoPro Hero7 Black
Waterproof Case Hero 4
My biggest waterproof issue came on the Hero4 Silver. These cameras were not waterproof out of the box, and you had to put a waterproof case around them. But when you did this the microphones were covered and the audio was atrocious, coming out muffled.
But GoPro had an ingenious option, providing 3 cases. One was fully waterproof which results in terrible sound. The second was splashproof which results in better sound. The third was the skeleton case, not waterproof but still shockproof. The skeleton case results in great sound. The idea was if you want great sound, just swap to the skeleton case.
So one day I went swimming at the beach with my GoPro and forgot that I had recently switched to the skeleton case. The GoPro drowned instantly. RIP GoPro Hero4 Silver.
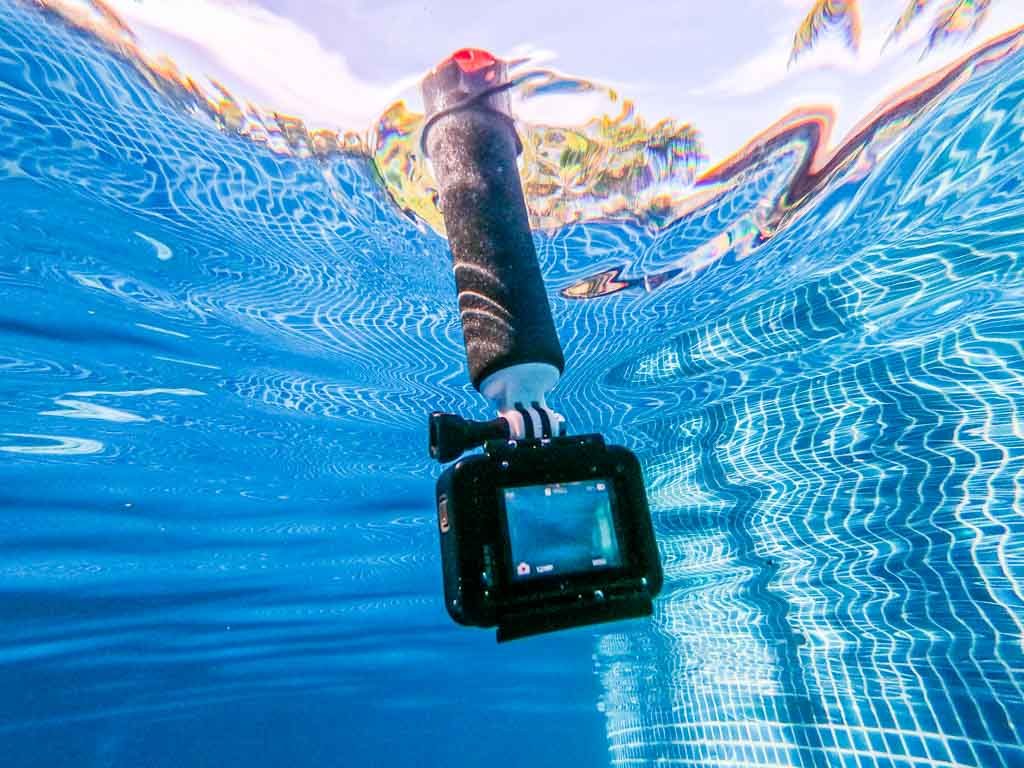
GoPro’s Don’t Float
So GoPro Hero5, Hero6, Hero7, Hero8 and Hero9 are completely waterproof without a case. That is awesome. But the problem is they don’t float. You will need to put a case on them with some floating attachment if you want your GoPro to float.
I would suggest you never, under any circumstance take your GoPro swimming without a floating device. Or else Davey Jones’s Locker may get a new GoPro.
Floaty attached to the GoPro
It’s Hard to Hold a GoPro Level
The GoPro is such a great little camera to hold, it feels comfortable holding it in your fingers without a selfie stick or GorillaPod. This is how I take a lot of GoPro footage, just dangling the camera from a sleeve & lanyard.
The problem is it’s very difficult to get your frame level. That is, to have a horizontal horizon. I found that often the footage was recorded with a slanting horizon, which looks terrible. This must be levelled using post-production editing software if the footage is to be used, a tedious and time-consuming process.
The problem is that the GoPro is so small that it is hard to keep it level. When it comes to GoPro vs camcorders, the camcorder is much easier to hold level. You really need to have a handle or a selfie stick to hold a GoPro level, so you have a longer reference point.
Plan B is to use a stabilizing gimbal, which always keeps the GoPro level. On the GoPro Hero5, this was a necessity due to the limitations of the optical image stabilization. I would always use the wonderful FeiyuTech G5 gimbal with a GoPro Hero5.
However, the Hero7 Black is the gimbal killer, with image stabilization so advanced that a gimbal is no longer required. So the last thing I want to do is to attach a gimbal to the gimbal killer Hero7!
Audio Quality
My GoPro Hero5 was perhaps the most disappointing camera I’ve ever owned. The GoPro camera quality is amazing, but the audio quality is awful. For starters, the audio is not very satisfying when you hold the camera naked. But then when it is enclosed in a case, you’re take to a whole new level of unsatisfying sound.
I found that every time there was any friction on the case or handle, there was a loud scraping/banging noise on the audio track. It was virtually impossible to remove even with post-production editing. My audio tracks were basically useless unless the GoPro was on a tripod with no movement.
The only solution I found was to use an external microphone, which adds extra cost and complexity your oh-so-simple GoPro.
As it turns out, the GoPro Hero4 non-water proof model had great little microphones. But when they went to the Hero5 waterproof model, the old microphones were updated to newer waterproof microphones.
This did not work out very good for GoPro, because their waterproof microphones were atrocious. Thank goodness they’re a lot better now in the GoPro Hero7 Black.
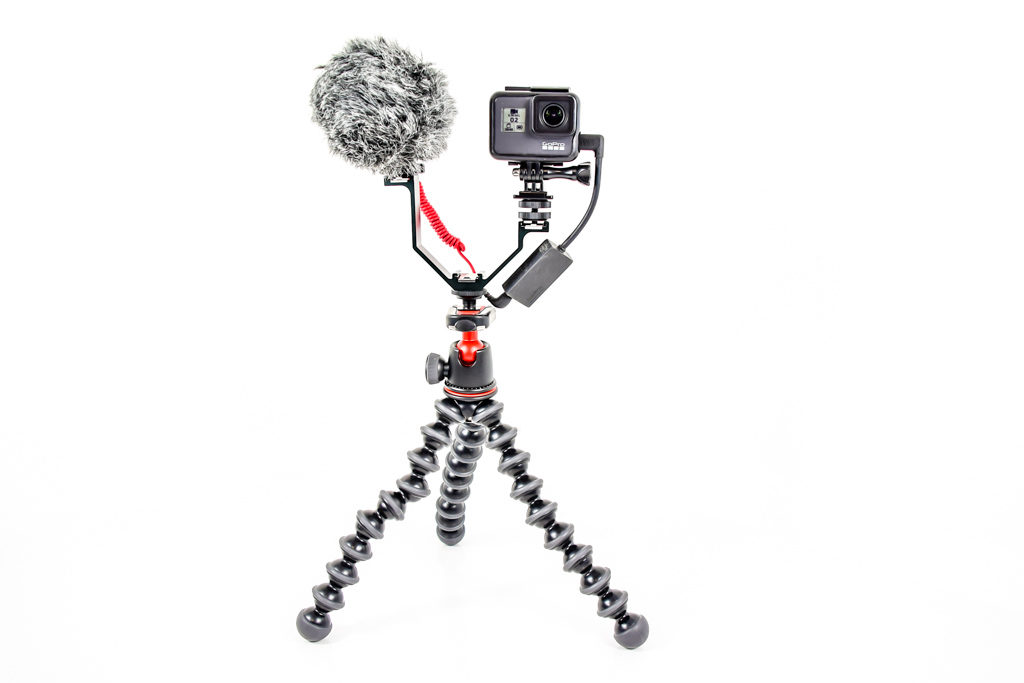
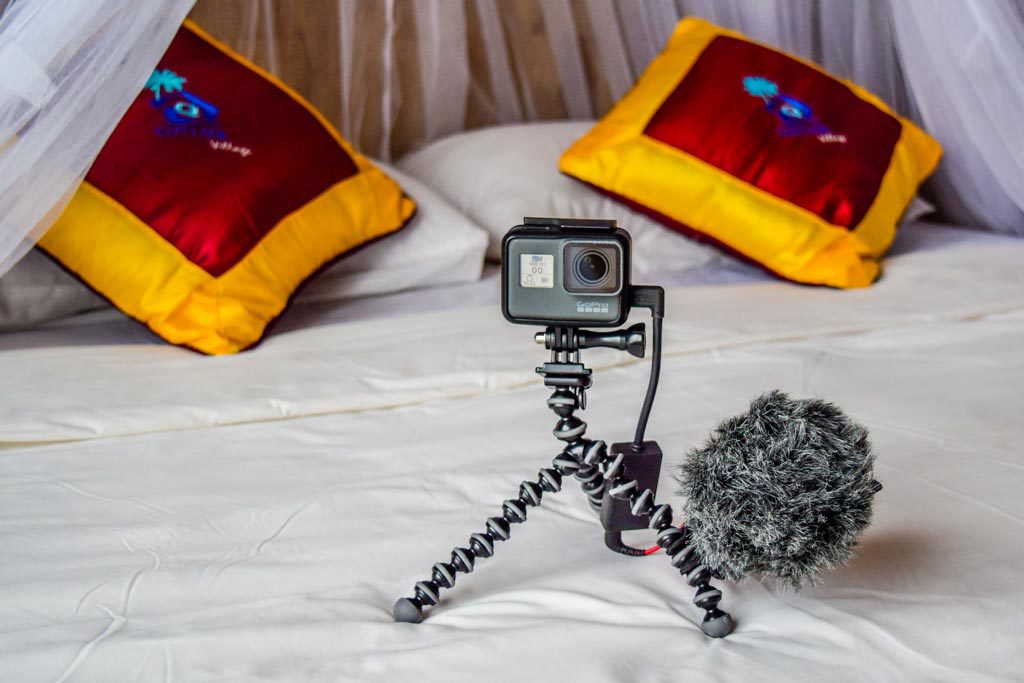
GoPro Vlogging setup with an external microphone
3.5mm Jack
On the topic of audio, most video cameras on the market have tiny little microphones which result in poor audio recordings. This is easily rectified by adding an aftermarket external microphone, normally via a 3.5mm audio jack. Most video cameras come with a 3.5mm jack for this purpose.
But not GoPro. The only way to plug an external microphone is to get a GoPro to 3.5mm jack adaptor. And the only way to get one of these is to go through GoPro and pay a premium price. Sure I tried a couple of cheap knock offs, but they didn’t even work.
The genuine microphone adaptors do work very well, however, they add an extra level of cost and complexity which could have been avoided had GoPro simply added a 3.5mm jack to their camera range. Not a problem if you own the awesome new GoPro Hero9 Black, with an integrated 3.5mm Audio Mic Input with Media Mod for HERO9 Black.
Case Holes
The GoPro cases do not have enough holes to accommodate the microphones. There are 3 external microphones on the GoPro. However, they are largely covered up as soon as you put the GoPro into the standard case which is supplied with the camera. This results in a muffled audio track as you would expect.
I have seen homemade solutions, where GoPro owners take to their drill at home and add more holes to the case. This is supposed to offer a noticeable improvement to the sound quality. But come on GoPro! This should have been engineered straight out of the box.
Not really a problem if you own the awesome new GoPro Hero9 Black, thanks to the flip down fingers. Good on GoPro.
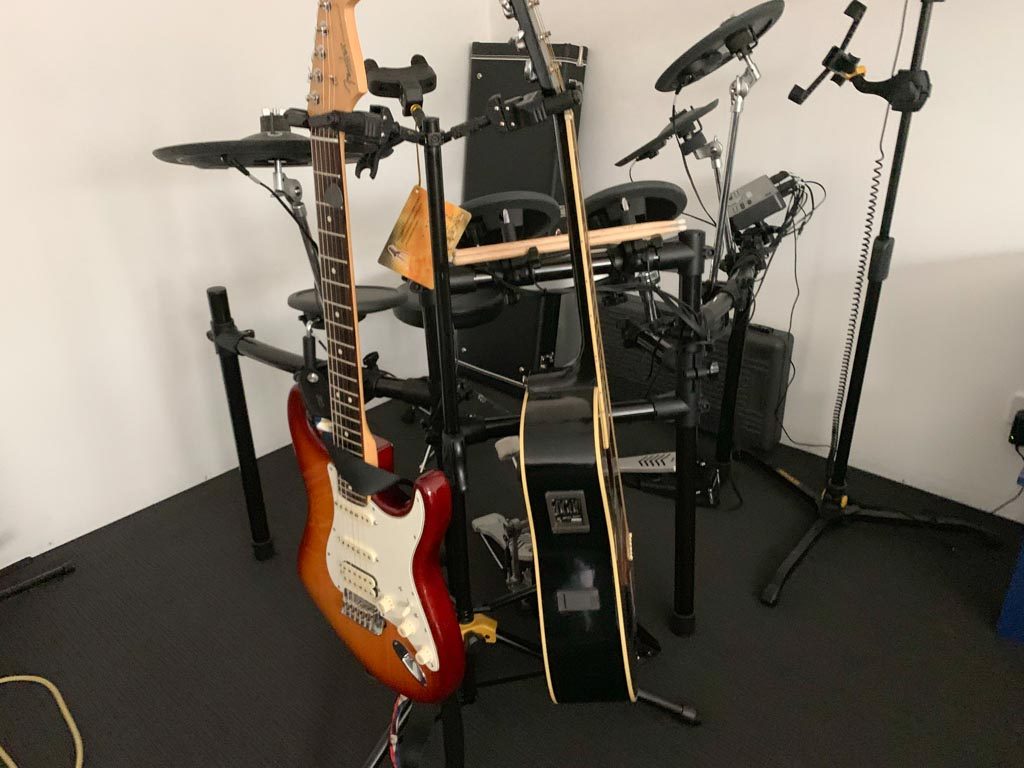
Making a Vlogging Rig
GoPro Hero’s can make great vlogging rigs. All you need is a GorillaPod, GoPro to 3.5mm adaptor, an external microphone, and some means of attaching the microphone to the rig. On my rig, the Rode Video Micro is attached to the GorillaPod using some little elastic hair ties. I purchased a 10 pack at a Bulgarian Pharmacy.
My vlogging rig is a little unwieldy to use, there are wires and dangly bits hanging off. I find it a little amazing that there are no easy solutions being marketed to turn this great little action camera into a serious Vlogging camera. It can be done, but it should much easier.
Hold the Phone! Check out this article on a great upgraded GoPro Vlogging Rig.
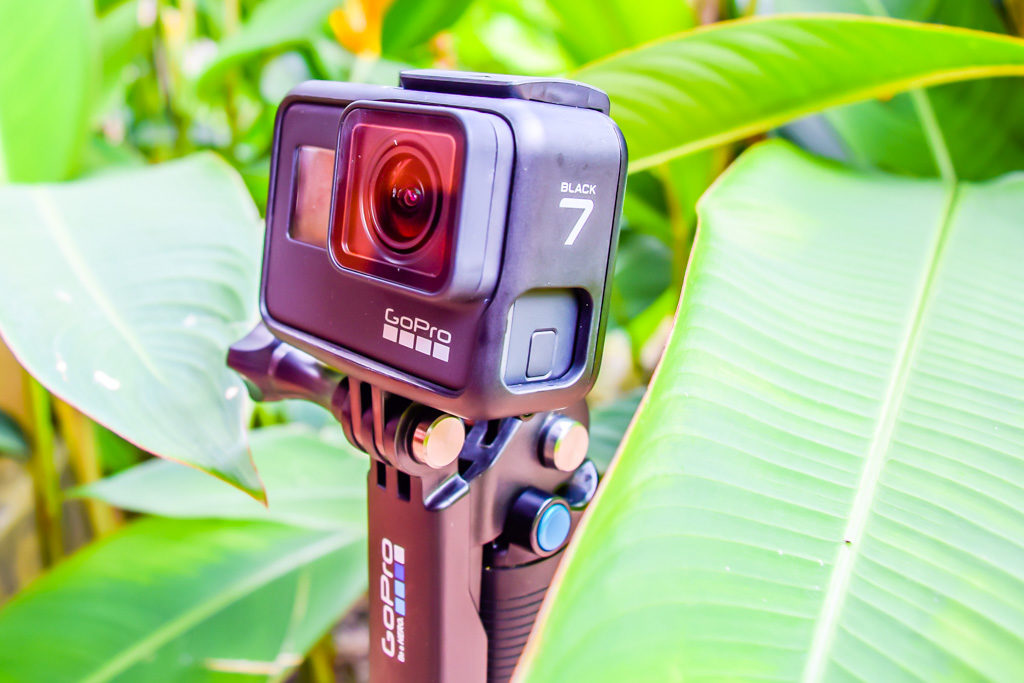
GoPro Hero 7 on a 3-way
Colour Grading
I am not impressed with the native colour grading of the GoPro footage. The video files are quite washed out and dull, requiring additional vibrancy and saturation to make them pleasing to the eye.
When you compare the GoPro Color grading to another popular video camera, the iPhone, there is no comparison. The iPhone video footage pops without any editing. The colours are sensational! But the GoPro looks bland and washed out prior to editing.
It’s not hard to fix, however, you do require some fairly decent video editing software. I generally edit video using Luma Fusion on the iPad or Final Cut Pro on the iMac. Both of these programs are more than capable of enhancing the washed-out colour grading.
Low Light Conditions.
I have not yet nailed any good GoPro footage in low light or night situations. The footage always comes out extremely grainy as soon as the light goes down. Forget about high detail video in the latter parts of a nice sunset. Then when you add some saturation in post-production editing, the grain looks even worse.
To be fair, many video cameras have the same problem. But this is definitely one thing that the GoPro is quite weak at. And I have more than a few grainy GoPro sunset videos to prove it.
Hold the Phone! Check out this article on using GoPro in low light conditions.
Battery Life
Start out with a GoPro, most people would try to operate with one battery. That’s the one that comes packaged with the GoPro. This can be quite frustrating because you tend to burn through one GoPro battery very quickly. So most people would opt to purchase a second GoPro battery. Overall GoPro battery life is quite poor.
How to Charge GoPro
Two GoPro batteries are great, they will get you through a reasonably long day of video footage. But I had some very anxious days with my GoPro, trying to conserve that second battery to get through the day.
Now I have 4 batteries, and it’s just right. I have never come close to using 4 batteries in one day, but on some rare occasions, I’ve used up 3 and started on the 4th battery.
Voice Commands is Hit & Miss
Voice commands are a great idea on an action camera. Especially when your GoPro is mounted to your helmet, or some other hard to reach the place. The trouble is, I seem to have about a 50/50 chance of the GoPro actually understanding my commands.
Ok, to be fair, it may have something to do with my thick Australian accent. Siri struggles to understand me as well. My GPS doesn’t understand me. Maybe I just need to learn to talk more clearly.
Love-Hate Relationship
Even though there are a few things I hate about GoPro cameras, there are also many things I love about them. In fact, I have another article telling you 21 things I love about GoPro cameras. It pays to see both sides of the argument for a fair GoPro Hero review.
Should You Buy a GoPro?
At the end of the day, I wouldn’t hesitate in recommending you to purchase a GoPro. These are an awesome camera, albeit with a few minor faults. There is no such thing as a camera that is faultless, so don’t bother searching for one of those.
Another positive is that GoPro apparently listens to their customers, evident because some of my pet hates with previous models have disappeared with the newer cameras like the GoPro Hero9 Black.
So if you are pondering the question “Should I get a GoPro”, at least now you know some of the annoyances you may inherit should you decide to invest in this great little action camera.
One of my favourite GoPro Hero5 videos
Would you like a free copy of our Ultimate Bucket List?
Not sure where to travel to next? We have created the Ultimate Bucket List to help you plan your next trip. 1170 awesome travel destinations in 167 countries. And we want you to have it for FREE.
If you are serious about Vlogging, then GoPro is a great choice. Not only is GoPro an affordable Vlogging camera, but it may also be very best Vlogging camera under 500 dollars. But you need to know a couple of tricks to get good results. Let me show you the ultimate setup for GoPro Vlogging.
Note: This post may contain affiliate links. Please read our disclosure policy for more information.
The Limitations of GoPro
Like any camera, GoPro gets more and more awesome with each new model. The GoPro Hero 8 Black is aimed at Vloggers, and you can purchase lights and microphones a.k.a the Light Mod / Media Mod to add to the GoPro, specifically targeted at Vloggers.
The GoPro Hero8 Media Mod includes a built-in Shotgun Mic as well as a jack that allows you to connect your favorite microphone. Add the LED Light Mod and you are well and truly in the Vlogging business.
But these genuine GoPro accessories are rather expensive. A much cheaper option is to use a slightly older GoPro with some cheaper accessories. But there are some limitations and traps to watch for with the GoPro.
Audio Quality
It’s no secret that the audio quality on GoPros is not that great. Although I must admit, my GoPro Hero7 Black internal microphones have on occasion captured some decent audio which is quite acceptable for a vlog. But generally speaking, you will need to add an external microphone for Vlogging.
Stabilitilization
GoPro specializes in image stabilization and is better than pretty much every other camera on the market. But the truth is, before the GoPro Hero7 Black you really need to use a handheld gimbal to get stable video footage. The Hero7 Black is quite acceptable without a gimbal, which is great news for vlogging.
Low Light Video
If you want to capture a lot of low light video, then a GoPro is not a good choice. GoPro does a great job of making their cameras small and lightweight. But that means the all-important sensor is also very small.
And that means you are always going to get poor results capturing video in low light. Footage will come out grainy, no matter what you do to the setting.
The Ultimate Setup for GoPro Vlogging
I’ve been through quite a few iterations of setups for GoPro Vlogging, and I’ve finally settled upon a setup which is almost perfect. So long as you own a GoPro Hero7 Black or newer, with the hyper smooth stabilization. Here’s what you need.
Whilst on the subject of microphones, it’s worth discussing the best microphone for Vlogging. Rode microphones are the hands-down leaders in the field, and the Rode Video Micro is the industry standard, which most vloggers use. It is very light and portable, extremely portable, and a part of practically every Vlogger kit.
The audio quality is second to none, and Rode even has a companion app to make your audio even better. But take it from me, you don’t need to get fancy by using the app. This microphone works perfectly straight out of the box.
How to Use the Ultimate Setup for GoPro Vlogging
Putting the setup together is simple, you just screw it all together, level it up and start recording.
Note that you will need to remove the waterproof door from the GoPro to plug in the 3.5mm Mic Adaptor. This will make your GoPro camera non-waterproof. If you wish to retain the waterproof rating of the camera, you will need to run with no external microphone and leave the waterproof door on.
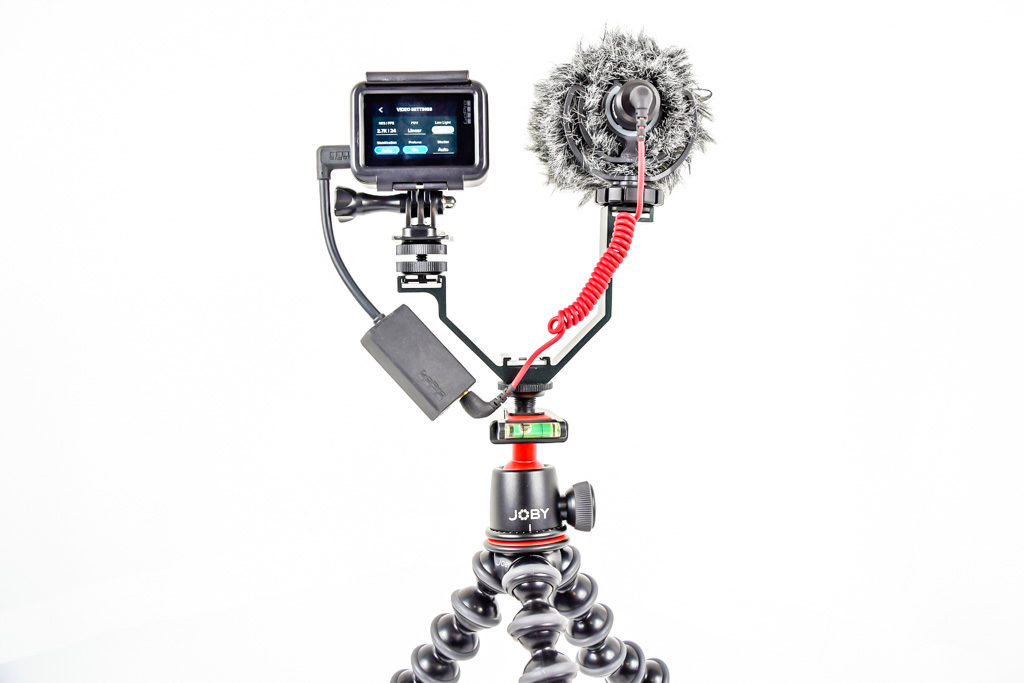
3.5mm mic adaptor plugged into the camera
This is a light and portable Vlogging rig, and it’s even great for travel vlogging! Just beware that the extra height of the Hot Shoe Triple Bracket may induce a little vibration. This will be noticeable if resting the tripod on a vibrating surface, for example, on a moving bus.
Walking With the GoPro
It is possible to walk with the GoPro Hero7 Black or later since the Hyper Smooth stabilization is sufficient to keep the footage nice and smooth. However, you will still need to be very careful and hold the tripod as still as possible.
GoPro Vlogging Rig Variation
GorillaPod has released an amazing variation of their 3K and 5K tripods. It’s called the GorillaPod 5K Video PRO kit. Not only does it come with a smooth fluid head for improved panning, but it has a flexible Gorilla Pod arm to hold the external microphone.
For Vloggers who need to purchase the Gorilla Pod, I recommend going for the Video Pro kit. You won’t need to purchase the hot shoe bracket and adaptor and will have a smoother and more versatile vlogging rig. Good one Gorilla Pod!
Pairing up the GoPro with the Gorilla Pod and Rode Video Micro, you have quite a cheap vlogging camera with outstanding capabilities. And you have the best in the business microphone for Vlogging.
Start GoPro Vlogging
So as you can see, setting up a GoPro Vlogging Rig is actually quite simple, once you know-how. And if you already own a Gorilla Pod, the hot show mounts are inexpensive Vlogging accessories to give you an effective budget Vlogging camera setup.
The important thing is to make allowance for an external microphone like the Rode Video Micro, an absolute necessity in every Vlogger kit. Happy GoPro Vlogging, and I hope you enjoy using this rig as much as I do.
Ready for action with the ultimate setup for GoPro Vlogging
GoPro Printable Cheat Sheet
Click below to download a handy printable GoPro for Beginners Cheatsheet. We’ll give you some quick help on the following:
GoPro frame sizes and resolutions
Frames per second comparison
Field of view comparison
Voice command list
Swipe motions used on GoPro touch screens
ProTune recommended settings
Time-lapse intervals, recording times and video lengths
The COVID-19 Pandemic is a big deal. For us Australians returning home from overseas in March/April 2020, we’re required to undergo a 14-day quarantine period in a hotel provided by the state. Want to find out first hand what it’s like to do the COVID-19 Mandatory Quarantine in Australia?
How to Get a Flight Home for my Mandatory Quarantine in Australia
The first challenge for Aussies planning to return home is getting a flight to Melbourne. In most countries, flights were all cancelled in March 2020, meaning you can’t get a flight home no matter how hard you try. Or can you?
I was stuck in Vietnam, and all international return flights were cancelled by the Vietnam Government in March 2020, similar to most countries. A friend told me to email the Department of Foreign Affairs and Trade (DFAT) and the Australian Embassy in Vietnam, to let them know I’m an Aussie stranded in Vietnam.
I received an email back saying they were trying to organise a one-off flight to re-patriate Australians, and they will email me when they have organised one. They warned that the flight would be at short notice.
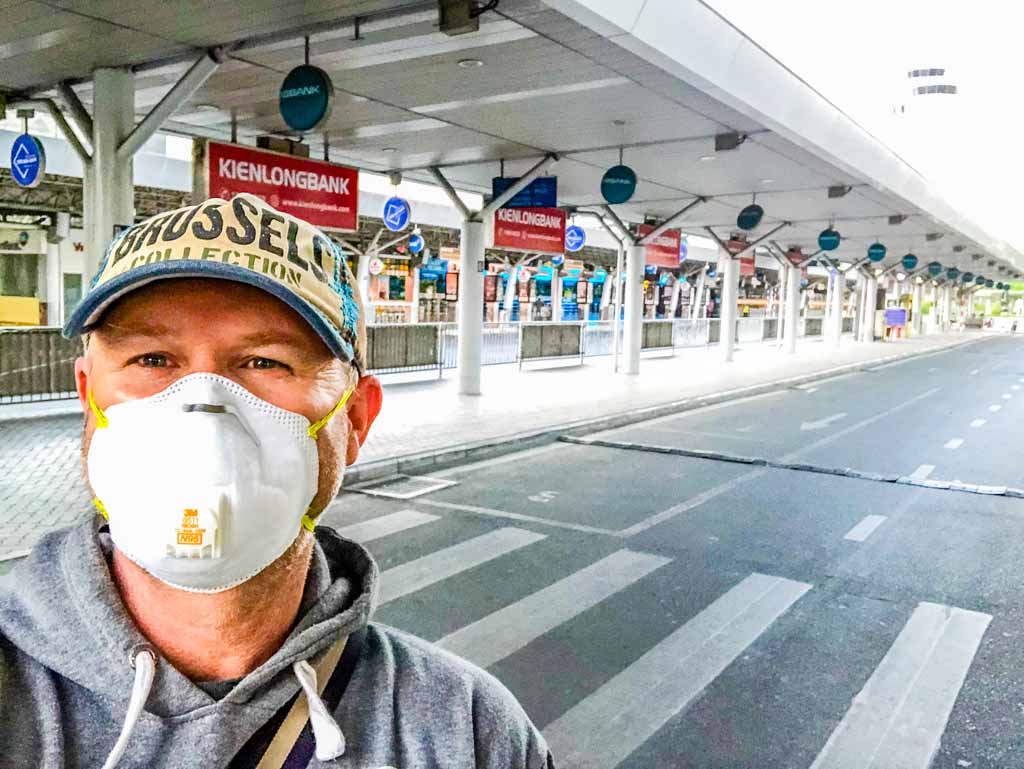
Ho Chi Minh Airport was 100% deserted
Getting a Repatriation Flight
On 2nd April I received the email saying there’s a flight leaving tomorrow. Yay, I was able to get home. So I organised a flight from Hanoi to Danang then Ho Chi Minh City. There was just one flight per day. Then overnight in Ho Chi Minh City and on home to Melbourne the next day
The Flight Home
The airport was absolutely surreal. The Ho Chi Minh City domestic airport was 100% closed down, not a soul to be seen. The international was 99% shut down, except for our flight. Just one flight leaving Vietnam. Wow.
On the flight home – note the hostess uniform!
10kg Luggage Limit
My ticket stated that there’s no check in luggage, just 10kg carry on permitted per passenger. Apparently the baggage handlers in Australia had a COVID-19 breakout, so baggage handling in Australia was not allowed. Apparently not all passengers got the message, as a few had to give up their large suitcases.
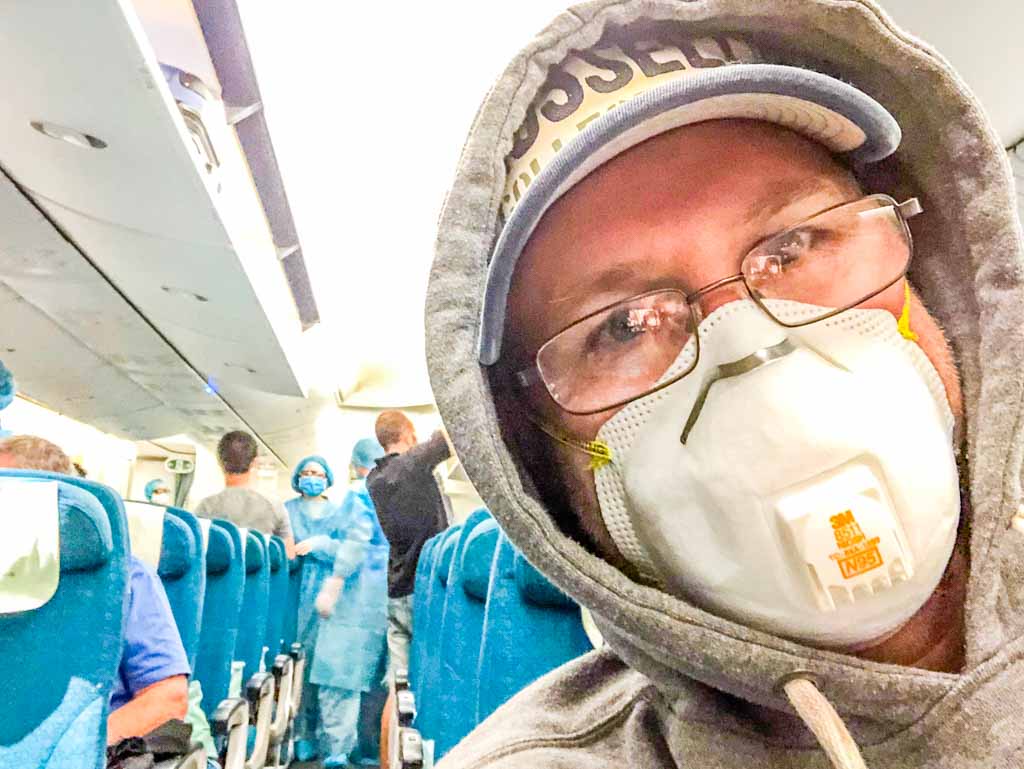
The flight home was normal enough, except that social distancing meant that every second seat remained vacant. And the hostesses were dressed up in protective suits and face masks. Apart from that, perfectly normal.
Arriving at Melbourne Airport During the COVID Pandemic
As expected, there were a few more health checks on the way in. We were required to answer question about any COVID-19 symptoms, and where we’ve been. We had to sign forms to state that we agree to mandatory 14 day quarantine in a hotel. And we had to sign to say we promise not to break the rules.
Overall it only took around 90 minutes to get through Melbourne Airport and customs. Of course it was sped up be having no other planes landing, and also no having to collect baggage.
We were shuffled onto the SkyBus airport shuttles into the city. The hotel destination was the lovely Pan Pacific Hotel on the edge of the CBD.
Checking into the Hotel
The hotel check-in process was also quite stringent with lots of paperwork to fill out. They needed to check if guests had any special medical requirements, any ongoing treatment, any illness and any dietary requirements. And of course if anybody is feeling any COVID-19 symptoms.
Hotel Checkin Procedure
The Quarantine Hotel Room
The hotel room is nice enough. They normally cost around $300 per night, however we were fortunate enough to get 14 days of mandatory quarantine for FREE! That’s at least $4,000 value by my calculations. Not bad.
In the hotel room we get 3 meals a day. Just like a normal hotel room, you get free wi-fi and a ridiculous amount of cable TV options. Also loads of free movies.
One peculiar thing with the hotel room was that nobody is allowed to enter the room for the 14 day period. No cleaning allowed, so we had to keep the room fairly clean all by ourselves. We were of course permitted to get a change of linen or towels by simply leaving the dirty ones outside the room.
Quite a view from my hotel room
Supermarket Delivery Orders
Mandatory Quarantine guests are also allowed to utilise a delivery service from the Woolworth Supermarket. I never had a need to use this, as the 3 meals a day were quite satisfactory for me. As were the complimentary tea, coffee and toiletries. But it’s nice to now the service is available if required.
Free Quarantine Meals
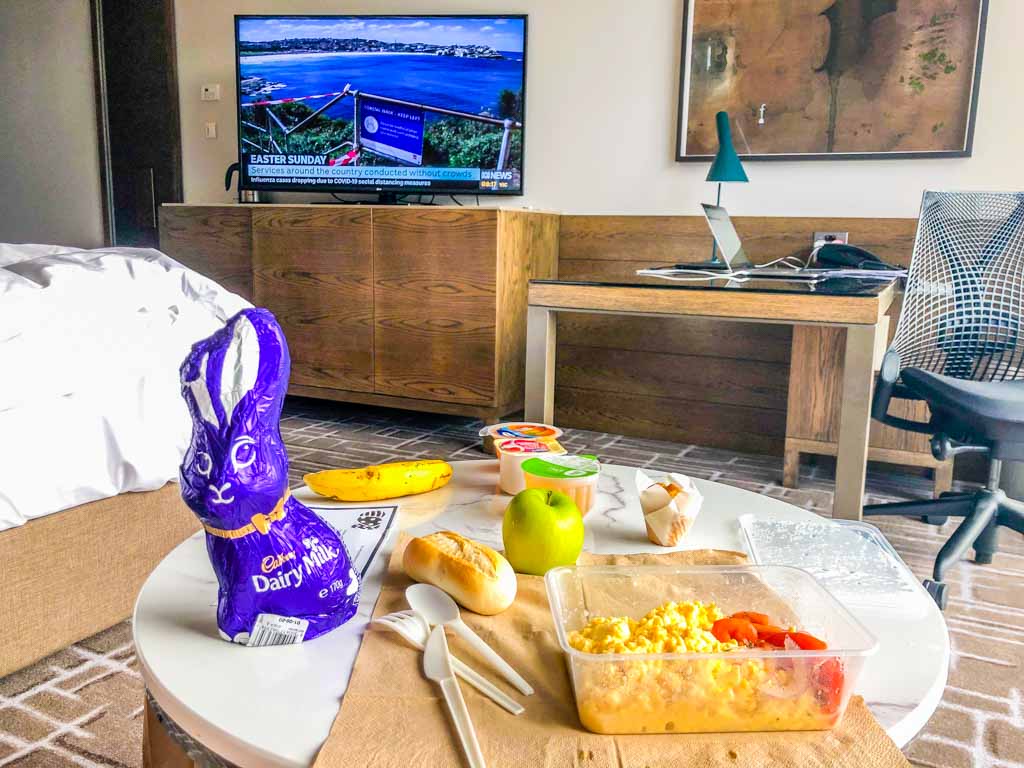
The meals were all delivered contactless, meaning they leave a bag of food outside the door and knock, then run away. You just open the door and pick up your delivery. The variety was great and the portion sizes were small but sufficient, which is great because it means that with a little exercise you won’t put on weight.
I was pleased to get some small packets of potato crisps and an occasional chocolate bar to make all those movie nights a little bit more enjoyable.
Easter Bunny was a nice touch with breakfast on Easter Sunday
Keeping in Good Health During Mandatory Quarantine
I believe it’s important to get at least half an hour of daily exercise during the mandatory quarantine. I ensured I followed an exercise routine, push-ups, sit-ups, walking stretching and similar exercises. and there are endless suggestions available on YouTube.
Grateful for our Mandatory Quarantine
While many people moan and groan about the mandatory quarantine, I am eternally grateful. With a bit of planning ahead (laptop, ipad, HDMI cable etc) the quarantine can be very productive. But the most important thing is that we helped the cause, to not import and spread the dreaded coronavirus.
So if you are contemplating a mandatory quarantine in Melbourne, Australia, don’t be scared. Just make sure you bring something to keep you busy like books, laptop, iPad etc, and you will be looked after. And best of all, you will help us all to flatten the curve and hopefully reduce the number of people going to the hospital, or worse.
GoPros are a true wonder of the modern age. There is so much technology packed into this tiny action camera. But now more than ever there are so many options to choose from. So why buy a GoPro? Here are 21 things to love about GoPro’s. These will give you some hands-on insights into what makes these such a neat little action camera.
Note: This post may contain affiliate links. Please read our disclosure policy for more information.
Huge Range of Accessories
The range of GoPro camera uses is mind-boggling. You can attach a GoPro to virtually any part of your body. Likewise, you can attach it to virtually any part of your car, bike, board, boat, or whatever. All you need is an accessory.
GoPro market an impressive range of genuine accessories. These will cater for practically any purpose you can imagine. They make sure you can video any kind of action using their vast accessories range. And if you’re not too fussed about GoPro quality in your accessories, just look toward the after-market range of gear.
Waterproof to 40m
The GoPro Hero5 was the defining moment for the GoPro action camera range. This was when GoPros became 100% waterproof without the need for a case. Prior to that, you had to use a special case to keep the water out of your action camera. Now your standard GoPro is waterproof up to 131 feet (40 meters). Now that’s impressive!
GoPro Hero5 Black pool fun
Time-Lapse & Time Warp
When on holidays in some beautiful exotic location, there’s nothing I love more than setting the up GoPro on a GorillaPod and pointing it at the setting sun. A GoPro time-lapse sunset is a special experience and a unique way of recording your holiday.
The GoPro Hero7 Black introduced Time Warp, which is Time-Lapse on steroids. Time Warp builds in the awesome image stabilization features of the GoPro Hero7, and applies it to the Time Lapse feature.
The result is the ability to record stable footage whilst walking. It’s a great way to condense a walk-through some amazing destination into a short, watchable time frame.
Time Lapse Sunset
Auto Image Rotation
I love how the image on the GoPro automatically rotates when you rotate the camera. This feature is called Auto Image Rotation. This may seem trivial, but it’s a big deal. This means you can mount your camera to a roof, a wall, a tree branch, or virtually anything that’s at an odd angle.
It also means you can get some great ground-level shots by using some kind of pole and just hold your camera upside down near ground level. Ingenious!
Looping
If you want to catch that moment a marlin strikes your bait, then looping is for you. With this feature, you can film a scene for as long as your battery will allow, and the footage will keep looping over itself so you don’t run out of memory. When the special moment arrives, you can be sure you captured it.
Looping Mode Icon in Lower Left of Screen
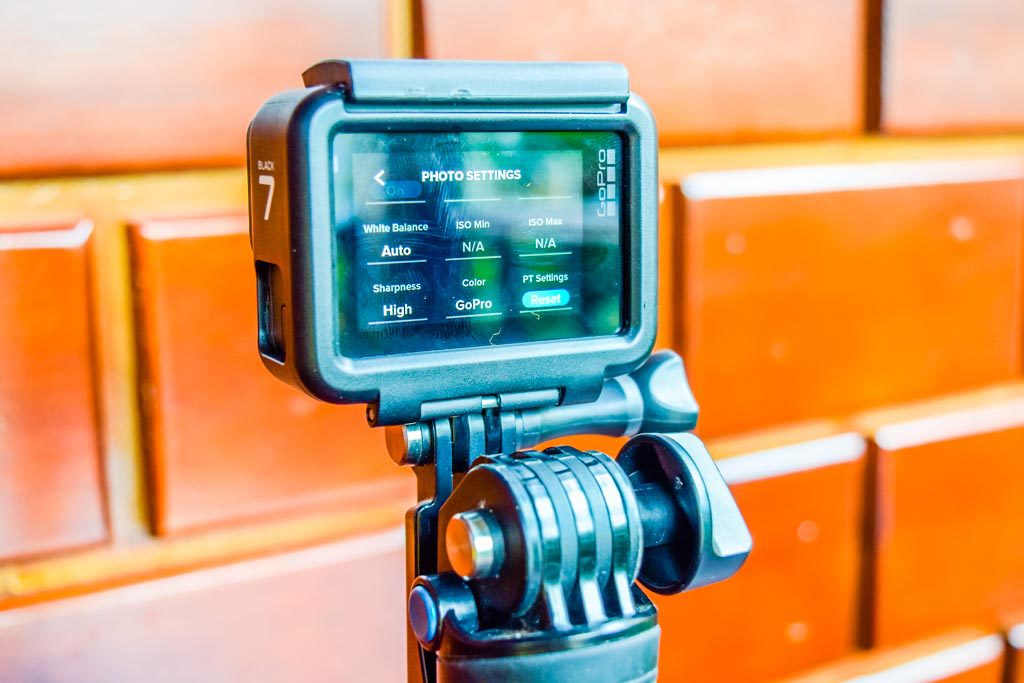
Protune
Protune opens up a whole new toolbox of settings when you want to have more control over your video recording. You can manually set your aperture, speed, colour grading…. This is a great way to get the best picture quality for your footage, without letting the automatic settings make the adjustments for you.
Protune Settings on Hero7 Black
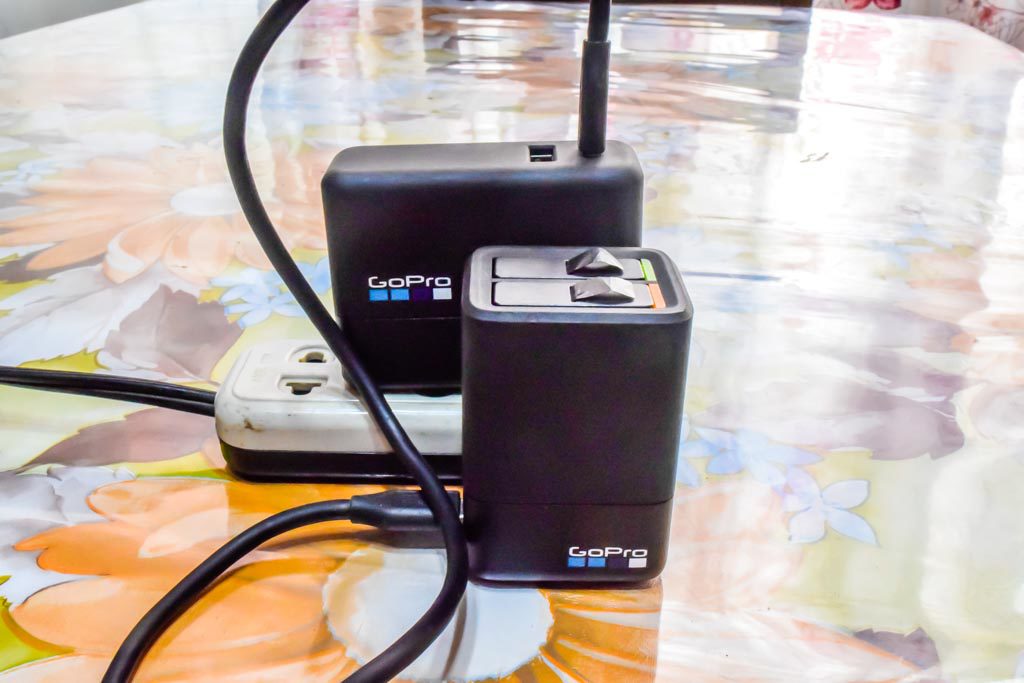
Charging Options & Spare Batteries
In the grand scheme of things, GoPro spare batteries are quite cheap. I always have 3 spare batteries in my kit so that I never run out of juice. They are quick and easy to change, and this way you have a long supply of power.
Charging 3 batteries at once
I recommend you add a supercharger, a GoPro wall adaptor especially for charging GoPros, and a double battery charger to your kit. Once you do this the charging options you have is quite extraordinary. Depending on your situation you can choose from many options to recharge your power.
Smart Phone Remote Control
GoPro has an amazing companion app for its action camera range. The GoPro app is amazing because it acts as a remote control for your GoPro, complete with preview screen. So by mounting your GoPro on a tripod you can control all the settings, press record and watch the preview all on your smartphone. Now that’s a smart way to use your phone!
GoPro App
As well as acting as a remote control, the GoPro app has many more terrific features. For example, you can update the firmware on your GoPro. Or you can update any of your settings, including ProTune.
The most convenient feature of this app is to wirelessly download all your videos to your smartphone. It will save them into the GoPro App so that you can export or copy them wherever you want. And if you are using an iPhone it will also save copies into your Photos library. Now that’s convenient.
All I do at the end of the day is re-format the micro SD card in the GoPro when the video files are all downloaded. It takes literally 20 seconds and is a fast way to delete all your files for a new day of action.
Quik App
After you have downloaded all your footage into a smartphone using the GoPro App, you can get even crazier. GoPro has a second app called Quik, which quickly creates a smart video from your footage.
You just press one button to export to Quik, and that’s it! After a few minutes, you have a beautifully produced video to export to social media, or wherever else you want it.
You can actually get more creative in the Quik App and make your own edits. There are dozens of styles to choose from, and heaps of effects to play with. This is possibly the smartest video editing app I’ve ever come across.
Compact Size and Weight
Cameras have been pocket-size for many years now. Especially now that smartphones have such amazing cameras. But the GoPro is so small, so compact that it leaves all other cameras in its dust. The GoPro Hero7 Black weighs a mere 115 grams.
As well as fitting neatly in your pocket the GoPro is a great travel camera, especially when you’re travelling light. That makes them a perfect choice for backpackers. The accessories are also lightweight and compact.
You don’t need necessarily need to bring many accessories, and you can package the GoPro up into a small and lightweight kit. Much smaller than the average DSLR or Cam Recorder.
Rugged Design
GoPro doesn’t use shockproof as a marketing tactic. But take it from me, these things are shockproof. I have dropped my GoPros on many occasions and given them their fair share of heavy bumps. Take it from me, these cameras are tough.
Let me compare this to a Sony Cybershot compact camera I once had, which I loaned to my 8-year-old son one day at Disneyland. Towards the end of the day, he dropped the camera about 2 feet onto the floor of a pirate ship. It was broken, never to be used again. That makes the GoPro so far ahead of the competition when it comes to rugged design.
Optical Image Stabilization
Admittedly with the GoPro Hero5 Black, the Optical Image Stabilization was not all that good. I used to pair it up with a hand-held gimbal stabilizer and managed to get some spectacular results when it comes to stable footage.
But the days of gimbals are over with the GoPro Hero7 Black on the market. Nicknamed the Gimbal Killer, this GoPro has incredible video stabilization without the need for a gimbal. This is actually the whole reason I bought this camera, to get rid of the Gimbal. To me, this makes the GoPro Hero7 Black the best GoPro for the money.
Optical Zoom
Another selling point for the GoPro Hero7 Black for me was the 3 x optical zoom. This is an amazing feature, and hard to live without once you’ve used it for a while. The interface is very well done such that you can easily change the zoom factor in a tight situation.
Impressive Model Range
I would say that anything from a GoPro Hero6 Black or newer is still a flagship model. There are quite a few features missing on the GoPro Hero7 White and Grey that I consider mandatory, however, the point is that GoPro has tailored their impressive line up to suit any budget.
You may decide to purchase the best cheap GoPro, the entry-level Hero7 White. Or go for the top of the line, Hero7 Black.
And if that’s not enough then there’s the range of session cameras. Sure there are loads of features missing from these, such as the LCD screen. But there’s nothing I love more than seeing more people entering the world of GoPro action cameras. And this is made possible thanks to the impressive line-up.
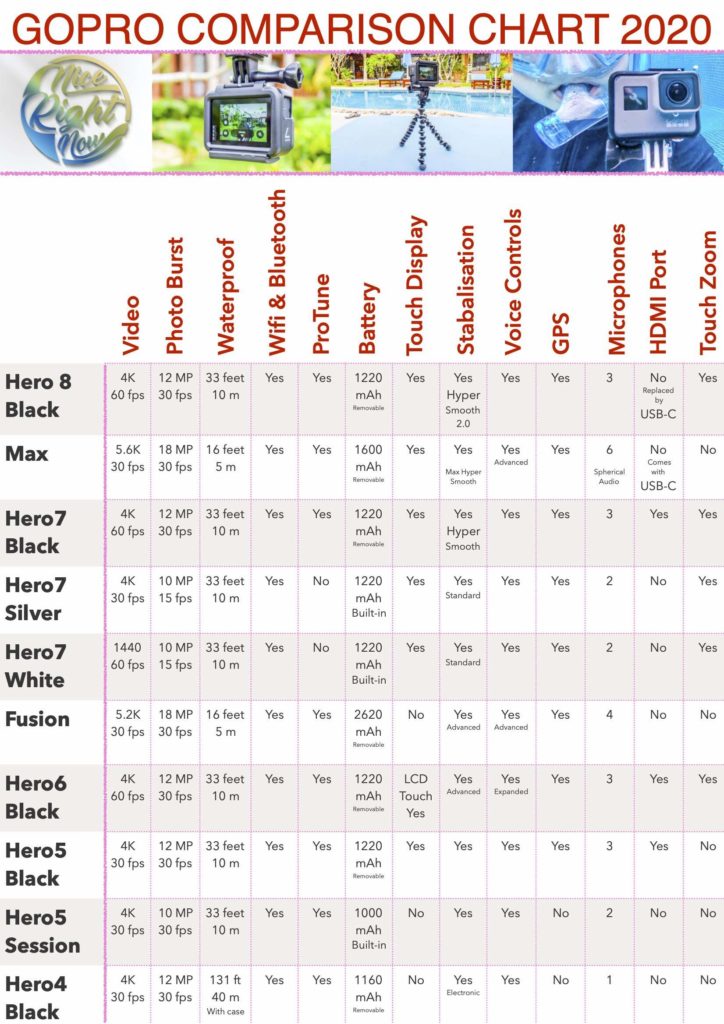
If you’d like to see a handy GoPro Camera Comparison chart, check this article to compare GoPro models.
Online Instructionals
Unless you’ve been living under a rock, you would realise that you can learn how to do virtually anything on YouTube these days. And GoPro is a perfect example. There is no feature on these little action cameras which does not have some kind of instructional video on YouTube.
This is especially true with GoPro because it has achieved such a cult status. There is such a gigantic following that the size of the market dictates the size of the instructional library.
But GoPro instructionals take it one step higher. Instead of just explaining how to do things, you can find instructionals on how to take it to the next level. Yes, you can easily learn how to achieve true GoPro mastery, higher than anything you believed was possible. Now that’s something you won’t find with a cheap GoPro knockoff.
Standard Sized Batteries
In an unforeseen boon for GoPro upgraders, GoPro has decided to keep the same battery size through the GoPro Hero5, Hero6, Hero7 and Hero8 range. This means if you had spare batteries for your GoPro Hero5, they will still fit your Hero7 should you upgrade.
This is a trend which I sincerely hope GoPro sticks to. Bad luck if you’re upgrading from a Hero 4 to something higher because your old batteries are now obsolete.
I don’t think I’ve ever seen a match made in heaven more so than pairing a GorillaPod to a GoPro. These things work together perfectly. GorillaPods are the most versatile tripods ever built. And GoPros are the most versatile action cameras ever built. Put them together and you have versatility squared.
I’ve even found another use for the GorillaPod, and that’s as an external microphone attachment. When plugging in an external microphone such as the Rode Video Micro to the GoPro, it’s quite easy to attach the microphone to the GorillaPod using something as simple as a hair tie.
Great Still Photos
My GoPro is primarily an action video camera. That is the whole reason I purchased a GoPro, and that’s how it is used 90% of the time. It is perfect for that. But it also takes some amazing still photos. Maybe not quite as good as a new iPhone, but GoPro photography is actually not that far behind.
On occasion, I’ve had to leave my iPhone behind, and just rely on the GoPro as my one and only travel camera. For example, kayaking along the coast of Vietnam. As well as taking loads of video, I have also banged off a few still shots. It’s really easy to switch from video to photo on a GoPro.
The 12MP super photos have been impressive, to say the least. I’m not exactly sure what the new Super Photo feature in the GoPro Hero7 Black does, but it takes amazing photos!
Wide Angle Photos and Video
I’m always comparing my GoPro to my iPhone because they are my 2 main cameras. And my 2 favourite cameras. But one trick the GoPro has that the iPhone does not is the ability to take wide-angle photos and video.
The GoPro wide-angle mode is optional, you can easily switch between wide-angle and normal. Actually, you have some in-between options as well. In the true wide-angle mode, you can capture 170 degrees of the action. That means you capture so much more action than the iPhone or most other cameras.
In fact, single feature has risen GoPro to the top over the years. GoPro is famous for that fish-eye action footage, where every little bit of the action can be seen.
Voice Control
At first, I thought this is nothing but a gimmick. That is, the ability to control your GoPro by talking to it. For example, “GoPro Start Recording” will start your video recording.
Over time I have tried this for real, and it’s actually quite useful. For example, when you have the GoPro strapped to your head using a head strap. It’s kind of awkward to turn the camera on using your hands, so the voice control works well.
Just ask the person next to you if the red recording light is on, because sometimes my Australian accent is hard to understand, even for a brilliant GoPro voice recognition computer.
Love-Hate Relationship
When I first purchased a GoPro, I did not like it at all. I didn’t understand the features, and it felt too weird. But over time, our friendship grew. And now I absolutely love my GoPro, now that I’ve taken the time to understand how it works. And then with each new model that comes out, the love relationship grows stronger.
My GoPro Hero7 Black is without a doubt the best, most fun, the most versatile camera I’ve ever owned. But there are still a few things that bug me about a GoPro camera. Maybe even hate. That’s why I have another blog called 10 things I hate about GoPro. That’s not to say I hate GoPros. But to give a fair assessment, you should at least discover the less desirable aspects of these cameras as well.
Will You Enter the World of GoPro?
So now you know why GoPro is my favourite camera. If you have the money then you can’t go wrong with a GoPro. These truly are the dynamo of the action camera range. But there are more and more competitors entering the market all the time. DJI comes to mind with their epic new Osmo Pocket.
I hope the things that I love about GoPro may inspire you to take the leap of faith, I truly believe you won’t regret it. Now the only real question is, which GoPro to buy.
Would you like a free copy of our Ultimate Bucket List?
Not sure where to travel to next? We have created the Ultimate Bucket List to help you plan your next trip. 1170 awesome travel destinations in 167 countries. And we want you to have it for FREE.
When you visit Europe there are so many must-see destinations to squeeze into your trip. This can make planning your trip quite overwhelming. We’ll show you how to break it down into smaller chunks, and how to plan your perfect Europe Itinerary ranging from 2 weeks to 4 weeks.
Note: This post may contain affiliate links. Please read our disclosure policy for more information.
A memorable lunch in Santorini Greece
Step 1: Book Your Holidays
Sounds obvious right? The thing is, it’s important to lock in some dates so you can seriously start looking at airfares. So it’s better if you submit that leave form at work, and lock in your holiday dates. Now you can seriously start your European plan.
Airfares to Europe should be booked at least 3 months in advance so you can secure some decent deals. Actually it’s even better to book 6 months out because accommodation availability will be much better and you will have more options to choose from.
Fancy a trip to Copenhagen?
Step 2: Check the Weather
Maybe you should have done this first. It pays to know if you’re travelling into hot weather or cold weather. Which would you prefer… a wintery ski holiday, a summery beach holiday. Or maybe something in between, like a crisp autumn break.
Our favourite time of year in Europe is early Autumn. That’s normally September-October. This is the shoulder season and you tend to get great deals on accommodation, and the weather is glorious. Not too hot, and not yet snowing either.
Spring is a close second for us, from March to May. Depends where you go, but this time of year you will get pleasant weather and picturesque snow-capped mountain peaks. Accommodation is still reasonably priced and plentiful.
Glorious summer weather in Santorini Greece
Step 3: Set Your Budget
Why is budget so important in Europe? It’s because of the vast difference in costs between different parts of Europe. Eastern Europe is generally the cheapest part to visit. If your budget is tight, you might be best sticking to Eastern Europe.
You just need to google “cheapest cities in Europe” and you’ll get loads of results like this one from TripSavvy. In a typical Europe trip you’ll need to set a budget for these 5 different categories:
Airfares
Ground Transport
Accommodation
Daily Expenses
Tours
Once you have set a budget and a duration, you can start working out your Europe Trip Itinerary by itemising each of these 5 travel categories and aligning your region to the relative cost of the area. For example, Scandinavia can be triple the cost of Eastern Europe. Thus a tight budget may put Scandinavia in the “maybe next time” bucket.
Day tour to Karlstejn Castle in the Czech Republic
Step 3: Find the Best Airfares
I guess it comes down to personal preference, but we use the Skyscanner app for all our airfares. This useful app/website compares all the different airlines and travel agents to find the cheapest deals.
But you must be careful, sometimes Skyscanner refers you to some rather dodgy travel agents. You figure this out when the dodgy travel agent suddenly increases the price when it’s time to pay. If you encounter this, just pick the next cheapest on the list. Easy.
Moscow is a great option for cheap airfares
Where Are You Flying From?
The first step is to figure out where you’re leaving from. This is normally fairly obvious, it’s normally where you live.
Where Would You Like to Go?
The next step is the fun part. We recommend just browsing through all the cities in Skyscanner on your chosen dates, and looking for the cheapest fares.
Perhaps start off with a part of Europe. “I’ve always wanted to go to Greece”. “I have to see the City of Love (Paris)”. Then check out all the cities in the region. Look for return airfares on your chosen dates, and try moving a couple of days either way.
Germany is well worth a look
Look for return airfares to your origin. Quite often 1 or 2 cities will stand out with awesome cheap deals. For example, Norwegian Air often has crazy cheap flights via Oslo or Stockholm to all parts of Europe.
We’ve seen return Airfares from Bangkok to Barcelona on top-class airlines for $600 Australian, that’s like about US$450. And I’ve also flown return from Vietnam to Switzerland for $500 Australian, about US$400.
Check your Airline Rating
I always go to Skytrax to check out the rating of the airline. Generally, I don’t choose them if the rating is below 5, aim for an overall score of 6+. Skytrax is fairly accurate in my experience. If it’s a dud airline, just forget them and move on to another one.
Airfare Checklist
Do you have sufficient baggage allowance?
Are the arrival times in line with hotel times? We prefer to arrive around lunchtime to check-in to the hotel at 2 pm and depart mid-afternoon to check out of the hotel around 11 am.
Is the Skytrax rating 6 or above?
Are your airport transfer times sufficient between flights?
Easyjet are an excellent budget airline
Step 4: Check Visa Requirements
Make sure you check the tourist visa requirement in the country you intend on staying. And check if you satisfy all the requirements. Visas are generally not negotiable so you need to get this one right.
For example, I once booked all our family airfare tickets for 1 week in Moscow. Then after researching the visa requirements I learnt that we needed to send our passports away for 3 weeks to get stamps.
But we also needed our passports in our possession for other travels. In the end, the Russian visa was impossible for us, and we had to cancel our airfares. That is sad and expensive.
Oh and make sure you fully understand the Schengen visa requirements, that is mandatory knowledge when travelling to Europe. This is the most common visa for visiting Europe, and it does have some limitations.
Visa Checklist
Is your country eligible for a travel visa in your intended Europe trip itinerary?
Do need to submit visa applications in advance?
Are there sufficient pages remaining in your passport?
Are you passport expiry dates at least 6 months after travel dates?
Bulgaria has minimal visa requirements post-communist era
Step 5: Create Your Europe Itinerary
Now for the fun part. You should now have a landing point somewhere in Europe. It’s time to plan your Europe trip itinerary from your point of arrival in Europe. Here are our golden rules of travel in Europe.
Golden Rules for Travelling in Europe
Minimum Stay:
Stay a minimum of 3 nights in each place. 4-6 nights is the optimum duration in any one place for us. Any longer and you will probably regret not moving on to see more places.
Boring Cities in Europe
There’s no such thing as a boring city in Europe. Every city we’ve been to, even those not really on the tourist map, has an amazing variety of things to see. The best Europe itinerary usually includes a place which is not the most popular for tourists.
Budapest has so much to see
Airfares are Cheap
Airfares in Europe can be ridiculously cheap. So you can travel by land in any direction from the city you arrived in, then simply catch a one-way flight back there on the day of your departure. We always use this method to plan a Europe tour itinerary.
Trains are Awesome
Travelling by train in Europe is awesome. The systems are so well established and there are so many interlinked tracks that you can get virtually anywhere. And they’re modestly priced.
Arriving at the modern Vienna (Wien) Station
Crossing Borders
It’s easy to cross borders in Europe. Generally, once you are in the Schengen area there are minimal border checks. Feel free to move through different countries.
Buses are Cheap
Buses in Europe are ridiculously cheap. And they don’t take much longer than flying. Remember you have to get to the airport, check-in, wait, fly, pick up your bags, find a taxi. It’s often just as quick to catch a bus and a fraction of the price. We love FlixBus and used them often.
Flixbus is a cheap way to change countries
Bonus Stopovers
Sometimes you can get a bonus stopover for a couple of hours or an afternoon in a random city. For example, flying Geneva to Budapest on Brussels Airlines, we stopped in Brussels for around 8 hours. This gave us time to catch a train into the old city centre and do some exploring for a few hours.
Budapest Grand Palace on the Danube River
Wasted Travel Days
Each day spent travelling between destinations is normally a wasted day. Travelling through Europe is a balance between seeing as much as you can, and not wasting too many days travelling. A perfect Europe 2 week trip may only allow 2 or 3 travel days, so you don’t waste too many days travelling.
5 Sample Itineraries in Europe
Here are a few of the 2 week Europe trip itineraries that we’ve tried out using the above strategies. It’s just a case of choosing point A to start and point B to finish. Then select 2 or 3 stops in between. Then figure out easy train or bus options to move between the different stops. It’s that simple.
Fly to London, United Kingdom. Connect to homeward flight.
Getting around London is a breeze
Get Creative
OK, so you can see that the sky is the limit when you get creative with your travel between cities. All the above have been chosen because they have economical and easy transport options between each city.
If you really want to be adventurous, you could just book your return flights from home, and a flight from Point B back to Point A. Then makeup all the stops in-between point A and point B as you go.
I don’t recommend this option because things do tend to get booked out early in some cases. Even buses and trains can get booked out, and especially accommodation. For inter-country transport and accommodation, I suggest booking at least a couple of weeks in advance.
A secret staircase in 700 year old Draculas Castle
SIM Cards
It’s really important to keep a smartphone with data at all times. Especially one a 2 week Europe trip, you simply can’t afford to lose time getting lost during your travel days. Smartphones are invaluable for using Google Maps and accessing the transport timetables for buses and trains.
Throughout most of Europe, you can use the same SIM card as you move through different countries. You just need to do a little research to make sure that your purchase the right one. Or ask the person at the counter it works where you are going.
For example, we purchased SIM cards on arrival at Heathrow Airport in London. The brand was Three, and they can be purchased in a kiosk in the arrivals hall. These SIM cards worked fine in every country we travelled to, except in Eastern Europe.
It can be a little tricky recharging the SIM card each month, but we managed to do it and did not have to purchase another SIM card in other countries.
Hot tip: Buy some recharge cards when you purchase your SIM card.
Catching a train to Sweden is a breeze
Currencies and Money Exchange
Whilst many countries use the Euro as their official currencies, there are many countries who do not. For these, you simply need to withdraw the local currency at an ATM machine on arrival.
It pays to make sure you have a suitable card to use at the ATM. For example, our everyday Australian ATM charges $30 per transaction, just because we’re overseas. And then they add some more fees and give a terrible exchange rate. Needless to say, we never used that card.
Our best travel ATM card is Citibank. These are renowned for having great ATM cards for travelling. Our second favourite is HSBC. Be sure to choose an account with no fees for using ATM’s in other countries. It pays to organise a good ATM card, it can save you hundreds of dollars in unnecessary fees.
Arriving by train at Luxembourg Central Station
The Best European Plan
Now for the fun part. You have your airfares and your visas sorted. You have accommodation sorted as well as your transportation between cities. Activities each day can be safely left until you get there, these are the easy part to figure out, and they may depend on the weather.
We believe this is the best Europe Itinerary because you’ve optimised your budget, your trip duration, your bucket list and the pace of your sightseeing. The good news is the cost of a Europe trip does not need to be prohibitive. We do hope you enjoy your trip. Bon Voyage…
Time to go home at Heathrow Airport London
Do Your Research
You can never really do enough research when planning the trip of a lifetime. Here are some hand-picked gems to help you along the way.
Would you like a free copy of our Ultimate Bucket List?
Not sure where to travel to next? We have created the Ultimate Bucket List to help you plan your next trip. 1170 awesome travel destinations in 167 countries. And we want you to have it for FREE.
It’s tough to see Athens in a day, there are so many must-see attractions. If you have a limited timeframe when visiting Athens, you will want to see all the best tourist attractions in a short amount of time. Here are the Athens Top 10 Attractions to help you to prioritize only the best.
Note: This post may contain affiliate links. Please read our disclosure policy for more information.
Purchasing Tickets
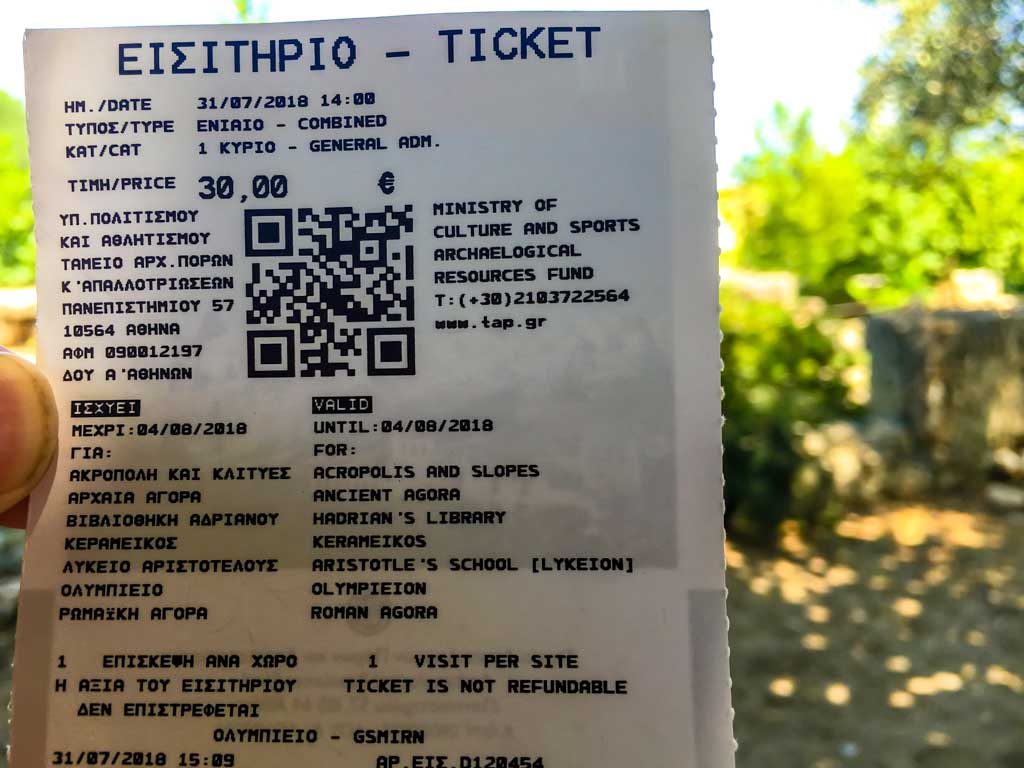
It’s important to get your tickets sorted out to minimize entry payments and inconveniences. The best ticket is the €30 Combined ticket. This will give you entry into the 7 most historic sights in Athens. These are all some of the best places to visit in Athens, but not all are included in this top 10 list.
This ticket is terrific value, considering that a single entry into the Acropolis costs €20. Importantly, you also get a skip the line pass into the Acropolis and Parthenon with the combined ticket. You can purchase this ticket at any of these attractions.
The 7 attraction combined ticket
Note that there are ways to see the Acropolis for free, or at a discounted rate. Check out this article for more information.
Top 10 Attractions in Athens
The best attraction in town is undeniably the Acropolis. This is the most visited attraction in Greece, and it can have a long line up to purchase your ticket and enter the Acropolis.
I recommend you don’t visit the Acropolis first. Doing this will probably land you in a very long line to purchase your ticket. Better to purchase a €30 combined ticket first at a less popular attraction, then you will get a skip the line entry to the Acropolis.
1: Acropolis Museum
It’s a great idea to visit the Acropolis Museum before you go to the Acropolis so you fully appreciate the history of this important site. It’s probably best to do this on a separate day to your Acropolis visit. Each of these stunning attractions deserves several hours of your time.
I firmly believe in the Trip Advisor People Awards. They are voted online by travellers just like you and me. And in 2019 they voted the Acropolis Museum as the 6th Best Museum on the planet. Impressive, right?
The museum price is quite cheap at €5, and it is not included in your Acropolis ticket. There’s a great cafe here with stunning views of the Acropolis. But then again, virtually all around this large hill has stunning views of the Acropolis!
An interesting model of the counterweight pulleys + cranks / cranes used to lift stone at the Parthenon, from the Acropolis Museum. pic.twitter.com/CnO5oLL1Xj
This is the second-best ancient site to see after the Acropolis. It is an expansive collection of ancient Athens ruins on the northwest slope of the Acropolis. You could easily spend half a day wandering through this amazing site, so give yourself plenty of time.
Acropolis with Ancient Agora in the foreground
The word Agora roughly translates as a gathering place and is at the heart of Ancient Athens. Most of the historical ruins in the Ancient Agora of Athens date back to around 4th century BC.
The most intact and interesting attraction here is the Temple of Hephaisteion. Built-in 449 BC, this is one of the biggest of all ancient Athens monuments which can be seen from all over the central city area.
Temple of Hephaisteion
3: Acropolis and Parthenon
You can’t visit central Athens without “not seeing” the ancient Acropolis. This is the most prominent of all Athens ruins. It is perched right up on top of a hill, such that you can see the Acropolis from all over central Athens. And virtually all Athens tours include the Acropolis.
You really need to take the walk to the top to appreciate this landmark property. Good thing that AcropolisAthens tickets are included in your combined ticket.
You should definitely walk up to the top of Acropolis if you are physically able. Be warned, it is quite strenuous and requires lots of stairs. But the views at the top are spectacular. And you will be treated to many amazing historical sites along the way.
The amphitheatre at Acropolis
Here are just a few of the sites you will see.
At the centre of the Acropolis is the Parthenon, the large rectangular ruin built way back in 447 BC.
The Old Temple of Athena, built in around 525 BC, sits next to the Parthenon.
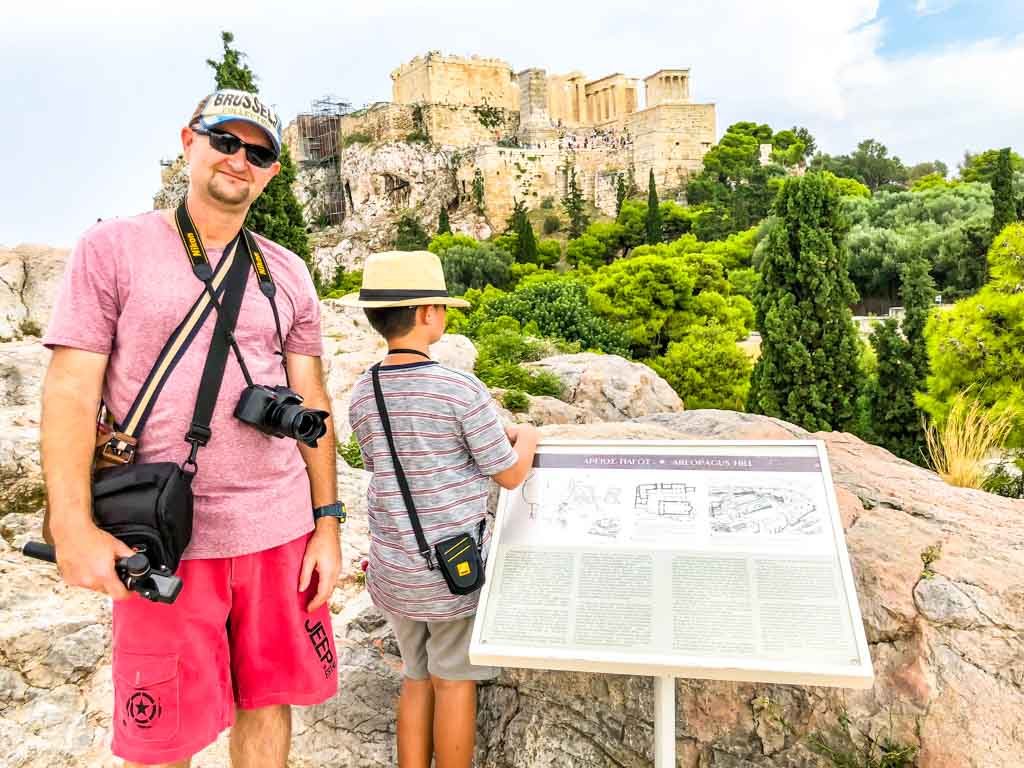
Areopagus Hill, where St.Paul the apostle stood to teach the new religion of Christianity in the 1st century. You can actually stand where St.Paul stood and taught.
Odeon of Herodes Atticus is an amphitheatre built in 161 AD on the slopes of the Acropolis.
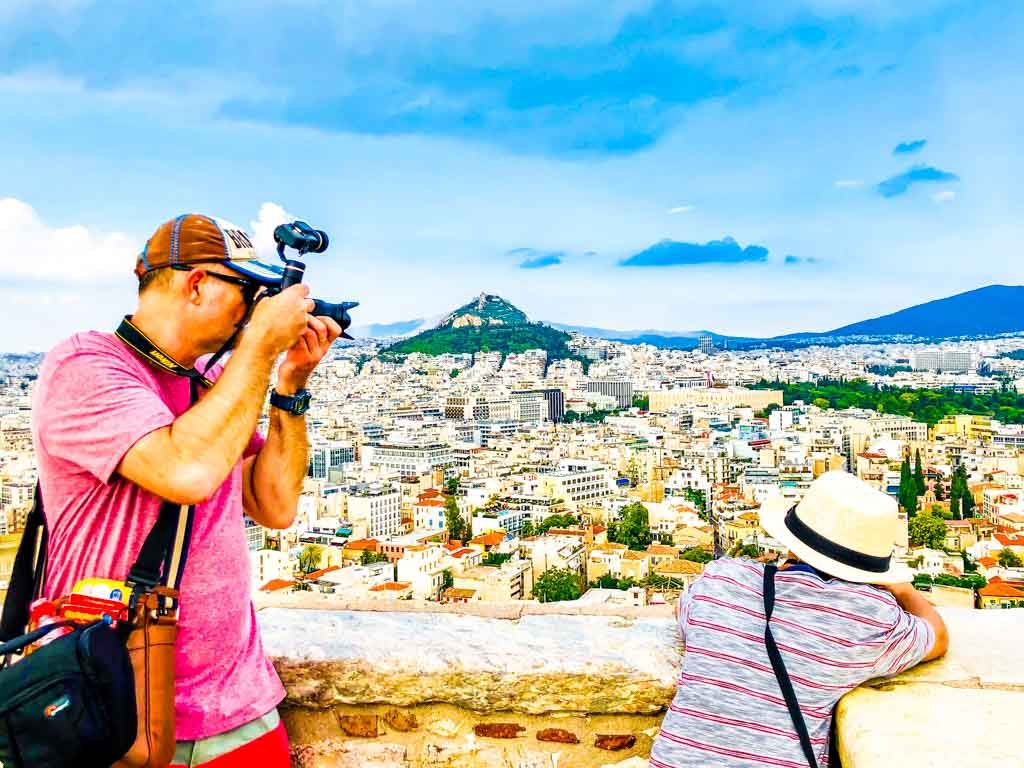
Spectacular 360-degree views over Athens and surrounding coastline.
The rock where St.Paul preached in the 1st century
As you can easily see the Ancient Acropolis and Parthenon are undeniably the best places to visit in Athens. If you only have time to visit one attraction, it must be the Acropolis.
The Parthenon at Acropolis
4: The Temple of Olympian Zeus
We found this to be one of the more picturesque sites in Athens. Also called the Temple of Olympian Zeus, this is the place to go for some spectacular photos. The massive temple is in the centre of Athens and was dedicated to the king of all Gods, Zeus.
Part of the Temple of Zeus
The temple itself is 44m wide and 110m long and is surrounded by a series of giant columns. The building was completed in the 2nd century AD, over 600 years after the massive project began! 21 of the original 104 columns are still standing.
5: The Panathenaic Stadium
This amazing stadium is such a cool place to visit, and my top pick for fun things to do in Athens with Kids. That’s partly due to the guided tour audio devices you can take for a self-guided tour.
Unfortunately, it’s not included in the 7-sites combined ticket. Don’t worry, the entrance fee is only about €5. And it’s easily accessible with a hop-on-hop-off bus stop at the front.
Inside the Panathenaic Stadium museum tunnel
Panathenaic Stadium is the only white marble stadium in the world. In fact, it’s the only stadium in the world built entirely of marble. It was built around 330 BC and is one of the main historic attractions in Athens. It is also where the first modern Olympic Games were held.
You can also hire an audio commentary device and take a guided tour around the entire stadium. It will take about an hour, and is an engaging and fascinating experience. Near the end of the tour, you are walked through an ancient tunnel to an underground museum.
A popular activity is to have a running race on an actual Olympic track, then stand on the podium for an amazing photo. This is an excellent way to conclude your tour of the best Athens Historical Sites.
The Olympic podium
6: The 4 Museums
This museum district makes it into the Athens top 10 attractions, and actually offers several options in one convenient location. You could easily spend an entire day in this museum district, which includes the following:
There are also a lot of nice parklands in this area full of interesting historical sights. We recommend the cafe at the back of the Byzantine and Christian Museum for a break, with beautiful and historic parkland setting. Here you will find some interesting archaeological diggings of the aqueduct network of ancient Athens.
Stopping at the War Museum
7: Syntagma Square
This is one of the cool things to do in Athens, and popular with locals and tourists alike. Syntagma Square is the central square of Athens and a non-stop hive of activity. Here you will find an abundance of shopping, cafes, and restaurants.
Syntagma Square is also flanked by the Old Royal Palace and Greek Parliament House for some outstanding sightseeing. In fact, there is fantastic sightseeing in virtually every direction from this popular square, the biggest in Athens.
Monastiraki Square is where you will find the Monastiraki metro train station. How convenient! This square is also a gathering place lined with amazing authentic Greek restaurants, and surrounded by a giant flea market. And it’s a stone throw from the best Athens Historic Sites, like Hadrian’s Library and Roman Agora.
This area is buzzing with activity, and it literally never closes. You are just a right in the middle of all manner of shopping, conveniences, and restaurants, which all flank the lively Monastiraki square. This is the place to come for some cheap souvenir shopping or to sample some authentic Greek cuisine.
There’s also a wonderful old church in the middle of Monastiraki Square, which makes for a great photo. You will also find some wonderfully. preserved archaeological diggings with glass floor viewing platforms.
Monastiraki Square is great for shopping
9: Rooftop Bar or Restaurant for Sunset
You could try to be on the Acropolis Hill for an unforgettable sunset. However, this is not possible during the summer due to the late time of the sunset, and the early closing time of Acropolis. Another great option for watching the sunset is at a rooftop bar.
There is no better way to finish your Acropolis visit than unwinding with some cool refreshments and a nice meal, whilst you watch the unforgettable Acropolis light show turn on at sunset. Undoubtedly one of the cool things to do in Athens.
We highly recommend the A for Athens restaurant and cocktail bar, with uninterrupted views of the Acropolis. Keep in mind that reservations are mandatory to enjoy this rooftop restaurant at Sunset. The restaurant is on the top floor of our favourite accommodation, the A for Athens hotel.
Monastiraki Square seen from MS Roof Garden restaurant
Right next door to A for Athens is the MS Roof Garden, on the top floor of the Plaka Hotel. This restaurant is cheaper than A for Athens, and the views are just as good. It would be wise to book a table for the best front-row views, but you can still dine here without a booking.
10: National Archaeological Museum of Athens
This is the largest archaeological museum in Greece and contains large collections of artifacts from different periods of Greek history from all over the country. It’s actually the richest collection of Greek artifacts in the entire world. It’s about 25 minutes walk from Monastiraki Square, but well worth the effort.
Entry to this museum is quite cheap at €5 low season and €10 high season. You can also purchase a 3 day combined ticket for €15, which includes the National Archaeological Museum, Epigraphic Museum, Numismatic Museum, and Byzantine and Christian Museum of Athens.
Museums are a wonderful source of learning for kids, and this huge museum is a testament to that. Definitely one of the best things to do in Athens with kids.
Here are your 4 best options for getting around to see the top 10 attractions in Athens.
By Foot
This is quite a compact city, and all of the Athens top 10 attractions are easily accessible by foot. Given that Athens is blessed with a lovely Mediterranean climate, sightseeing by foot is a great option.
The healthy way to go
Central Athens is also rather hilly so be ready with some comfortable footwear. But as an added bonus you will usually pass by some unexpected and delightful surprises along the way.
City Sightseeing Athens Hop On Hop Off Bus
The City Sightseeing Athens bus is an awesome way to see all the major attractions. It passes by all of the Athens top 10 attractions and is an efficient and economical way to see them all.
This is our top choice out of all the Athens tours available. Especially if you have only one day in Athens to do all your sightseeing.
City Sightseeing Bus
Uber
We love Uber, it’s a wonderful alternative to taxis. It also has a terrific iPhone app to make bookings easy. Uber is in Greece, and this is our preferred way of getting around. That is if you don’t want to walk.
Metro Train System
The Metro train system is worth considering if you’re on a tight budget. It’s not all that useful for travelling through central Athens due to the limited stops, but the metro is handy if you want to travel a bit further out. There are convenient stations at Acropolis and Monastiraki Square.
The Best of Athens
Athens is without a doubt one of the most tourist-friendly cities on the planet. It is very easy to see all the top 10 attractions in Athens, and it can easily be accomplished in 2 days. Or you could take longer to enjoy them at a more leisurely pace. Either way, you are sure to enjoy Athens!
Would you like a free copy of our Ultimate Bucket List?
Not sure where to travel to next? We have created the Ultimate Bucket List to help you plan your next trip. 1170 awesome travel destinations in 167 countries. And we want you to have it for FREE.
The Acropolis is the most fascinating historical site in Athens and the most famous landmark in Greece. As well as being a designated UNESCO World Heritage site, it is also a finalist in the New 7 Wonders of the World list. Built in the 5th century on top of a rocky hill in the middle of Athens, this is a must–see site. To make the most of your visit, here are 21 hot tips for visiting the Acropolis in Athens.
Note: This post may contain affiliate links. Please read our disclosure policy for more information.
Alternatively, you can purchase a single attraction ticket, which makes the Acropolis price €20. You will need to line up for this at the Acropolis ticketing booth when you get there, and the line can be quite long. This is another good reason to purchase the combined ticket because you can purchase your ticket at a less popular site.
Skip the Line Tickets
Another popular option for visiting the Acropolis is to purchase a guided tour with skip the line tickets. This means you can purchase your tickets well ahead, and you don’t have to line up at all. Now that’s cool.
2. Visit the Acropolis Museum
Ok, so we never did this, mainly because we ran out of time. Everybody else recommends you visit the Acropolis Museum first so you fully appreciate the history of the Acropolis and discover the important Acropolis s facts. It’s probably best to do this on a separate day to your Acropolis visit if you have time because both of these stunning attractions deserve several hours of your time.
I believe in the Trip Advisor People Awards. They are voted by travellers just like you and me. And in 2019 they voted the Acropolis Museum as the 6th Best Museum on the planet. Impressive, right?
The museum price is quite cheap at €5, and it is not included in your Acropolis ticket. There’s a great cafe here with stunning views of the Acropolis. But then again, virtually all around this large hill has stunning views of the Acropolis!
3. Read a Book First
Instead of going to the museum we decided to purchase a book on Ancient Athens history. This told us everything we wanted to know about the Acropolis, as well as many other parts of Athens and Greece. It’s such a fascinating read when you are sitting amongst it all.
I guess if you really wanted to save some money you could discover the history on Wikipedia or some other site. Here you will learn that the Acropolis is an ancient Citadel, and contains the ruins of some important buildings like the Parthenon.
Alternatively, you can simply check out a good YouTube history lesson on the Acropolis. Here’s an awesome video to get you going:
4. Take a Detour Up To Areopagus Hill
I found this to be one of the most fascinating parts of our visit to the Acropolis. Areopagus Hill (2) is located just near the main Acropolis entrance (1), so it’s convenient to visit.
On top of Aeropagus Hill
Areopagus Hill has some amazing history. You can climb up onto this rock and stand where the Apostle Paul stood 2,000 years ago. Only instead of listening to St.Paul preach, you will be more likely to be posting selfies with the incredible backdrop of Athens. Here are just a few of the things this rock is famous for.
The rock is really called Areopagus but was formerly known as Mars Hill after the ancient God of War.
It used to host the Greek Senate prior to 600 BC.
In ancient times the rock functioned as a court for convicting criminals and was the site for many famous trials.
The Apostle Paul delivered a famous speech here in the 1st century AD and is said to have taught the throngs of people here the new religion of Christianity.
5. Bring Your Own Water
You can buy bottled water near the Acropolis entrance at some small refreshment shops. But it is very expensive. It makes much more sense to bring your own. Note that you cannot purchase water up on top of the Acropolis hill, only down at the base.
Make sure you bring a large water bottle, it can get very hot up there. And you may spend longer than you thought up at the top when you realize how much there is to see.
6. Go Nice And Early
The early bird catches the worm at the Acropolis. That is to say, the early birds avoid the long crowd at the ticketing line, and they avoid the heat of the day. Just make sure you stick with the Acropolis hours, which is 8am opening time.
It is also a good idea for photographers to get up early. There are always hordes of people visiting the Acropolis, being the most visited attraction in town. So if you want any chance of getting that prized photo without people in it, going early is your best option.
7. Include in a Hop-On-Hop-Off Bus Tour
Athens has several different hop-on-hop-off bus tours. These are the tourist buses which allow you to get off at any of the major tourist attractions. And all of these include the Acropolis as a bus stop. This way you don’t even have to know how to get to Acropolis, the bus will just drop you at the main Acropolis entrance.
Once you have walked up the stairs to the top, you will want to take your time up there and enjoy the amazing history. The spectacular views are something you will want to savour, taking your time to admire them from every angle.
There are no food shops up on top of the hill, so you are best to make sure you fill up before you walk up to Acropolis. There are heaps of food shops at the base of Acropolis, so don’t worry about not being able to find something.
9. Bring Sun Protection
In case you didn’t know, Greece is a very hot and sunny place in the summer. And there is not hotter and sunnier place than the Acropolis, perched high up on a rocky hill. There are no trees at the top and very little in the way of shade. You are going to get sunburnt unless you take appropriate precautions.
It sure is hot up here
Make sure you at least bring a hat, preferably a wide–brimmed hat. Also some sunscreen. And it doesn’t hurt to wear light long-sleeved clothing as extra sun protection. You will want to spend a long time at the top, so come prepared.
10. Wear Solid Shoes
Wearing flip flops to the Acropolis would be a big mistake. Sitting atop a large rocky outcrop, you will find yourself scrambling across uneven rocky ground, not really suitable for flip flops. You need solid footwear so you don’t slip on the rocks. And your footwear should have a good grip on the soles.
The walk to the top involves some long winding paths and many stairs. Make sure your shoes are comfortable. A pair of stilettos would be a poor choice for the hike to the top.
The rocks are very slippery
11. Bus Up, Walk Back Down
Actually, if you are feeling fit, it’s a good idea to walk up to the Acropolis. It’s only about a 15-minute walk from central locations such as Monastiraki to the entrance to the Acropolis. It’s all uphill, reasonably strenuous and very scenic. Well worth the effort.
For those who have limited energy or time, it’s a good idea to catch a bus to the base of the Acropolis. But you don’t want to miss this amazingly scenic walk down to the surrounding Athens neighbourhoods. This is one of the most unforgettable strolls on the planet, and such a shame to miss it. And it’s easy because the entire walk is downhill.
If you take our advice and walk down to surrounding Athens, you will walk along delightful streets lined with authentic Greek restaurants and cafes. Some of these will even have some live traditional music playing. These make for a great place to compliment your Acropolis experience, and to grab an authentic Greek meal.
13. Know Which Days the Acropolis is Closed
The Acropolis is open most days of the year but is closed on a handful of days. Make sure you don’t plan to visit one of these days. If visiting around any of these main holiday periods you should get an update from an official Acropolis website.
25 and 26 December
1 January
25 March
1 May
Easter Sunday
14. Free Entry Days
How would you like to save yourself €20 entrance fee to the Acropolis? This is entirely possible on any of the free entry days. Once again it pays to check on an official website like this Ministry of Culture and Sports website. Here are the days where you don’t have to pay entrance fees.
The first Sunday of every month from 1st November 1st to 31st March
6 March (in memory of Melina Mercouri)
18 April (International Monuments Day)
18 May (International Museums Day)
Last weekend in September (European Heritage Days)
28 October
The Temple of Athena
15. Know the Free Entry Conditions
There are many other ways you can get free entrance when visiting the Acropolis. The government website publishes 17 different ways to gain free entry and 3 ways to gain reduced entry. Some of the free entry conditions might surprise you; just make sure you bring relevant documentation.
Here are a few conditions which qualify for free entry, and check the Government Website for full conditions:
Unemployed
Journalists
Persons with disabilities
Archaeological Site members
Single-parent families
University students
Tourist Guides
Young people under 18 years of age
Enjoying the view at the top
16. Know The Acropolis Hours
The Acropolis is open to visitors from 8 am to 8 pm. However, the last admission is at 7:30 pm.
If you’re interested in catching the sunset from the Acropolis, you should check out the sunset hours in advance to see if they fit the Acropolis hours. Note that daylight savings start around the end of March, with sunset moving from 6:45 pm to 7:45 pm.
Daylight savings is in place until late October. During Summer months you won’t be able to fit the sunset into the Acropolis opening times.
17. Train Access
If you’re wondering how to get to Acropolis, look no further than the Metro trains. Here are your best options for catching the Metro Train to the Acropolis. Each of these will involve a walk of up to 15 minutes.
Take a train to Metro Station “ACROPOLIS”, then via Dionysiou Areopagitou Street.
Metro Station “ACROPOLIS” then through the archaeological site of South Slope, Dionysiou Areopagitou & Thrasyllou Street.
Metro Station “MONASTIRAKI”, then through the archaeological site of Ancient Agora or Plaka district.
18. Visit a Roof Top Bar at Sunset
You could try to be on the Acropolis Hill for sunset, depending on the season. Another great option for watching the sunset is at a rooftop bar. We highly recommend the A for Athens restaurant and cocktail bar, with uninterrupted views of the Acropolis.
There is no better way to finish your Acropolis visit than unwinding with some cool refreshments and a nice meal, whilst you watch the Acropolis light show turn on at sunset.
Tip: Book your table ahead, this is mandatory at the best rooftop restaurants and bars.
Like any major tourist attraction, you will find that you pay premium prices close to the attraction. But if you leave your souvenir shopping until you get to Monastiraki Square you can definitely find a bargain.
As well as housing a flea market all around Monastiraki Square, there is a line of great souvenir shops going up the hill behind Monastiraki Metro Station. These are all very competitive and are all okay with bargaining. And the range is phenomenal.
20. Bring a Zoom Lens
It’s hard to imagine the stunning views from the Acropolis until you arrive. You get views of the city, all the major historical sites, surrounding hills and coastline. And you get all the ancient archaeological sites which make up the Acropolis. Basically, this is a photographers dream.
We suggest you come prepared when visiting the Acropolis by bringing your best photography equipment. A DSLR camera equipped with a zoom lens is perhaps your best option if you have one. You will definitely want some zoom capabilities. Oh, and bring a light tripod if you have one. A GorillaPod would be perfect.
21. Don’t Overdo It
The Acropolis is the most popular attraction in Athens and with good reason. This is a stunning tourist attraction, one of the finest on the planet. You do not want to rush this.
When you visit the Acropolis Athens, it deserves to be the highlight of your day. Don’t try to fit too many other things into your day, or you will regret not allowing enough time for the Acropolis. We suggest spending an entire day focusing on the Acropolis.
The amphitheater at Acropolis
22. Suggested Itinerary for Acropolis
Here’s a suggested itinerary for visiting the Acropolis in Athens.
Take a leisurely 20-minute stroll up to the base of the Acropolis from a surrounding neighbourhood.
Be sure to walk up to the top of nearby Areopagus Hill. Allow an hour to admire the stunning views.
Take your time walking up to the top of Acropolis. There is so much to see along the way and many stunning viewpoints.
Allow 2-3 hours at the top. There are so many different viewing platforms. You are now in Instagram heaven.
After you leave, take a leisurely stroll back towards Monastiraki Square. Stop at a cafe along the way and soak up some traditional Greek music and food.
Do a spot of souvenir shopping near Monastiraki Square. You will find loads of authentic Acropolis souvenirs here.
Have dinner at a rooftop restaurant overlooking Monastiraki Square and the Acropolis, catching the sunset. Be sure to book ahead, this is mandatory for a quality rooftop restaurant. We recommend the stunning A for Athens restaurant and cocktail bars for your million dollar views.
Taking the stairs up to Aeropagus Hill
The Most Visited Attraction in Athens
There is little doubt that this is the best attraction in Athens. In 2017 it was reported that 1,593,362 people visited the Acropolis. That’s about 5,000 per day on average. So you do need to carefully plan your visit to get it right. It will leave lasting memories, being one of the most extraordinary places you have ever visited. The Acropolis is likely to stay with you in your heart forever.
Would you like a free copy of our Ultimate Bucket List?
Not sure where to travel to next? We have created the Ultimate Bucket List to help you plan your next trip. 1170 awesome travel destinations in 167 countries. And we want you to have it for FREE.