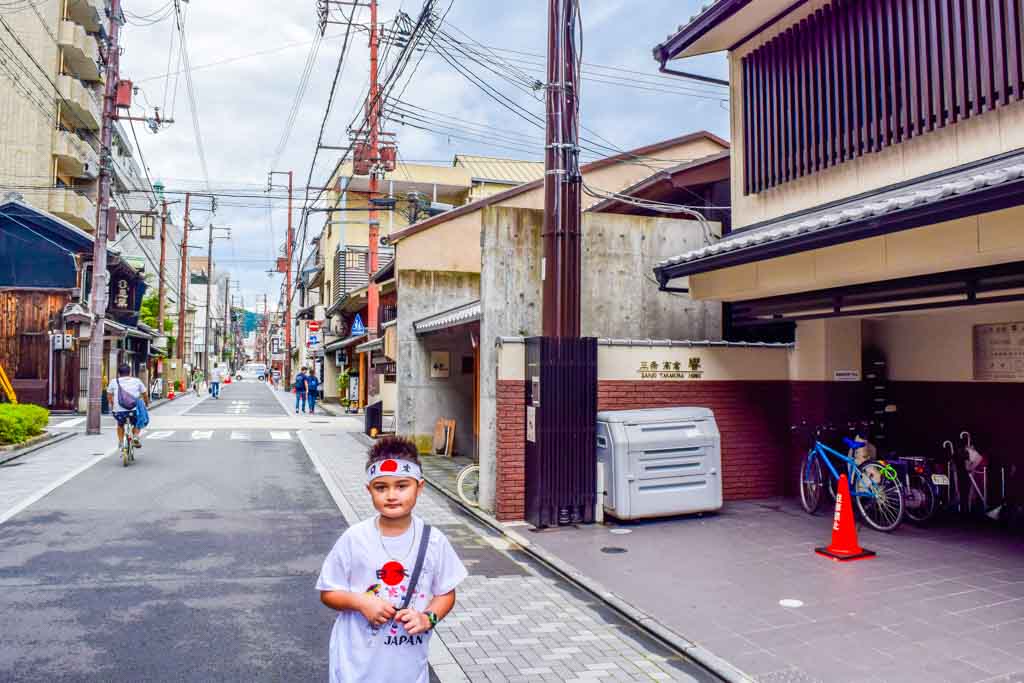
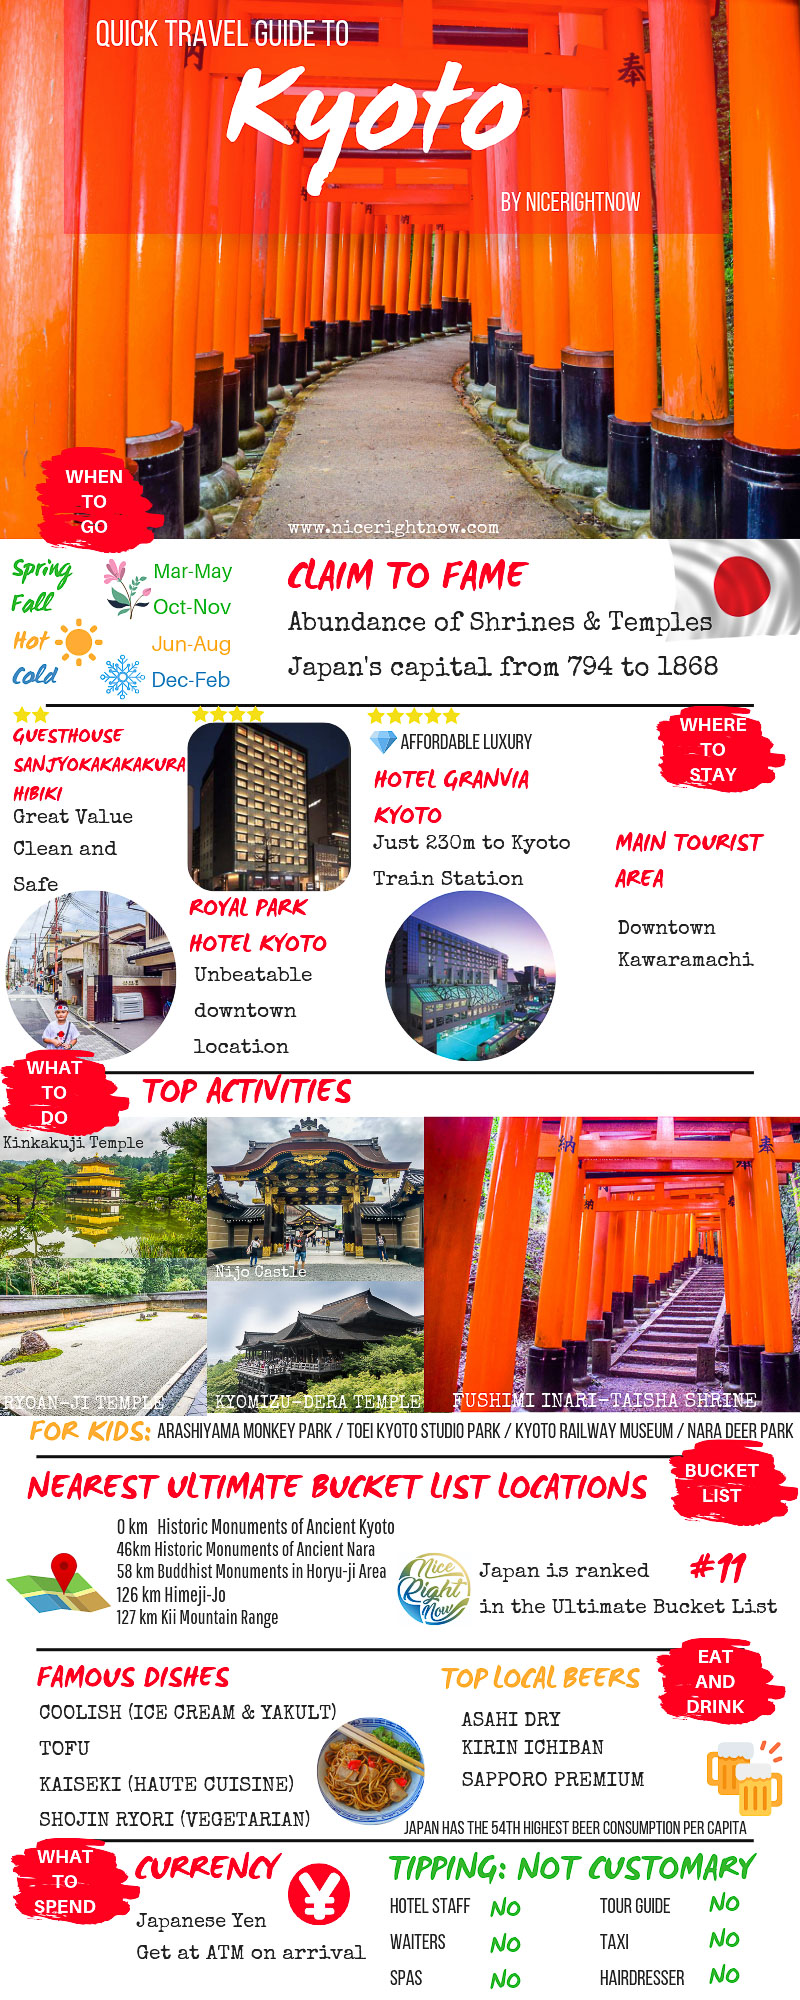
Kyoto was the capital of Japan and the home of the Emperor for over 1,000 years, up until 1868. No wonder it’s so packed with history and beautiful national treasures! If you are planning to visit this city of priceless historical value, you may like to check out our Quick Travel Guide to Kyoto.
Note: This post may contain affiliate links. Please read our disclosure policy for more information.
Top Things to Do in Kyoto
Top top Kyoto tourist spots are the temples and shrines. The problem is that there are just so many to choose from, how do you figure out the best Kyoto temple or shrine to visit? You can see most of them by using the excellent Subway network combined with short taxi rides. You should at least try to see some of these most popular Kyoto places of interest:
Fushimi Inari-taisha Shrine – This is the number 1 Kyoto Shrine to visit, and is depicted at the top of the page. It’s the one with the bright orange monuments stretching all the way up a mountain side.
Nijo Castle – Built in 1603 this castle is right in the centre of town, and is one of the most popular Kyoto tourist spots.
Kyomizu-dera Temple – Not far from the Fushimi Inari-taisha Shrine, this is a hillside temple which offers incredible views of Kyoto.
Kinkakuji Temple – Also known as the Golden Pavillion because this 1397 residence of a Shogun was completely covered in gold leaf. There’s a big chance you’ve seen photos of this gorgeous Kyoto Temple all over the internet.
Ryoan-ji Temple – This 1488 UNESCO World Heritage temple houses the most famous Zen Garden – Rocks surrounded by swept pebbles. Wait until you see how popular these rocks are. And it’s so close to Kinkakuji Temple that you can make it part of your very own Kyoto walking tour. Here are some of the best Kyoto tours to choose from:
Day Trips from Kyoto
The train network is so amazing in Kyoto that you can easily catch a train virtually anywhere for wonderful day trips from Kyoto.
Nara Deer Park – The most popular Kyoto day trip, because it’s so simple to get there by train. Actually Nara has so much more that just the deer park. Like Kyoto, Nara is filled with amazing historical shrines and temples, as well as several UNESCO World Heritage sites.
Osaka – This city is shopping heaven, and is less than half an hour away on the insanely fast bullet train from Tokyo. There are also stacks of other historical attractions to see in Osaka.
Best Place to Stay in Kyoto
Downtown is the best area to stay in Kyoto for tourists, because it has good access to the awesome Kyoto train station. This station is a subway station, a regional train station, and a bullet train station. You can see all the Kyoto tourist spots by catching a train from Kyoto Station in any direction.
Kawaramachi is another great place to stay, because it is close to the famous Gion District, and also close to the most famous Kyoto shrines and temples. Kawaramachi is a perfect starting point for your Kyoto walking Tour.
Budget Accommodation
We have a favourite “secret” guesthouse to stay in Kyoto. It’s not fancy but it’s very safe, private, fantastic value, and just 8 minutes walk from the nearest subway station. There’s a convenience store right next door and it’s in a charming neighbourhood. Check out the Guesthouse Sanjyokakakura Hibiki.
Guesthouse Sanjyokakakura Hibiki in suburban Kyoto
Mid Range
Also highly recommended is the 4 star Royal Park Hotel Kyoto Sanjo, which is in an unbeatable location in downtown Kyoto. It’s just 3 minutes walk to the subway station and 10 minutes walk to the famous Gion District
Affordable Luxury
The Hotel Granvia Kyoto is just 230m from the Kyoto Central Train Station, so you will be able to easily travel anywhere for sightseeing. 5 star luxury in a perfect location.
Deals on the Best Hotels in Kyoto
We recommend you always shop around for discounted deals on the best hotels, and the Booking.com deals finder is a great place to start.
Quick Travel Guide to Kyoto
Plan Your Trip to Kyoto
Read More about Kyoto
Quick Travel Guide to Kyoto
Would you like a free copy of our Ultimate Bucket List?
Not sure where to travel to next? We have created the Ultimate Bucket List to help you plan your next trip. 1170 awesome travel destinations in 167 countries. And we want you to have it for FREE.
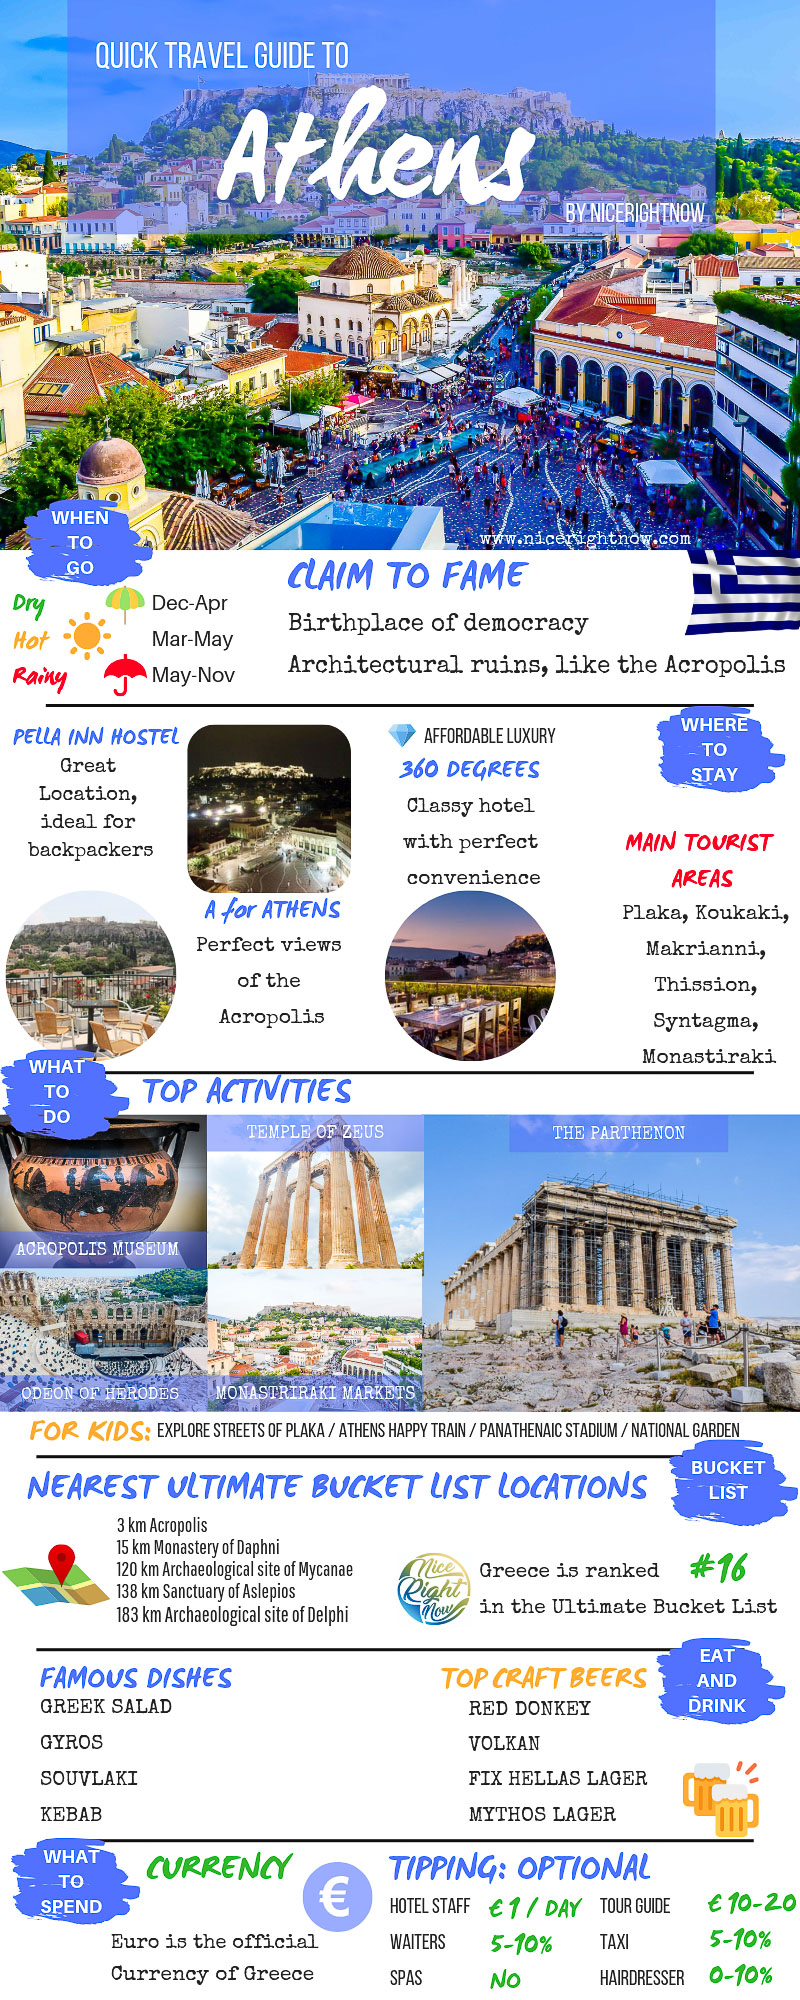
Athens is an intensely energetic city in Greece made famous by the incredible Acropolis and Parthenon. Stroll through 3,000 years of history, and marvel at the spectacular temples build for the ancient Greek Gods. If you’re planning a trip to Greece then check out this Quick Travel Guide to Athens.
Note: This post may contain affiliate links. Please read our disclosure policy for more information.
What to See in Athens
There is little doubt that the most famous of all things to see in Athens is the Acropolis, perched high up on a rock in the middle of the city. Here are some more things to see in Athens.
The Parthenon: This is the ancient building you can see perched atop the Acropolis. No visit to Athens is complete without claiming the hill to this UNESCO World Heritage site.
Acropolis Museum: Housing over 3,000 artifacts from the Acropolis, this incredible museum is located right at the foot of Acropolis.
Odeon of Herodes Atticus: An large amphitheater built in 161 AD, located at the base of the Acropolis, this will transport you back 2,000 years to the height of the Roman Empire.
Temple of Zeus: Not far from the Acropolis, right in the center of Athens, is this incredibly 17-meter high temple. Almost all sightseeing tours in Athens will include the Temple of Zeus.
Monastiraki Flea Markets: Actually the whole area around Monastiraki Square is magnificent for strolling around, but especially the flea markets which surround the square on both sides. This is the best place for souvenir shopping, one of the most fun activities in Athens.
The Temple of Poseidon: Just 69km from Athens, the Temple of Poseidon dates all the way back to 44 BC.
Ancient Olympia: A slightly longer day trip to the birthplace of the modern day Olympic Games. Marvel at attractions such as the Corinth Canal, Ancient Olympia and the Temple of Zeus.
Where to Stay in Athens
We think the Monastiraki area is the best place to stay in Athens for the great shopping and flea markets, and the perfect views of the Acropolis from the multitude of rooftop restaurants. And it’s a great starting point to explore all the top things to see in Athens. Other popular places to stay, depending on what type of traveler you are:
Plaka: Tourists
Kifissia: Families
Gazi: Budget
Psiri: Nightlife
Exarchia: Trendy
Cheap Accommodation
Pella Inn Hostel is an ideal accommodation for backpackers in Monastiraki. You can choose from dorm-style rooms or go to a private room.
Mid Priced Accommodation
We love the A for Athens hotel and thoroughly recommend it. A for Athens has the most amazing views of the Acropolis on the rooftop restaurant, where you will get to admire the best view in town over breakfast. And sunsets from here are just stunning. The rooms are moderately priced, and the bustling Monastiraki square is right across the street. Along with a metro station and all the sightseeing bus tours stop right outside the hotel.
Affordable Luxury
360 Degrees is another centrally located hotel in Monastiraki, but a little more classy. The position is A1, right on Monastiraki Square with every convenience imaginable right outside your door.
Shop Around For a Better Deal
We always recommend shopping around for a better deal, and here’s a great place to start. Booking.com
Quick Travel Guide to Athens
Plan Your Trip to Athens
Read More about Athens
Athens Top 10 Attractions
Hop On Hop Off Bus Athens Sightseeing Tour
Roof Garden Athens, Best Rooftop Restaurant in Athens
21 Hot Tips for Visiting the Acropolis
A Is For Athens Hotel Review
How to See the 7 Best Athens Historical Sites
Ultimate Europe Itinerary for 2 Weeks
Quick Travel Guide to Athens
Would you like a free copy of our Ultimate Bucket List?
Not sure where to travel to next? We have created the Ultimate Bucket List to help you plan your next trip. 1170 awesome travel destinations in 167 countries. And we want you to have it for FREE.
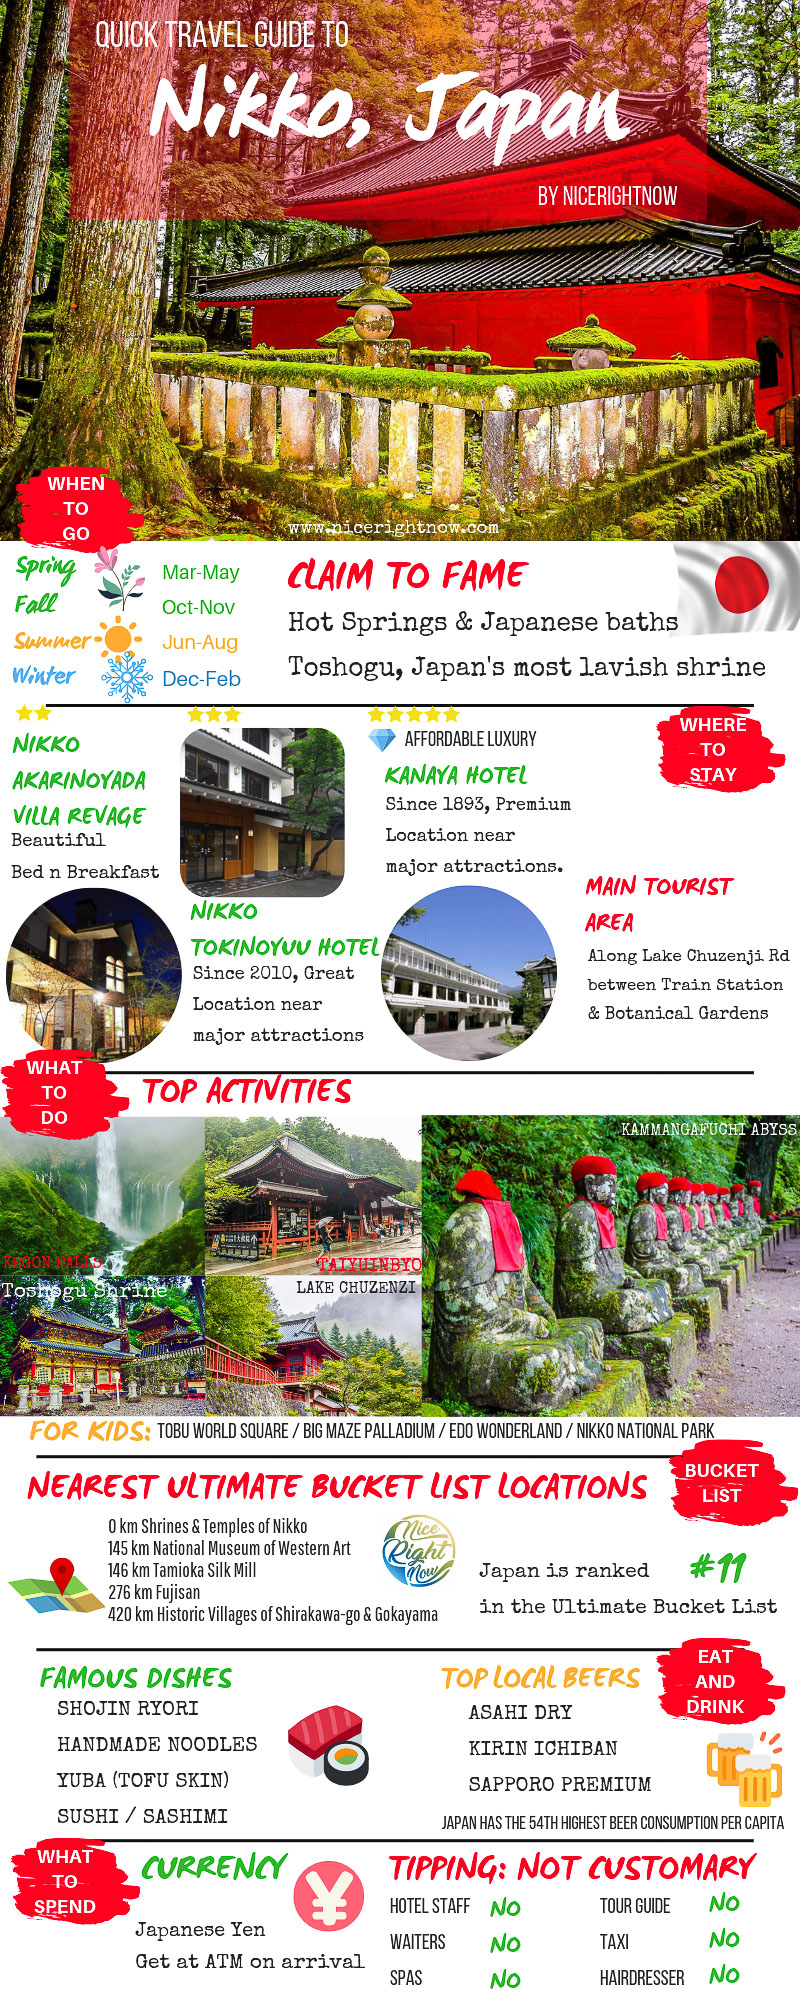
Nikko is an amazing historic town within easy reach by train from Tokyo. Toshogu Shrine is the most lavish shrine in all of Japan. Nikko also has beautiful lakes and hot springs nearby, where you can experience a genuine Japanese Onsen (Hot Bath). Before your Japanese adventure begins, why not check out this Quick Travel Guide to Nikko.
Note: This post may contain affiliate links. Please read our disclosure policy for more information.
Things to Do in Nikko
The Shrines and temples of Nikko are so culturally important that they have made it onto the UNESCO Work Heritage list. The most important shrines and temples date back to the 17th century and are in beautiful natural surroundings. Nikko sightseeing is actually very easy, because there is such a high number of attractions within easy reach.
Tosho-gu Shrine: This is complex of a dozen buildings dating back to the 1600’s. The complex is set on a mountain in a lush forest, such that the walk to the Nikko Toshogu Shrine is half the fun. This is one of the most important shrines in all of Japan, and is part of the Nikko World Heritage listing for Nikko Shrines and Monuments.
Iemitsu Mausoleum (Taiyuinbyo): A short walk from the Tosho-gu Shrine, this is the mausoleum of a famous Shogun.
Rinnoji Temple: The most important temple in Nikko, Rinnoji Temple was founded in the 8th century by the Buddhist Monk who introduced Buddism to this area.
Kammangafuchi Abyss: This is my favourite of all Nikko attractions, a pleasant riverside walking trail which takes 2-3 hours. Along the walk you will pass by a line of 70 ancient statues, with the hills of Nikko as a backdrop.
Shinkyo Bridge: Ranked as one of Japan’s 3 finest bridges, this magnificent Nikko bridge was built in 1636. Best of all it’s easy accessible from the centre of town.
Day Trips from Nikko
If you have some more time up your sleeve, there are many more amazing Nikko attractions accessible by a day trip. The bus network in this area is excellent, so it is inexpensive and easy to catch a bus to any of these locations.
Lake Chuzenzi: A scenic lake in the mountains above Nikko. It’s easy to catch a public bus there from Nikko. Once there, you will find a 25km walking trail around the lake with various waterfalls, Onsen, restaurants and embassy villas along the way. You can also take sightseeing boat cruises on the lake in high season.
Kegon Falls: Nikko’s most famous waterfall, located near Lake Chuzenji. The falls are a towering 100m high, and even have a 100m deep elevator to a viewing platform half way down.
Where to Stay in Nikko
Most of the best Nikko accommodation is located along Lake Chuzenzi road, between Nikko station and the Botanical gardens. This is a convenient location as you get off the Tokyo to Nikko train, and is close to all the famous Nikko World Heritage sites. It’s also a convenient place to catch the Nikko bus for day tours in surrounding areas.
Bed and Breakfast
We found a beautiful Bed and Breakfast in Nikko. If ever we were to give 10 out of 10 for our accommodation, this is it. The host is amazing, offering the best service we have ever experienced. The breakfasts are sensational home cooked extravaganzas. And there are a couple of authentic Japanese baths out the back, which are complimentary to guests. Check out Nikko Akarinoyado Villa Revage, and book yourself a room!
Mid Range Accommodation
The 3 star Nikko Tokinoyuu Hotel is still fairly new, build in 2010. It’s affordable and in a great location, around 7 minutes walk to the major Nikko World Heritage attractions. And it’s on the main road so getting a bus to Lake Chuzenji will be easy.
Affordable Luxury
5 star Nikko Kanaya Hotel is the oldest Resort Hotel in town, established in 1893. This hotel is in a premium location, just a couple of minutes walk from the famous Shinkyo Bridge. It is an 8 minute walk to the biggest attraction in town, the Nikko Toshogu.
Find Great Deals on Accommodation in Nikko
We always recommend shopping around for amazing deals with your accommodation. This Booking.com deals finder is a great place to start.
The historic city of Brasov is in Transylvania in central Romania, and has a population of some 300,000 people. Brasov Romania has a fascinating history and comes complete with the biggest church in Europe, and a central medieval square. No visit to central Romania is complete without a visit to the beautiful Brasov.
How to Visit Brasov Romania
You can easily get to Brasov by car, train or bus. It’s about 170 km north of the Romanian capital Bucharest, which is roughly a 2 hour drive on good quality roads.
We visited Brasov as part of a day tour we booked through our favourite tour booking platform GetYourGuide.com. The tour was called Romania’s 2 Most Popular Transylvanian Castles in 1 Day. First we visited Peles Castle, then stopped at Brasov for 2 hours for lunch and a guided walking tour. After Brasov the tour headed off to the nearby Dracula’s Castle.
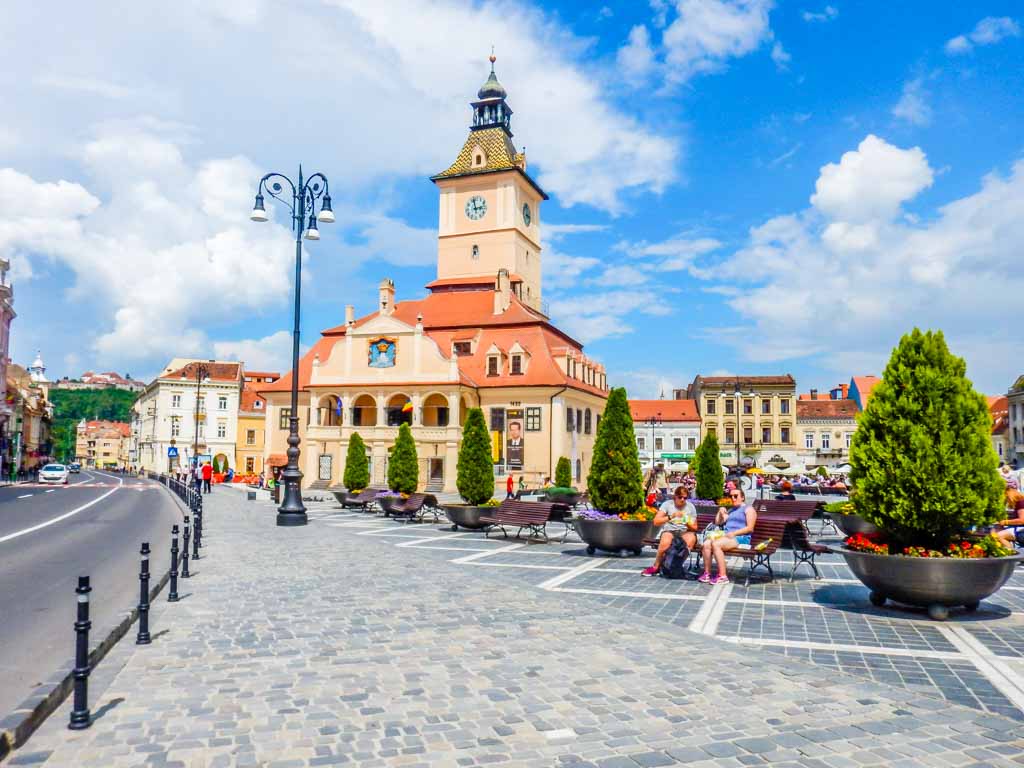
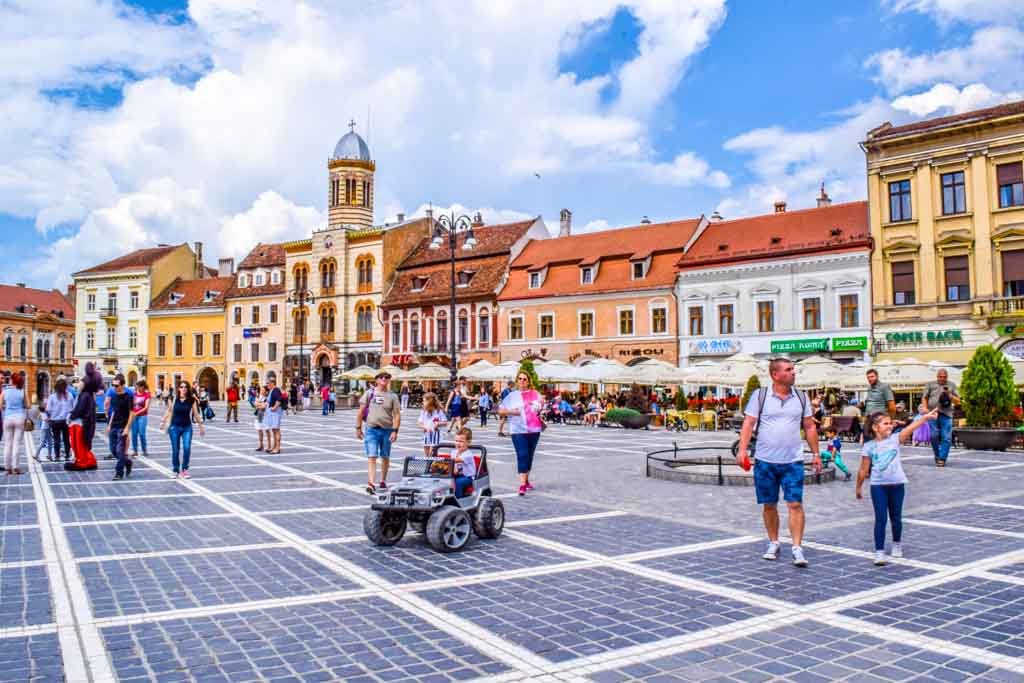
Brasov Town Square from the road
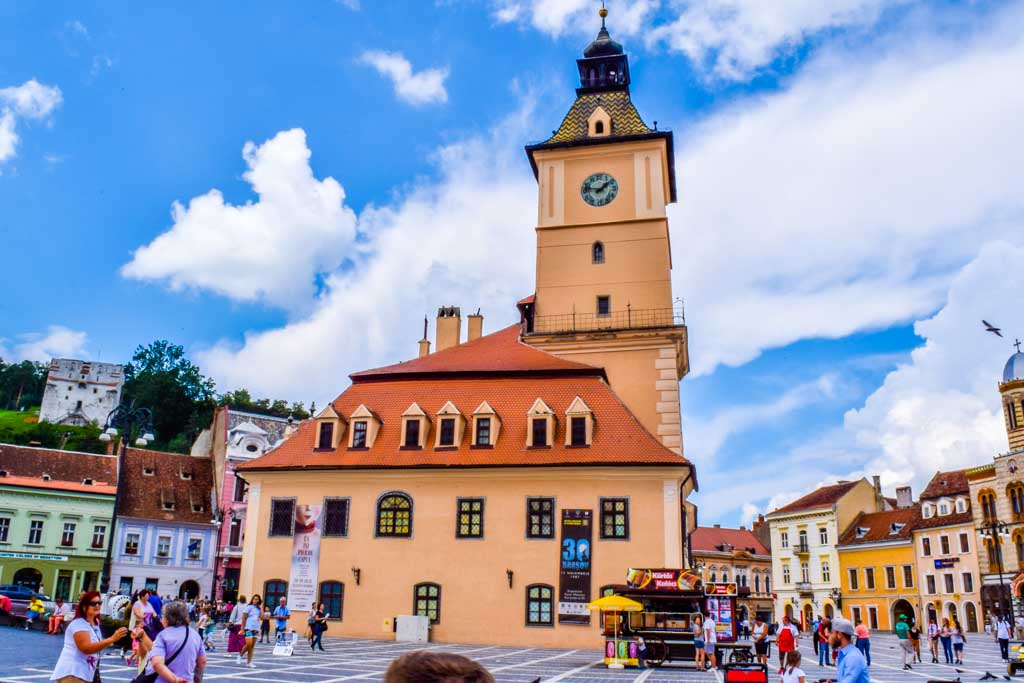
Brasov Town Square and Old Town Hall
We spent most of our time in Brasov around the beautiful medieval Town Square. The Old Town Hall is the centrepiece, which was built in the 13th century. The Old Town Hall comes complete with the trumpeters house, which was used in medieval time as the watchtower for incoming attackers. Now the Old Town Hall is a history museum.
The Old Town Hall
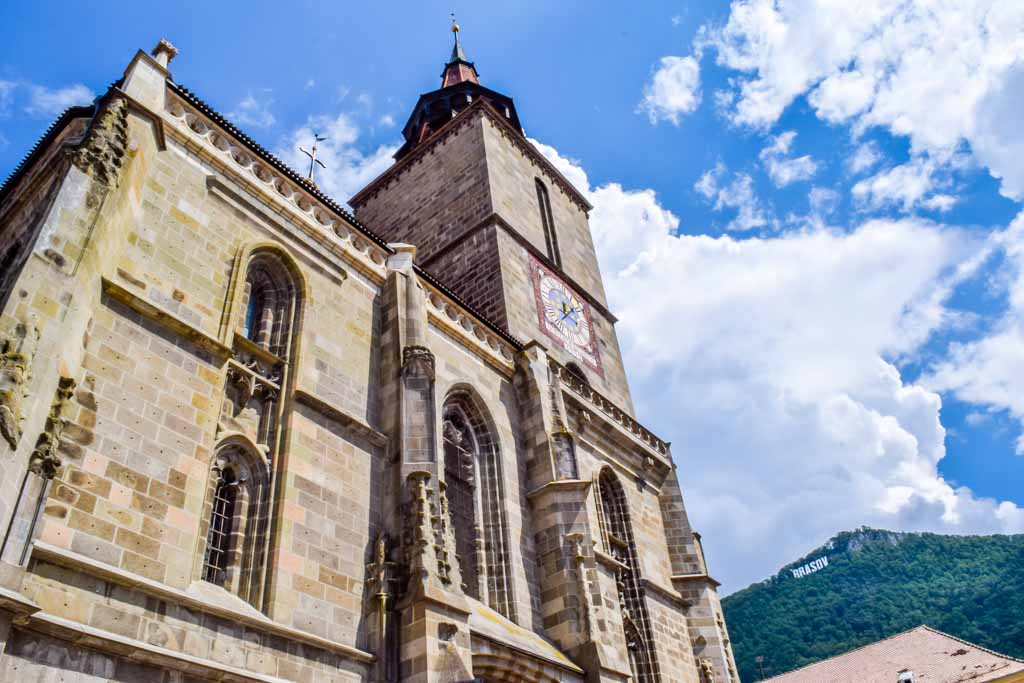
The Black Church
Just on the edge of the medieval Town Square is the Black Church, built in the late 14th century. It’s called the Black Church due to the massive Brasov fires in the year 1689, which destroyed the town and turned the walls of the church black.
The other side of the Black Church
Then it took almost 100 years to restore the church and to build the tower. This remains to this day the largest Gothic church in all of Eastern Europe. It also houses the largest Church bell in the whole country, which weighs in at a massive 7 tons.
Brasov Old Town Restaurants
As you explore the Town Square you are surrounded by alfresco style restaurants on the edge and and surrounding streets. Hence there are countless dining choices of authentic romantic cuisine, with a wide range of international style restaurants. This is a fantastic and moderately priced way to enjoy lunch, in a fascinating historical town.
Alfresco dining in the square
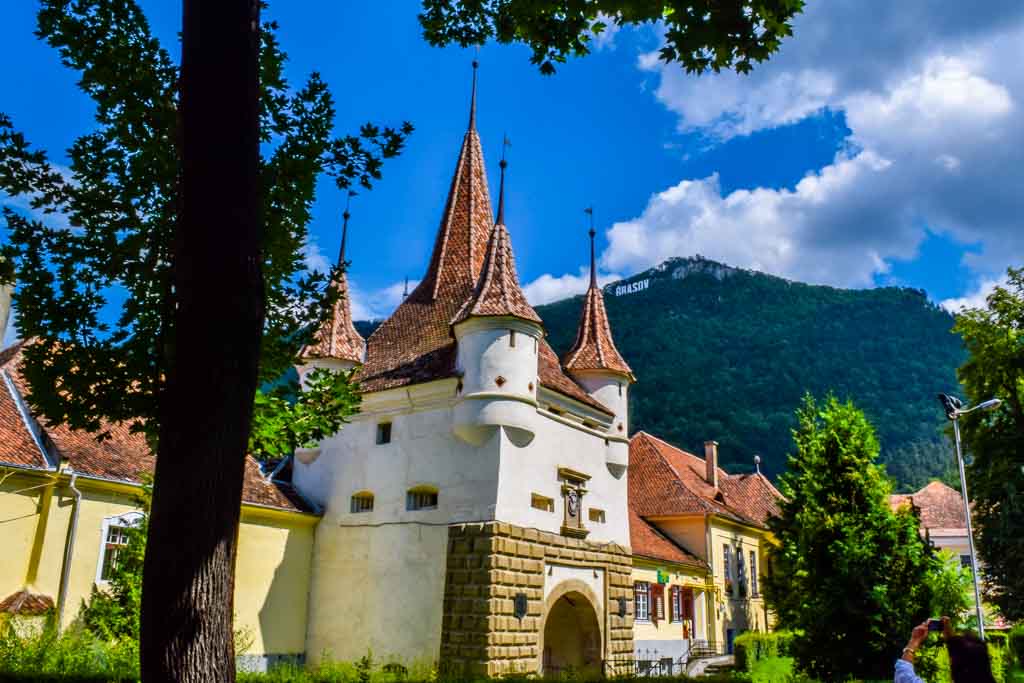
Catherine’s Gate
Also very close to the Black Church, about a three minute walk, is Catherine’s gate. This was built in the year 1559. The town used to be surrounded by bastions, rock walls, and gates for protection. This is the last surviving gate, and is an important glimpse into medieval history.
Catherine’s Gate is part of the medieval fortification system
Hollywood Sign
One of the unique things about Brasov is the Hollywood style sign high up on the hillside overlooking the town. It sure looks great as a backdrop in your photos. Also if you have time you can take the cable car up to the top of the mountain to enjoy the view. The mountain is some 3,200 feet high and has a great few over Brasov.
Does your town have a Hollywood style sign?
The cable car is called the Tampa Cable Car, and tickets cost a mere 10 Lei for a one-way adult ticket. This will take you to a viewing point 1,400 feet above the city of Brasov.
Free Guided Walking Tour of Brasov
We were fortunate enough to have a free guided walking tour through the Brasov Town Square and surrounding points of interest. But if you decide to visit Brasov outside of a guided tour, there are plenty of free walking tours available starting from the Town Square.
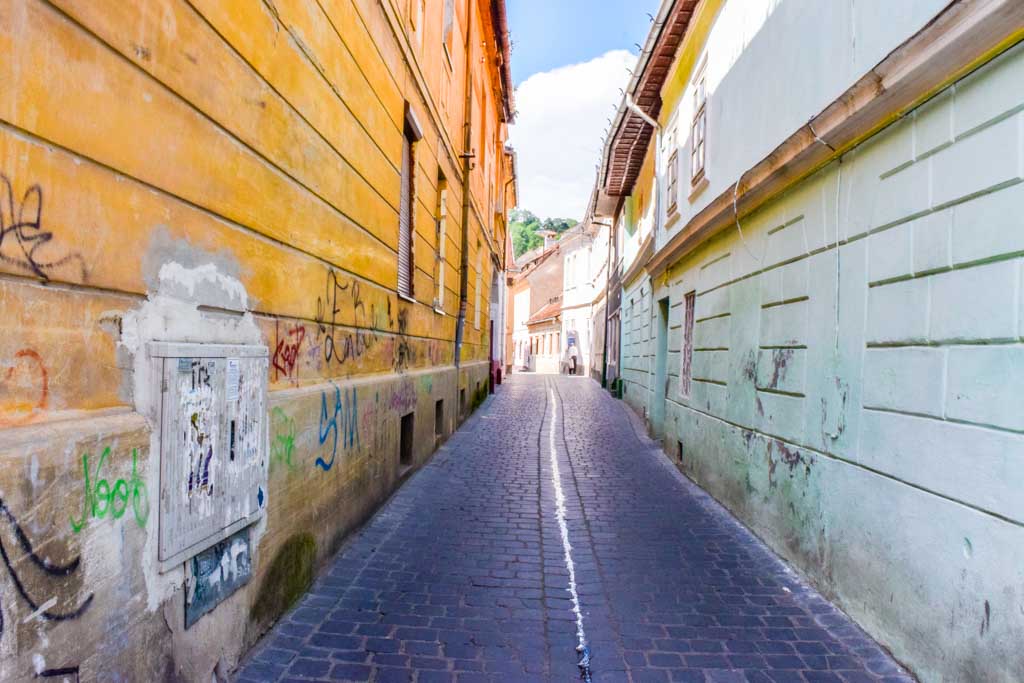
The narrowest street in Romania at 1.3m wide
During summer the free walking tours leave at 10:30 AM and 6 PM every day, and the duration is two hours and 30 minutes. Although the cost is free, the usual thing is to offer a tip to the tour guide at the end of the tour.
Brasov Romania is Not To Be Missed!
If you want to see some authentic examples of medieval Romania, then Brasov is the number one place to go to. It’s easy to get to and not too far from Bucharest. The number one attraction is the Town Square, including the nearby Black Church (just a 1 minute walk). If that’s not enough, there are heaps of other great attractions within walking distance on your visit to Brasov.
The super colourful Town Square
Would you like a free copy of our Ultimate Bucket List?
Not sure where to travel to next? We have created the Ultimate Bucket List to help you plan your next trip. 1170 awesome travel destinations in 167 countries. And we want you to have it for FREE.
Romania is known for it’s thick mountainous forests, Transylvania, Dracula and beautiful medieval towns. And Bucharest Romania is home to the giant communist Palace of the Parliament. Here are some tips to make your arrival in Bucharest Romania just that little bit easier.
Tips for Arriving in Bucharest Romania
These are tips we learnt on our first trip to Bucharest Romania. Each of these will help you settle in just that little bit quicker.
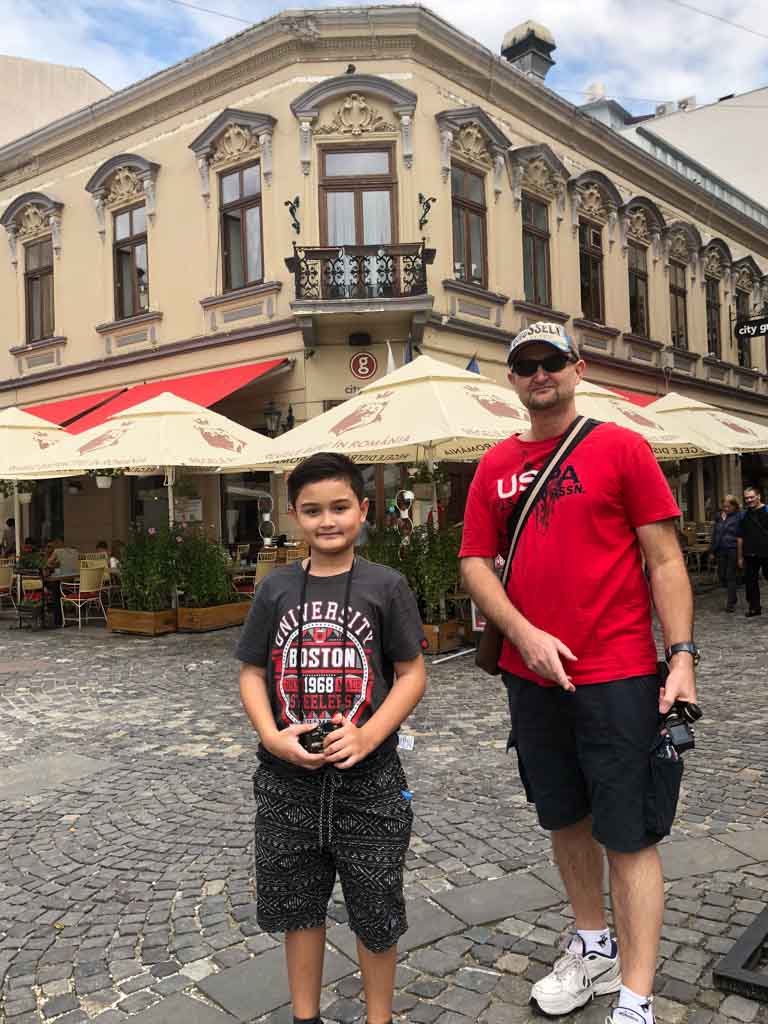
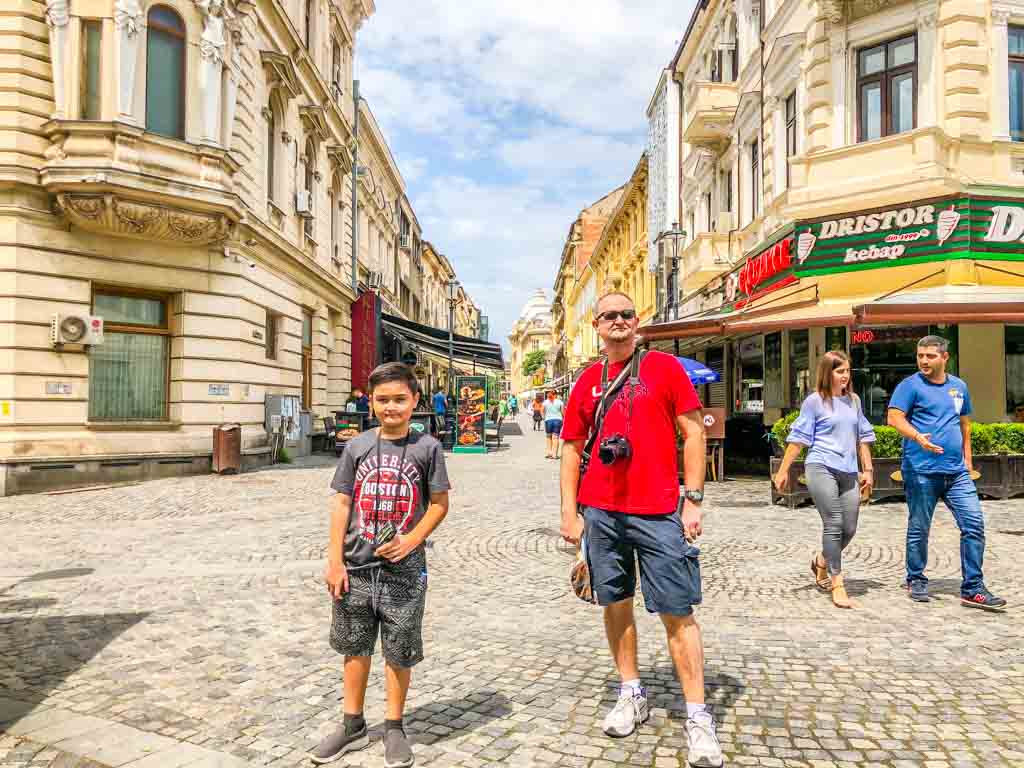
Exploring the Old City Bucharest
Buying a SIM Card
Buy a SIM card at the airport upon arrival. Look for a little magazine stand on the left just as you walk through the large double doors from baggage claim into the arrivals area. They sell Orange SIM cards, and if you talk to the vendor nicely they should activate the SIM card for you.
Orange is the biggest provider in the country, and the best SIM card to get if you want great coverage at a good price. A good idea is to download the Romania SIM card wiki before you arrive. This provides all the information you will ever need regarding re-charge and activation numbers.
Activating your SIM Card
It’s easy to buy load for your new SIM card at roadside newspaper stands. You can just buy for example a 50 Romanian Lei package, and the seller will be happy to load it for you. But your new Orange SIM card should come loaded with Internet and phone calls. In other words, there is no need to recharge.
With the Orange SIM card you need to make sure you activate it by turning your phone off and on again. Then you must use a special activation code 0000. Fail to do this off/on step and you won’t be permitted to make a phone call, even if the SIM card contains a healthy balance.
Using Romanian Currency
The currency used in Romania is Romanian Lei, or RON for short. It’s a good idea to get some Lei at the airport ATM’s as you arrive, inside the arrivals hall. It’s also a good idea to know the exchange rate before you arrive. For instance, for us Aussies it’s roughly 3 Lei to 1 Australian dollar.
Now that you know the exchange rate, calculate how much Romanian Lei to withdraw from the ATM… in advance. That will save you the trouble of having to do the calculation whilst you’re standing at the ATM machine. 1,000 Lei should get you up and running.
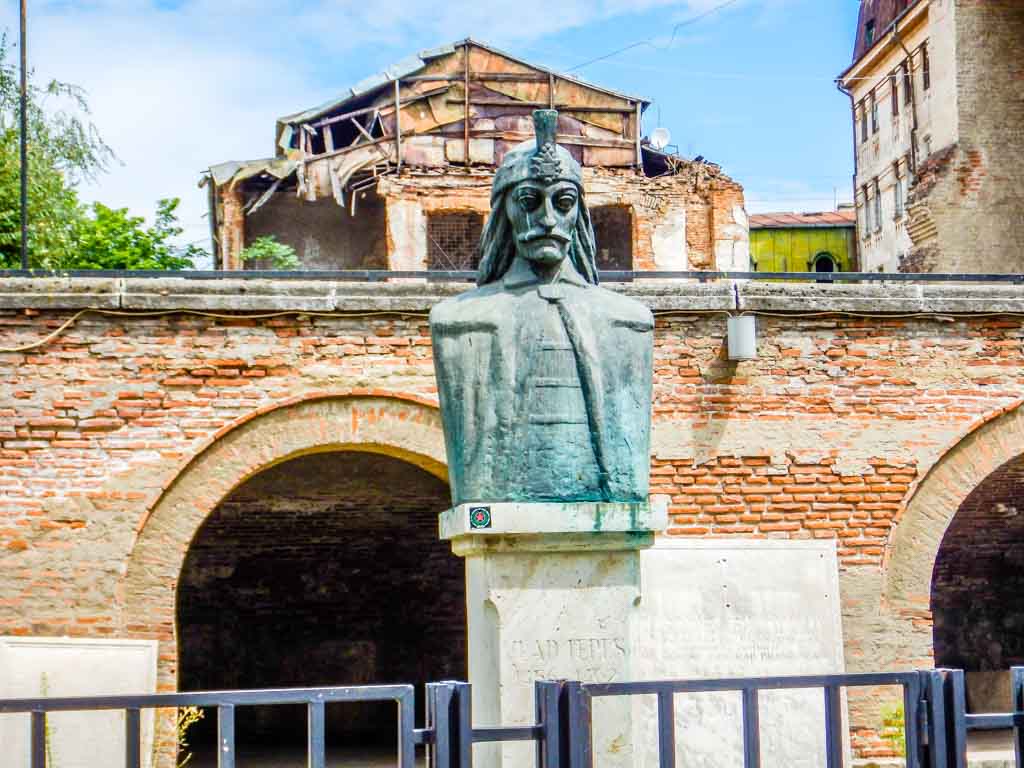
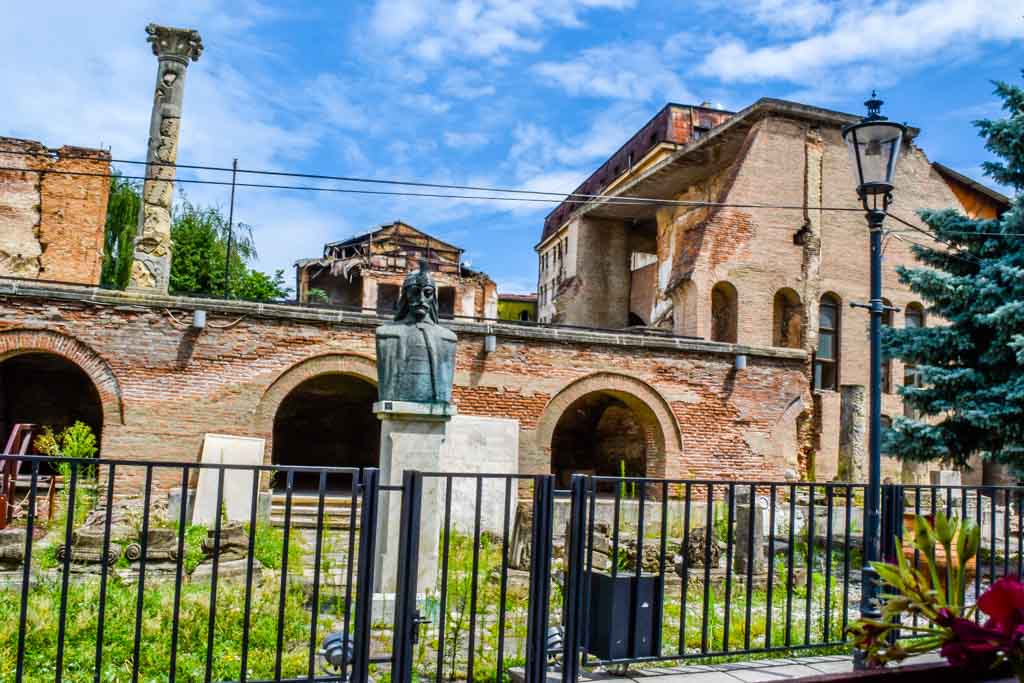
Vlad the Impaler’s house in Old Town
Paying in Euros
If you want to pay in Euros then Romanians will sometimes accept it. But not always. Often prices will be advertised in Euros, however you should always pay in Romanian Lei. So make sure you have some local currency on hand.
Keep in mind you are unlikely to get an attractive exchange rate if you pay in Euros, they will just round up to a convenient number. Make sure you have notes and not coins. Apparently coins are difficult for vendors to exchange into Romanian Lei.
Airport Transfer using Mozio.com
It’s a good idea to pre-arrange an airport transfer before you arrive. Especially if you’ve had a long flight and can’t be bothered with the hassle of finding a taxi. Pre-arranged transfer is the ‘no fuss’ way of getting a transfer, not having to worry about finding a ride when you arrive. But it will cost a little more.
A great website is mozio.com, where you can arrange a transfer from the airport into the city center for around €25. The driver will be waiting in the arrivals area with your name on a board, you just have to find him and you’re off.
Taking a Taxi from Otepeni Airport
Ubers and Taxis of course cost much cheaper than Mozio.com at about €8 into the Old City. However Uber is difficult until you have an active SIM card. Taxis are an easier proposition at the airport. These can easily be arranged using the yellow console in the arrivals area.
Like anywhere, just make sure your taxi turns on the meter so you don’t get ripped off into paying some exorbitant price. Yes shonky taxi drivers exist all over the world, and they sometimes pray on unsuspecting arrivals… like you.
We’ll catch anything to avoid a taxi
Taking an Uber from Otepeni Airport
Another convenient option at the airport is Uber. Taking an Uber in Bucharest from the airport to the city is about the same as a taxi, around €8.
Uber is a great option, because if you have Uber set up with a credit card on your smartphone, then there’s no cash involved in the transaction with the driver. This saves you the requirement to have local cash on hand for your first day arrival.
The downside is that you need to have your SIM card activated to use Uber. It all depends if you feel like waiting at the airport long enough to install and activate a SIM card, or if you have roaming options from another country.
English Speaking in Bucharest
English-speaking locals are very common in Bucharest Romania. And overall I have to say the standard of English is very high, in comparison to other countries I’ve been. No need to half guess what the locals are saying, the locals very easy to understand and converse with.
Of course it’s nice to know you’re pleases and thank you‘s in the local language. But you can easily get by knowing zero Romanian and speaking only English.
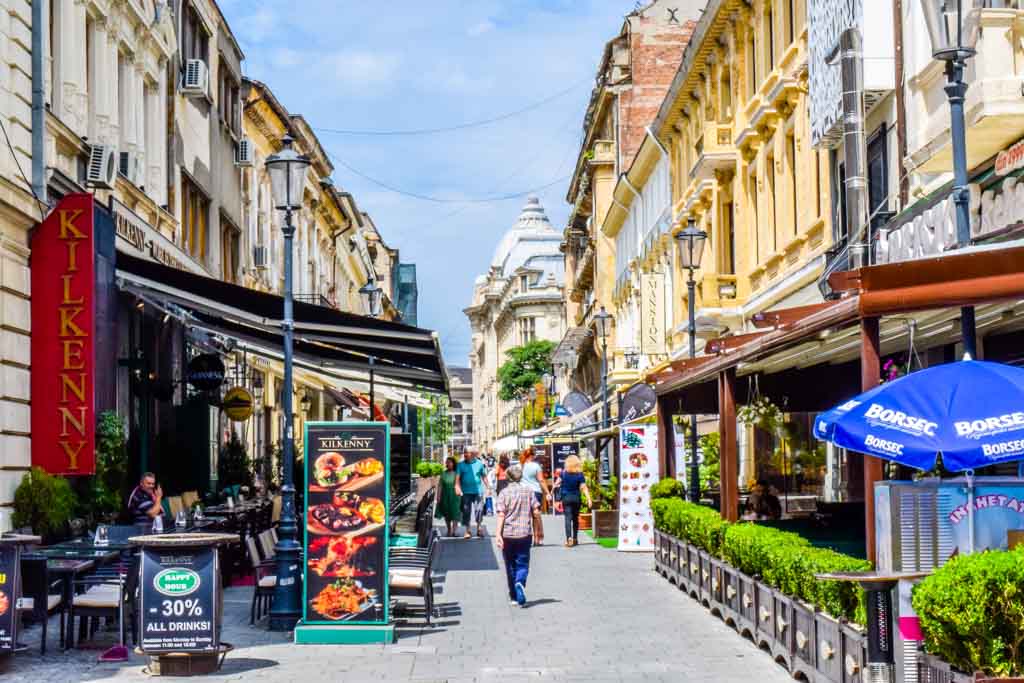
Dining in Bucharest Old City
Our airport transfer driver told us that there are 240 restaurants in the Old City area of Bucharest. The main area covers just a few blocks and it’s easy to walk from one side to the other.
That means you can’t go wrong going to Bucharest Old City for a meal, especially in the evening when all the tables and chairs are out on the pedestrian only streets, weather permitting.
Daytime dining options in Bucharest Old City
Getting Around Bucharest
Uber is available in Bucharest. We stayed in the old city center in an apartment, and used Uber as our main mode of transport, many times.
Most of our rides were only 5 to 10 minutes in duration, because the main tourist areas in Bucharest Romania are quite compact. The thing that I found funny was that every single Uber ride cost us exactly 10 Romanian Lei. This is remarkably cheap, only about $3.
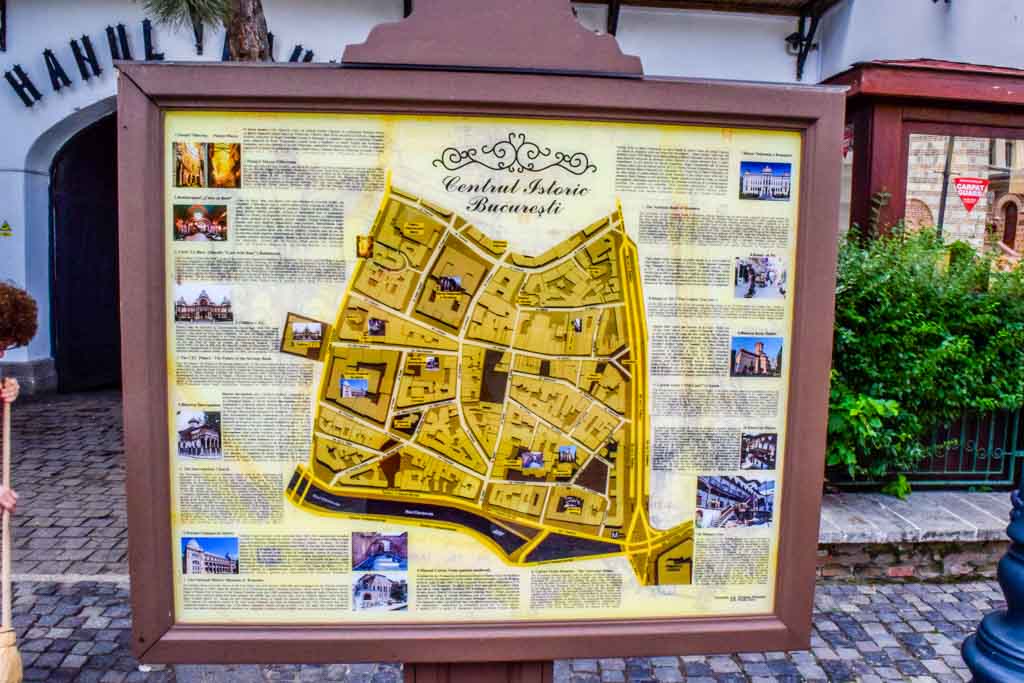
Bucharest Old City Walking Tour
Make sure you allow a couple of hours for a walking tour in the Bucharest Old City Center. There are so many historical sites jam packed into a small area. And there are loads of tourist maps in the area by way of street signage, so you will never get lost. Unless you want to get lost. Getting lost in the Old City is actually fun.
You don’t really need to research before you go, just look at the signs and simply wander around. The whole area is made up of pedestrian streets, so walking around is simple. This is the tourist hot-spot in Bucharest.
Tourist maps are everywhere in the Old City
Power Outlets in Romania
Romania uses the standard European power plug. You know, 2 round prongs and 210-230 Volts. Just make sure you bring an adaptor or two with you. Although Romania is generally a cheap place to purchase goods, I found the price of power adaptors ridiculously expensive.
That is to say, the cheapest adaptor I saw worked out at around $20, and they’re not particularly easy to find. Better off to come prepared.
Tipping in Bucharest Romania
I always like to research the local tipping customs. Otherwise that first tip is usually AWKWARD, not knowing the normal rate to tip. Here’s a rough guide.
Taxi Drivers: round the fare up, or 4-5 Lei
Hotel Staff: 5-10 Lei for a maid or porter, per day
Waiters: 5-10 % of the bill
Restaurant food: 10-12% of the total
Tour Guides: 10-20 Lei per day
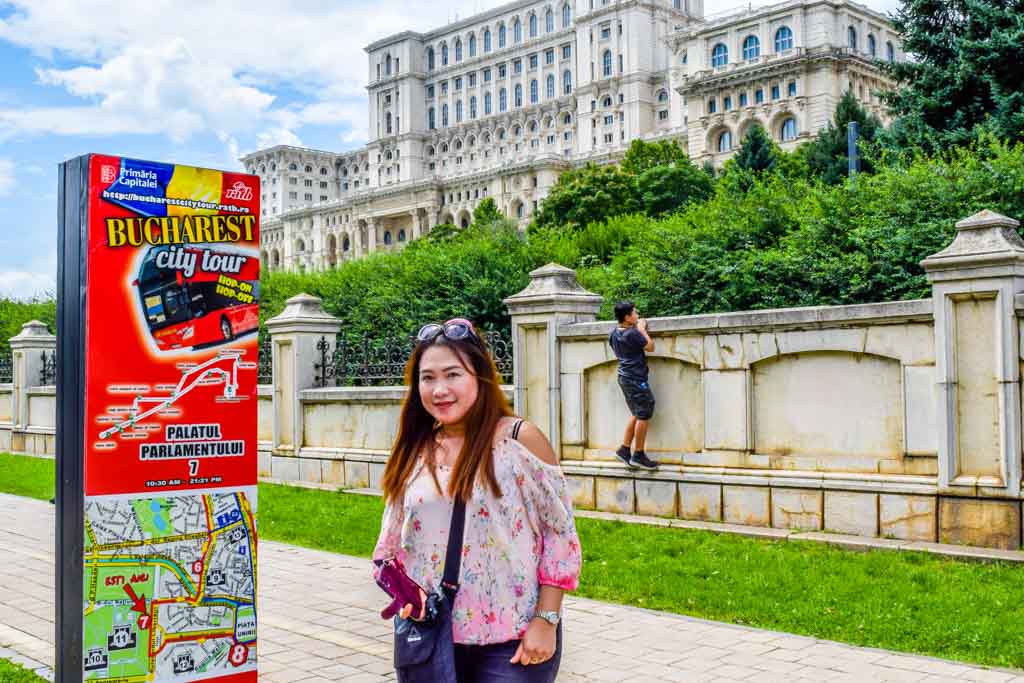
Great scenery at the Palace of the Parliament
Bucharest is Safe and Fun
Overall Bucharest Romania might not be the most picturesque city in Europe. But that’s part of the charm. The people are friendly and open hearted. The city is safe to walk around day and night. The Old City is bursting with atmosphere. Open your heart to Bucharest Romania, and have some fun.
Would you like a free copy of our Ultimate Bucket List?
Not sure where to travel to next? We have created the Ultimate Bucket List to help you plan your next trip. 1170 awesome travel destinations in 167 countries. And we want you to have it for FREE.
The main tourist district of Hanoi is the Old Quarter. This area has some wonderful colonial French architecture and is jam-packed with cafe’s, restaurants, shopping and a beautiful lake. This is the perfect place for a self-guided walking tour; just arm yourself with a Hanoi Old Quarter Map and go exploring!
Note: This post may contain affiliate links. Please read our disclosure policy for more information.
The Best Hanoi Old Quarter Map
When it comes to the best Hanoi activities, self-guided walking tours are at the very top of our list. They are free, healthy, kid-friendly, and all done at your own pace. Stop wherever you want, for as long as you want. No tour guide is going to push you around. All you need is a map and 2 feet.
Hanoi Old Quarter Walking Tour #1
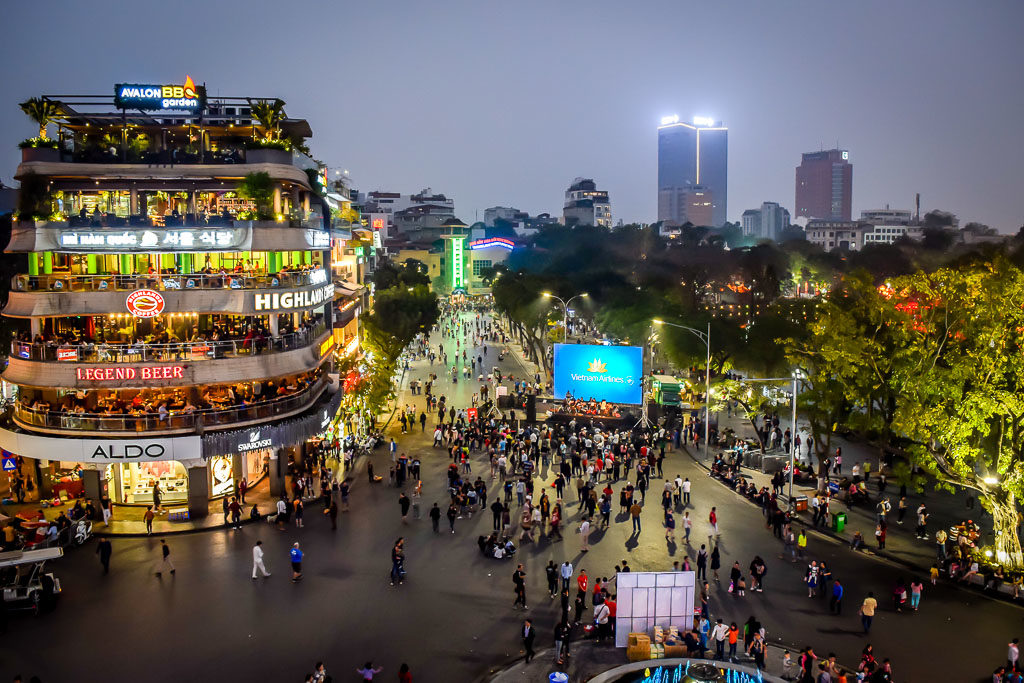
Vietnam Online has a terrific Hanoi walking tour map. This starts and ends at the famous Avalon Coffee Lounge at the northern end of Lake Hoan Kiem. Avalon Coffee Lounge is our favourite place to dine and chill out.
There are lots of other great dining options on multiple levels and amazing options on the rooftop with perfect views over Lake Hoan Kiem.
Hanoi Old Quarter Walking Tour #2
Frommers is one of the most trusted travel guides available and has been in publishing guides since 1957. They have over 100 travel guides for purchase and are a trusted name for online travel guides.
This Hanoi Self Guided Walking Tour takes a leisurely 3 hours to complete and takes in many of the Hanoi top attractions.
Best Hanoi Walking Street – Walking Tour #3
The Best Hanoi Walking Street is found on the northern end of Lake Hoan Kiem. Actually, it’s all the way around the lake, from Friday night through to Sunday night when they close the lake off to traffic.
Barricades are placed on the roadway, stages are erected, and the lake scene becomes a bustling tourist scene. The walk around Lake Hoan Kiem is definitely on the Hanoi must-do activities list.
Here’s a short video of the best Hanoi Walking Street, outside the Avalon Coffee Lounge, along the northern edge of Lake Hoan Kiem.
Lake Hoan Kiem – Walking Tour #4
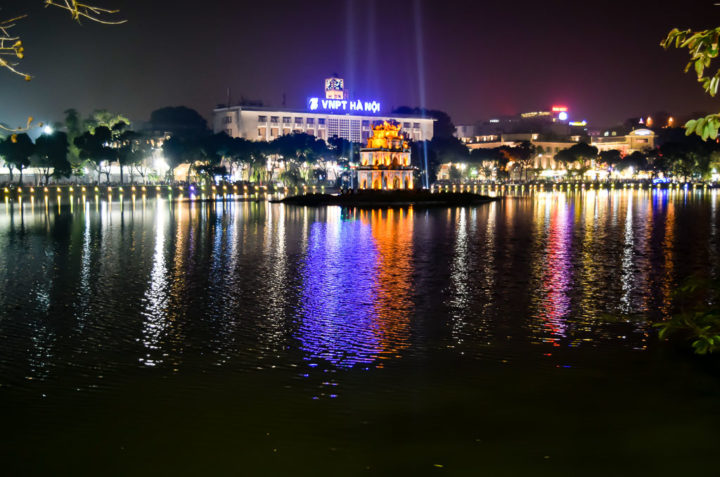
Lake Hoan Kiem is in the heart of the Old Quarter district and is the historical centre of Hanoi. It is also one of the major scenic attractions of the city and is at the top of the list of Hanoi walking tours.
Apparently, in 1428, the Emperor was boating on Lake Hoan Kiem when a Golden Turtle God came up and asked him for his Magic Sword. The sword was given to him earlier by the Dragon King God.
So they call this “The lake of the Restored Sword” (Hoan Kiem Lake in Vietnamese).
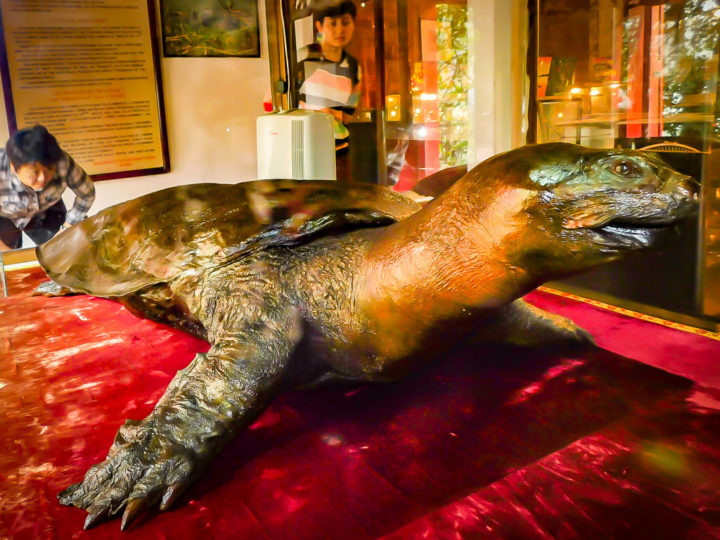
Giant Turtle inside Jade Temple
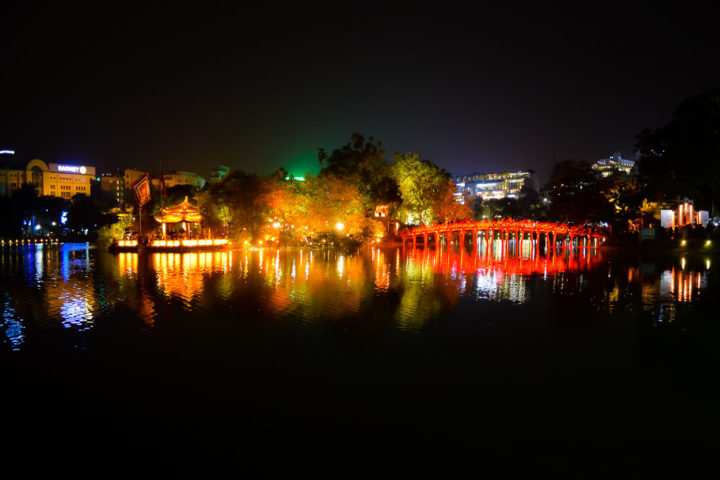
At one end is a 300-year-old island temple, “The Temple of the Jade Mountain”. At the other end of the lake is “Turtle Island”, which has an ancient TURTLE TOWER built on it. That’s because the lake was inhabited by giant turtles.
Sadly the very last turtle died in 2016. Our first tour of the lake was a day trip to the temple on Jade Island. To get to the Temple, you walk across a fantastic red footbridge where you are greeted by a toll booth charging 30,000 dong for adults (about $2). Free entry for children, yay!
We did not find the temple especially exciting, however, it is a great opportunity to hone your photography skills on the many bonsai and flower exhibitions. There is also one of the giant turtles on display (dead of course) in a giant glass display, about 1.5m in length.
Road Closure Around the Lake
The main road at Northern End with the stage set up
Each Friday morning they erect barricades on all streets around the lake to stop the maddening road traffic. And they also erect a large stage in the middle of the main road. They do this every Friday, Saturday and Sunday.
It attracts hordes of people, both local and tourist to come and enjoy the lake for the entire weekend. We were advised by our hotel staff to do our walk around the lake during the week because the weekends get rather busy.
The lake is completely surrounded by shopping outlets and eateries so it is a food, shopping and entertainment extravaganza.
The western side of Lake Hoan Kiem
View from the Western Side
To circumnavigate the lake by foot takes about 40 minutes if you walk fast, or 2-3 hours at a leisurely pace. We started at the northern end of the lake, and the first stop was at the COFFEE CLUB overlooking the northern roundabout.
It fronts onto the stage where we were treated to a stringed orchestra on the stage reciting some Russian symphony orchestra hits. Very entertaining, with ample photo opportunities from the fourth floor of the Coffee Club.
As you set off on your walk you will see sidewalks lined with vendors selling ice creams and hordes of local kids devouring them by the truckload. This truly is a family affair.
Stroll down the western side and you will find there are not many people and some medium-priced cafes dotted along the way. Very few shops but some large government looking buildings.
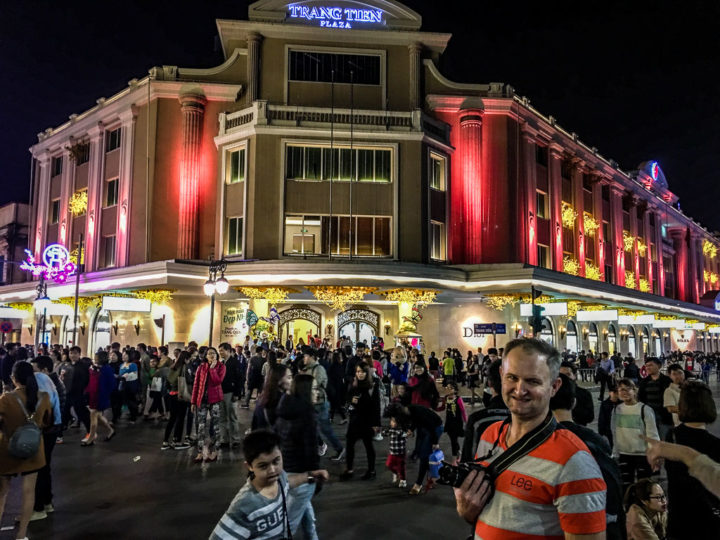
Southern Side of Lake Hoan Kiem
At the southern end of the lake, you will find a whole different scene. Branded cosmetic outlets, expensive handbag shops, boutique hotels and designer shopping malls.
This is undoubtedly the luxury end of the lake catering for the upper-class tourist. Whilst the northern end of the lake is dominated by ridiculously cheap market style shopping, the southern end of the lake is dominated by branded handbags and high-end outlets.
Upmarket Southern End of the lake
Western Side of Lake Hoan Kiem
Next, we set off along the western side of the lake. As it turns out there is a large park area on this side of the lake and the Vietnam Symphony Orchestra was in full swing performing a concert. Symphony orchestras are very popular in Vietnam.
View from the western side
There were literally tens of thousands jamming in to see the large screens and the magnificent sound systems which were set up. It was a pick-pockets heaven so we got through this area as quickly as we could hold on tightly to wallets and phones.
Apparently, this is the artistic side of the lake. As well as the orchestral performance there were areas of ballroom dancing and street portrait artists everywhere.
Back to the Start
Northern side means Nike factory outlet stores. Actually, all the big name sports shoes were on sale for a measly 300,000 dong per pair ($17). You can probably bargain these down to about $13 per pair and fill your suitcases!.
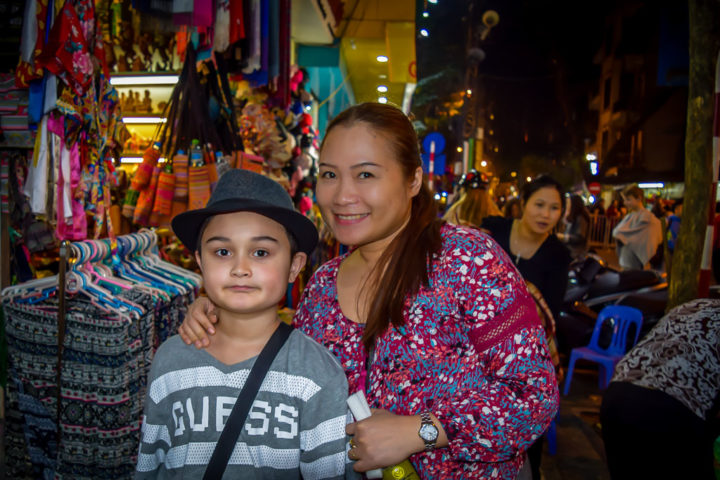
Buy yourself a hat!
Of course, there are all sorts of different product with factory outlets, as well as a variety of Vietnamese souvenir shops. Awesome shopping with variety and good prices. But they need to be because big night markets are less than ten minutes work away with a mind-boggling variety.
The Best of the Hanoi Old Quarter Walks
We loved the walk around Lake Hoan Kiem the best. The lake walk on the weekend is a wonderful activity, and very cheap. Kids will love it because there is an explosion of activity to keep their senses aroused and remain thoroughly entertained. It is safe from road traffic thanks to the traffic barricades.
Very nationalistic monument on Northern Shore
But you do need to hold your wallet tightly in the busy areas due to pickpocketers. You will find unlimited food and drink options, a variety of street entertainment and a huge variety of shopping options for all budgets.
You will also find sensational photo opportunities along the lake, especially at night. Definitely give the lake walk a go if you are in the Old Quarter of Hanoi!
Plan Ahead For Your Hanoi Trip
Going to Hanoi? If you would like to do some more research here are some great resources available.
Would you like a free copy of our Ultimate Bucket List?
Not sure where to travel to next? We have created the Ultimate Bucket List to help you plan your next trip. 1170 awesome travel destinations in 167 countries. And we want you to have it for FREE.
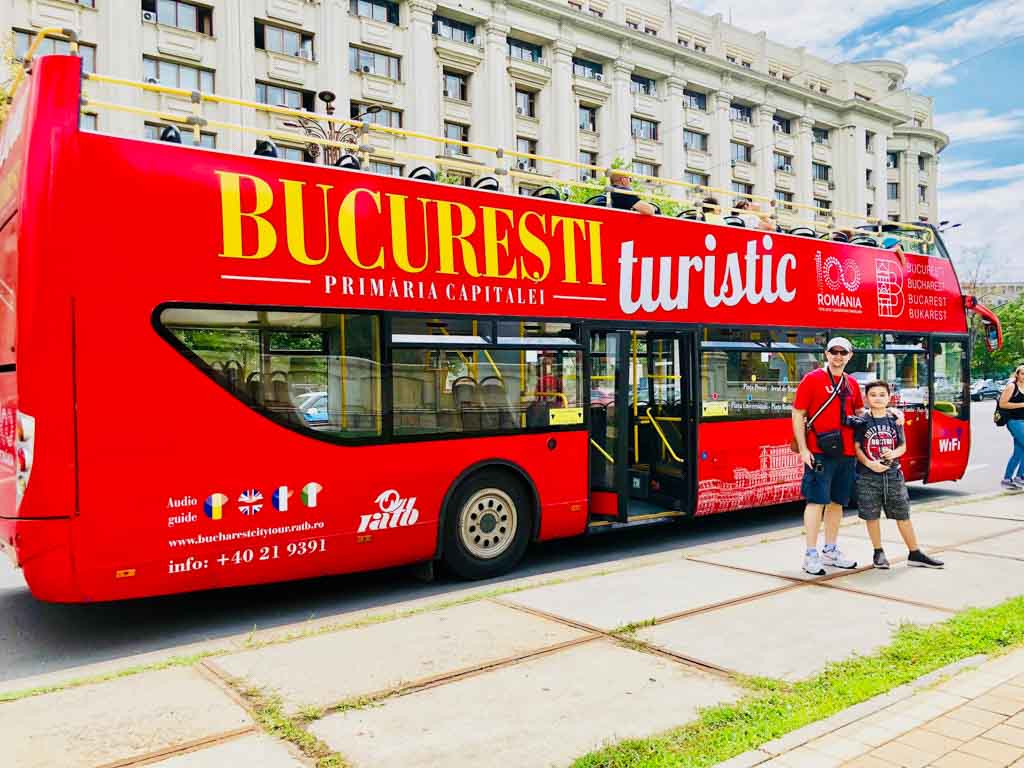
When we visited Bucharest we wanted to see as much as we could in one day. We wanted to see all the most important attractions, on a budget. We wanted the best Bucharest bus tour.
We stumbled upon Vlad the Impaler’s 15th century house in Old Town
Hop On / Hop Off Bus Tours
We love hop on hop off bus tours. We have used them in London, Amsterdam, Vienna, Athens and Budapest. So when we checked online and found a hop on hop off bus tour in Bucharest, we were very happy. Now we knew there was a cheap way to see all the best tourist attractions in Bucharest.
This bus tour is slightly different to the others we’ve used. In all the other cities you normally get two or three different bus routes, with a boat tour as an optional extra. In Bucharest however, the city sightseeing bus tour is just a single bus route, and no boat option.
So the hop on hop off options are a bit limited in Bucharest. But to compensate for lack of options, the price is drastically discounted. This is probably the best priced of all Bucharest tours that money can buy.
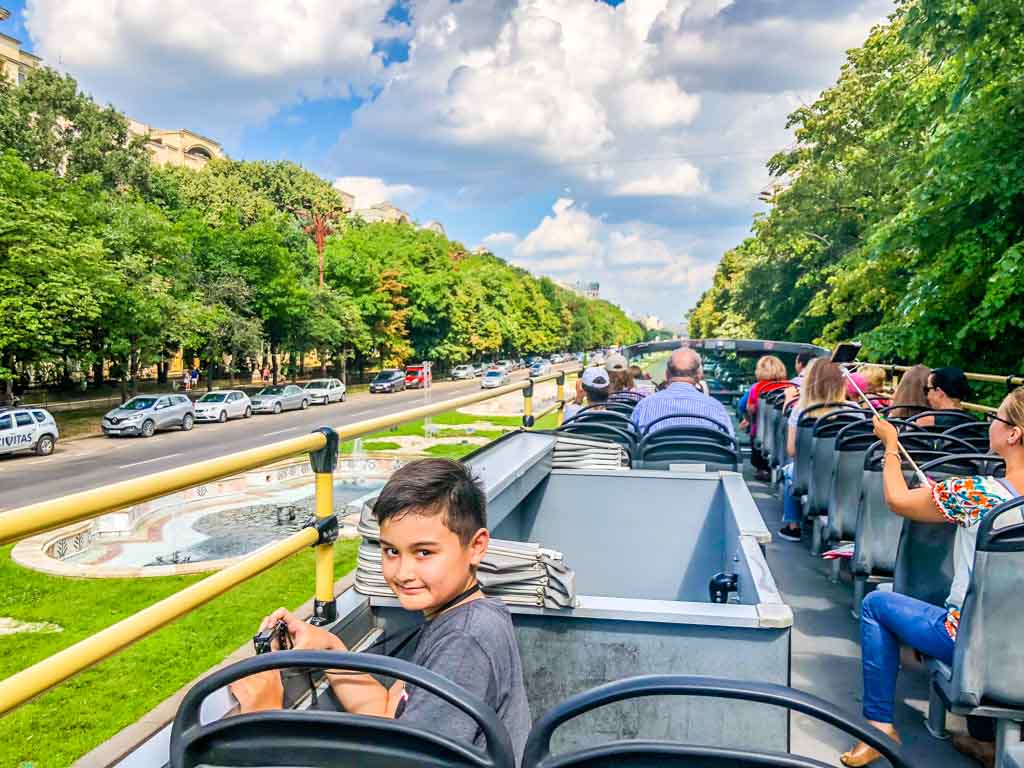
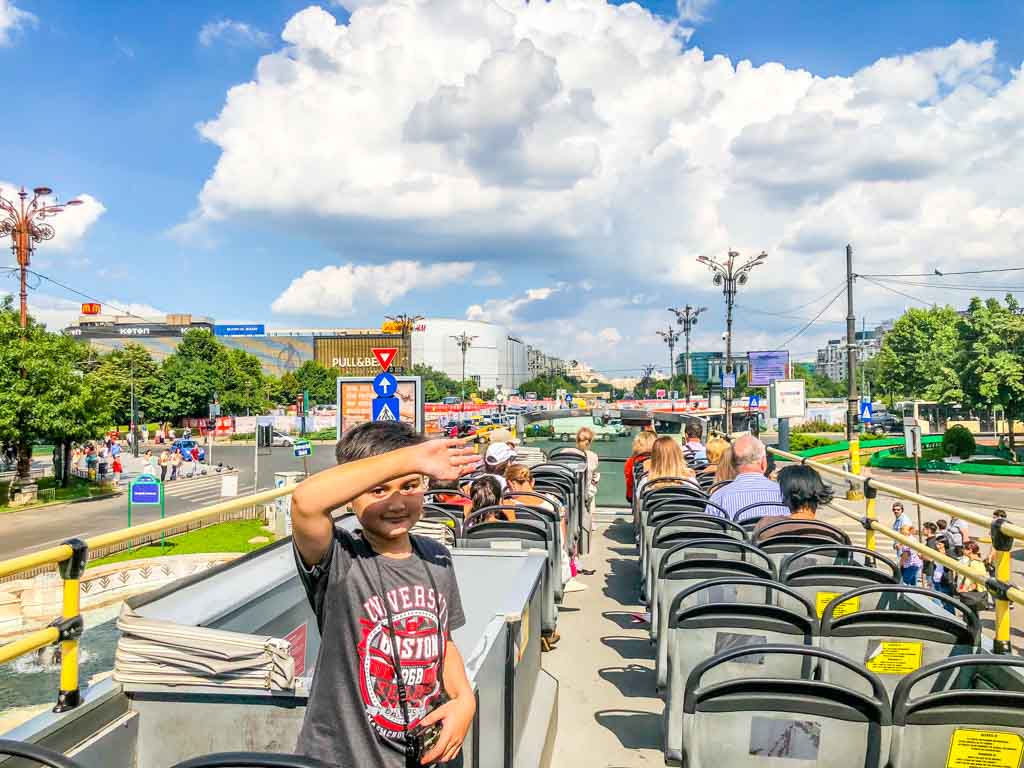
Enjoying the open topped bus tour
What’s the Cost for a Bucharest City Tour Bus?
The bus to choose is the Bucharest City Tour bus. At the time of writing, this is the only hop on hop off bus tour option in Bucharest. Those other cities we toured had 2, 3 or even 4 different bus tour companies to choose from. So the choice is quite easy in Bucharest.
Tickets cost 25 Romanian Lei for adults, and which is about $8.50. And kids are only 10 Lei. And tickets are valid for 24 hours. That makes this bus an absolute bargain. To get your ticket, just find a bus stop and pay the driver or ticket collector.
Audio Commentary
One other feature that we really like on hop on / hop off buses throughout Europe is the guided audio tour. Normally you get a free set of earphones on the bus, then plug it in and listen to a historical guided tour of the city. It’s wonderful to hear the guided commentary as you drive around and see all the attractions. Audio tours are normally in 15 to 20 different languages.
Bucharest city hop on / hop off bus is different. We asked the ticket collector if audio commentary is available on the bus. She apologized and informed us that the portable audio units are only in French or Italian. None in English.
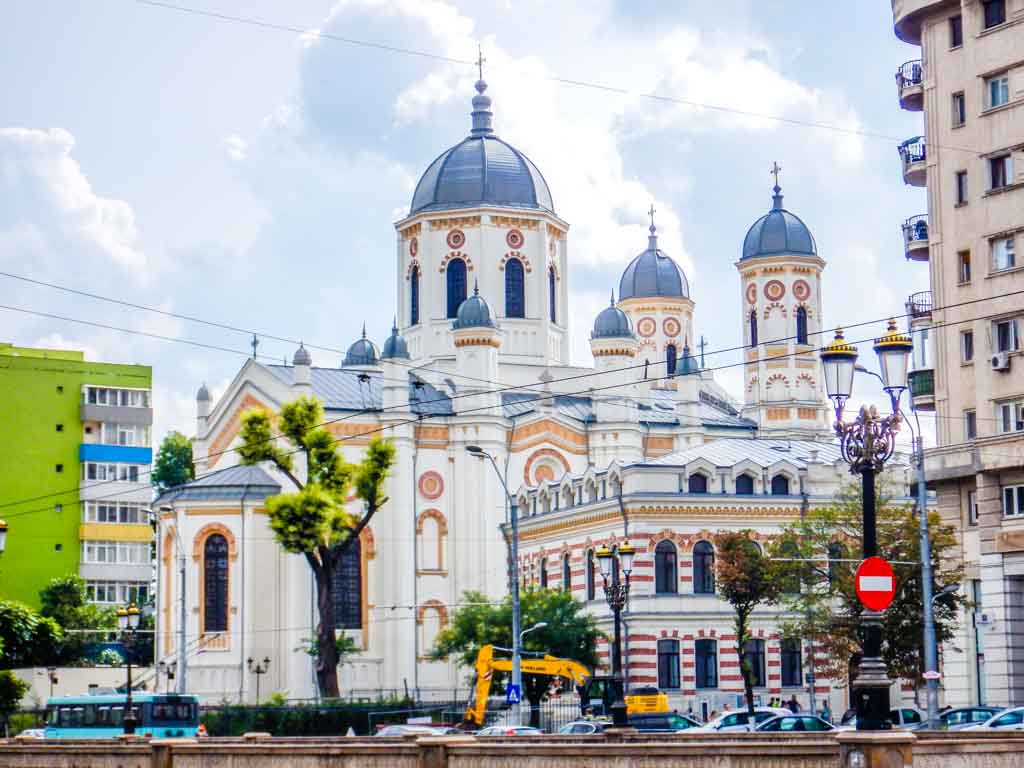
One of the many fine Orthodox churches you will see
Our ticket collector said we can download a guide in English for free, however we were unable to locate this (I must admit, we didn’t try very hard). Headphones are not provided on this bus, you need to bring your own. Since we didn’t bring headphones we had our first hop on / hop off bus without audio guided commentary.
Free Map
Like all the other hop on hop off bus tours, we were issued with it terrific free map. All the main attractions are listed, with a photo and a bit of a description. Very useful, but kind of difficult to unfold in a bus seat.
Companion App for Smartphone
One thing that’s not included on this tour is a companion app for your smart phone. Not a big problem because the map is so easy to follow, and folds up neatly to fit in your handbag.
Exploring the Bucharest Old Town at bus stop #5
The thing we really liked about companion apps in other cities is the ability to locate a bus stop easily. The communion apps normally come with a live map showing the location of the buses, and the directions to the nearest bus stop. Not in Bucharest, since there’s no app available (not in July 2018, anyway). But anyone with some basic Google Maps skills, a smart phone and a map should be able easily find a tour bus stop.
Tour Bus Stops
There are 14 bus stops, and buses run every 15 minutes. What really annoyed us in some of the other cities is that the hop on / hop off buses finished too early. 5:30 to 6:00pm seems to be the norm throughout Europe. No problem in Bucharest however, because the hours are from 10 am until 9:30 or 10 pm.
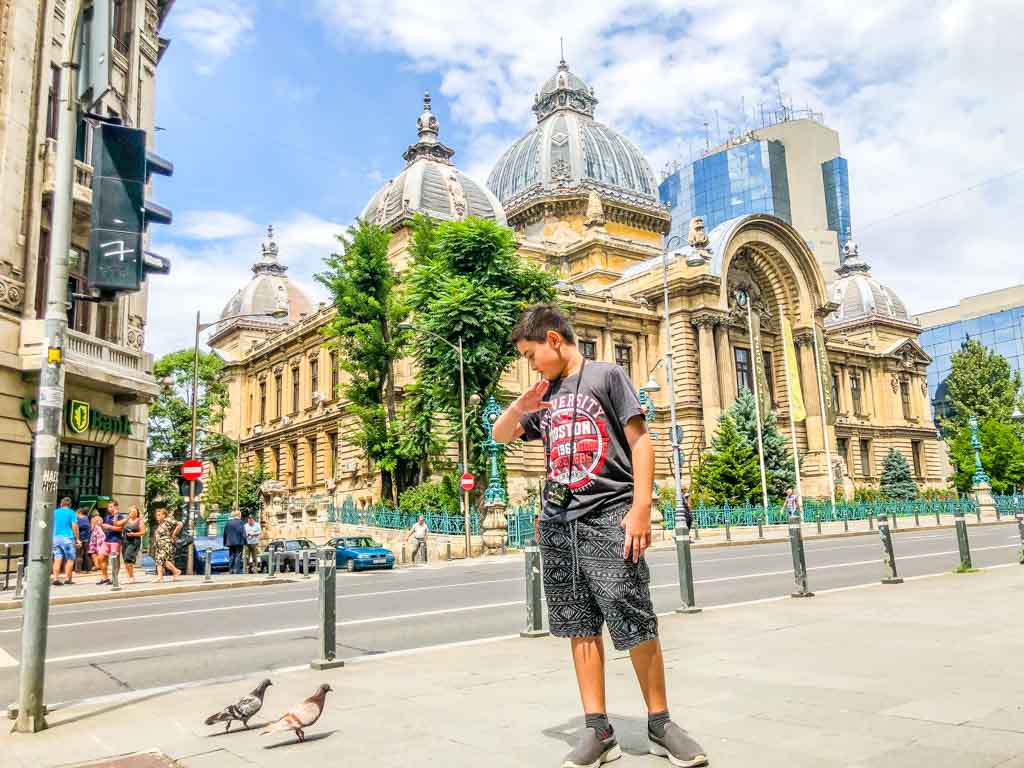
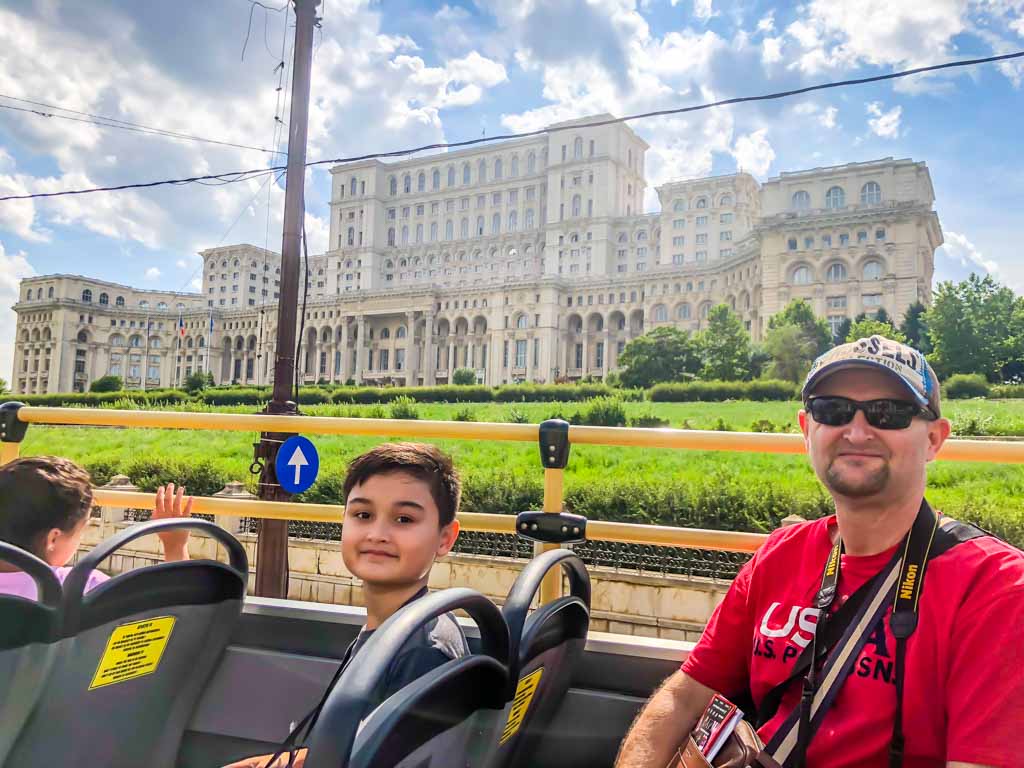
We jumped on at bus stop number 6, the CEC, on the edge of Bucharest Old City. We didn’t have to travel very far to get to the number one attraction in Bucharest, the Palace of the Parliament at bus stop number 7. This is the main attraction that I really wanted to see, so we got off the bus at stop 7.
CEC at Bus Stop #6
In mid July the weather was around 32°C and sunny. We found ourselves in the middle of the day without not much shade around. We were literally cooking on the top level of the double decker bus, without any shade. So when we got to the Palace of the Parliament we decided to take the tour, which last for one hour and 15 minutes. It was so comforting to escape the heat of the day in this lovely air conditioned palace.
Overall we spent about three hours in the Palace of the Parliament including the standard palace tour, having a cuppa, and waiting for the tour to start. I guess that goes with most stops involving a tour, you should probably allow around 3 hours per stop.
Back on the Bus
The tour was a lot more physical than I thought, lots and lots of stairs to climb. By the end of it we found that we were quite exhausted, and with aching feet. Time to get back on the bus for a rest. Time to head to the bus stop just around the corner from the Palace.
Bus stop near Palace of the Parliament
It is such a relief to sit down on the bus after some strenuous walking on a hot summer day. Except that it is very hot sitting on the top level of the bus, without any shade. You really do need sunscreen on this bus tour during summer.
Northern End of the Circuit
Our next stop was to be at the north end of circuit where the Village Museum and the King Michael of Romania Park are located. Traffic was very thick by this time, around 4 pm. Bucharest is known for having terrible traffic problem problems, especially at peak hour. Same as practically every capital city on the planet, I guess.
The full bus circuit takes about 50 minutes in light traffic. In peak hour traffic, we figured it will take around two hours to do the full circuit, back to our starting point at bus stop number 6.
Athanaeum is another popular stop
We never actually made it past bus stop number 8 on this day. Instead we ended up having a late lunch, relaxing and heading home ready for tomorrow’s touring activities. The north end of the circuit will have to wait for another day.
That’s the beauty of this inexpensive bus tour, if you don’t do the full circuit it’s not a big deal.
Overall Rating of the City Sightseeing Tour
So how does the Bucharest city to hop on hop off bus rate? Overall it’s a fairly basic bus tour. The buses are comfortable enough and have an open roof. Pretty much the same quality as you find in any other major city.
You’ll get great photo opportunities from the top level, because there is no roof to obstruct your view. And there truly are lots of magnificent sights to admire in Bucharest. The quality of these bus tours are comparable to any other we’ve been on, in other cities.
It was a bit too hot and sunny for us in the middle of the day, in the middle of summer, in July. It would be much more comfortable in the shoulder seasons at the start or end of summer. Or to start earlier in the morning, say 10 am.
Having a great time on the bus
The prices are outstanding, it really is very cheap to do a full circuit of this beautiful city. There are plenty of great attractions to see along the way, and it doesn’t have to cost an arm and a leg.
So Many Attractions to See
So many attractions in fact, that unless you are as fit as an amazing race contestant, you’re not likely to see them all of Bucharest’s best tourist attractions in one day. You’re probably going to need two days to see most of the attractions in Bucharest, if you take this bus tour.
The good thing with this bus is that they run every 15 minutes, so you’ll never have to wait too long for the next bus. If you’re trying to figure out what to do in Bucharest, we thoroughly recommend taking the City Sightseeing Tour Bus.
Cruising past the Palace of the Parliament
Just have a look online at the bus route map and decide which stops you want to get off at, because you might not have time to see them all. Especially if you do a tour inside a museum or palace along the way. We say you should definitely give the Bucharest City Sightseeing Bus ago. Maybe even twice!
Would you like a free copy of our Ultimate Bucket List?
Not sure where to travel to next? We have created the Ultimate Bucket List to help you plan your next trip. 1170 awesome travel destinations in 167 countries. And we want you to have it for FREE.
Have you ever though of taking a leisurely drive along one of the best coastal roads on the planet? I’m talking about a Road Trip along the Pacific Coast Highway in California. If so these tips for an Alamo car rental in LAX airport may be your best starting point.
Note: This post may contain affiliate links. Please read our disclosure policy for more information.
Why Get an Alamo Car Rental in LAX?
A self drive road trip is one of the best holidays money can buy. You have the freedom to go and see anything you want, anytime you want. You can stick to the main tourist route, or avoid it completely.
On your road trip you can change the itinerary at the drop of a hat if something catches your eye. And a great, no-fuss way to have a road trip is to hire a rental car.
On our family’s California Road Trip we hired a medium-sized SUV from the car rental company “Alamo” at LAX Los Angeles International Airport. After comparing the prices, terms and conditions of several major car rental car companies, Alamo came out on top, all things considered. And importantly we read heaps of Alamo rental car LAX reviews, and they seemed positive.
We then drove our rental car around California for 17 days and had a wonderful family travel adventure. Along the way we discovered a few do’s and don’ts for hiring a rental cars at LAX.
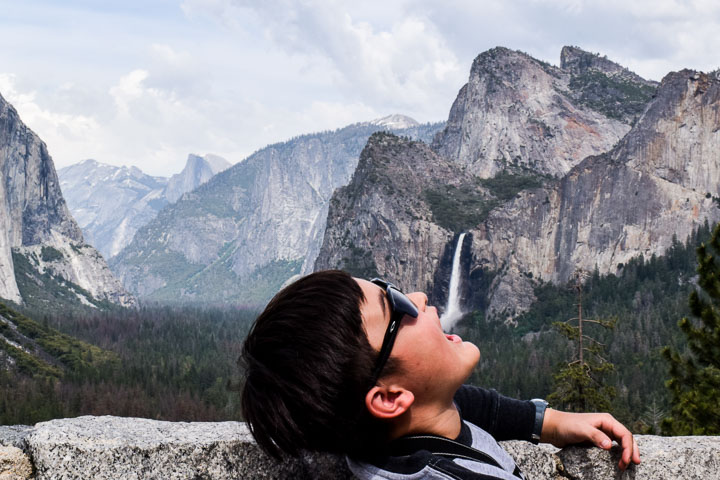
Spectacular road side scenery in Yosemite National Park.
Booking on Rentalcars.com
Google searches all seemed to point us to one place for the best priced car hire at LAX – rentalcars.com. Here we found some great deals. They also have a phone app which seems to offer the same results as Google searches.
As an international customer I found that the deals offered to us included many extras which were not available on the hire car company’s own web-site.
By booking our Alamo car rental in LAX through rentalcars.com, we were able to get some great free extras including collision damage waver, unlimited miles and extended protection. These extras would have added some hefty extra costs if we booked directly on Alamo’s company website.
Magnificent road side stop in Yosemite National Park
Using My Overseas Drivers License in USA
It is absolutely necessary to research the licensing requirements for your home country. Coming from Australia I discovered that all I needed to do was hold a valid driver’s license and produce it when I picked up the car. It doesn’t get any easier than that!
Makes me wonder why I paid for an international drivers license before I left Australia! Be sure to research the license requirements for your home country, because the rules do vary depending on where you are from.
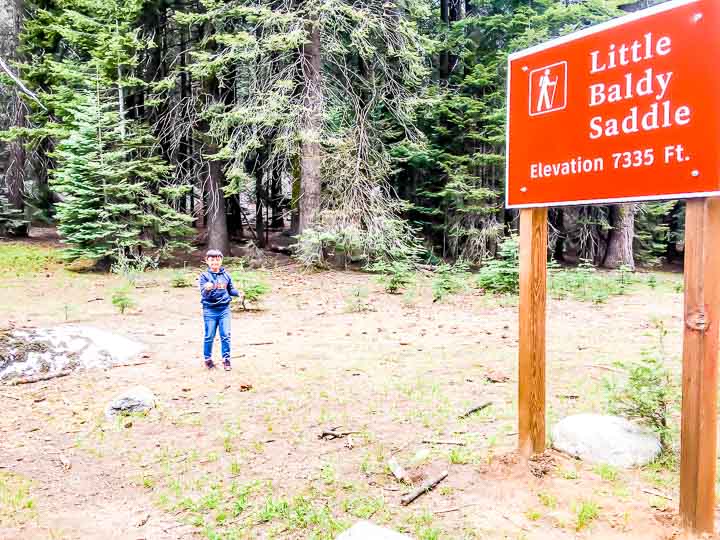
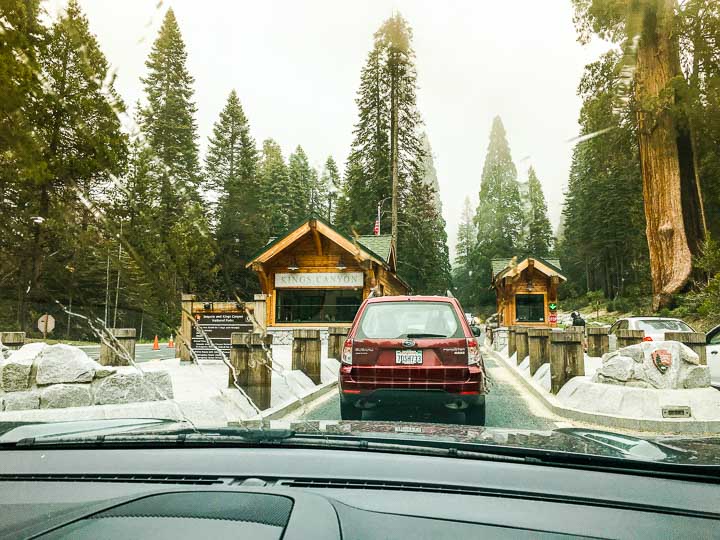
Roadsite stop to throw snowballs in Sequoia National Park
Which Size Car to Rent
Naturally you need to size the car according to the number of people in your group. Too small is uncomfortable. Too big may be wasting money. You also need to size your car to suit your luggage requirements.
For instance, I really wanted to hire a Mustang convertible for that iconic Californian road trip experience. And my LAX rental car research found heaps of Mustangs available for hire. However, a Mustang only fits 2 small cases according to the rentalcars.com website. Our 2 large cases would not have fitted, lucky I did my research!
Since we were travelling with 3 people and 2 large suitcases, we chose the mid-size SUV class instead. On rentalcars.com it clearly states the luggage capacity of each class. For the budget conscious, the smallest car possible to fit the luggage would offer the best deal.
We found there is a large jump in price from standard SUV to large SUV, from US $522 per week to $731 per week. So this little bit of research saved us $507 in rental cost, not to mention extra gasoline costs for the bigger car.
Overall we felt we got a pretty good deal. Back in Australia we would normally be slugged about half the hire car cost to reduce the huge insurance excess. I have to say we found that LAX rental cars much cheaper than Australia.
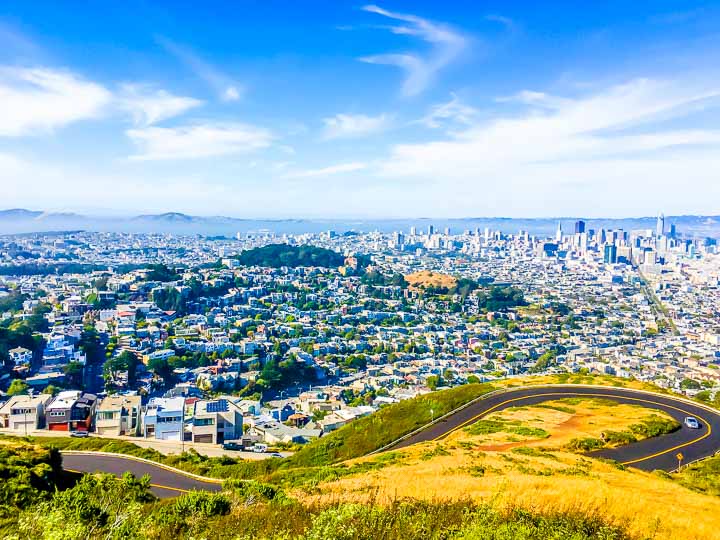
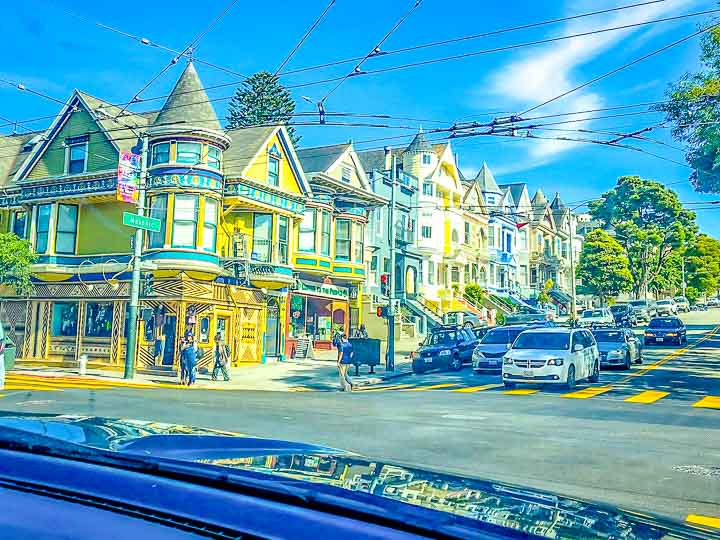
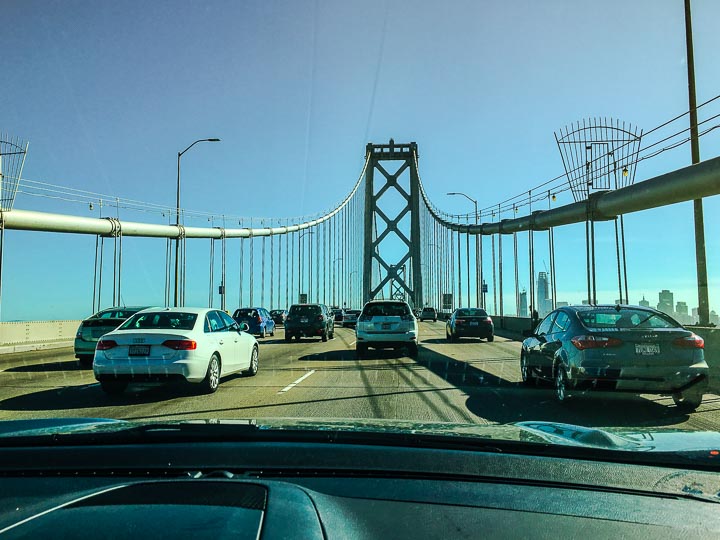
Twin Peaks in San Fransisco is easily accessible by car.
Hiring a GPS with the Rental Car
Hiring a GPS through the car rental company would have cost about $8 extra per day, or $136 for our 17 day road trip. Instead of paying $136 for GPS rental we chose to purchase a 4.3” Tom Tom GPS outright for $95 from Target upon arrival, since we don’t own our own GPS.
The nearest Target store was only about a 10 minute drive from the hire car depot and easy to find. Not only did we save ourselves $41, we also have a GPS for our next trip to USA. Another option is to bring your own GPS, just be sure to pre-load it with USA maps!
Before leaving home I pre-printed a Google Map showing the route from the Alamo depot to Westfield Calvert City Mall. But to make life even easier the man at the Alamo Counter was nice enough to draw me a mud-map to Westfield Calvert City Mall.
With his local knowledge the new route was slightly quicker and easier than the Google Maps route. So it’s a good idea to research your nearest GPS store, then ask the counter staff for directions.
By the way, this does not only happen when you get a car hire at LAX. This is a worldwide car hire trap, so be careful wherever you are.
Navigating around San Fransisco suburbia
Shuttle Buses from LAX to Alamo
The shuttle bus from LAX to the Alamo depot was very efficient. We missed a bus by seconds when we first arrived at the bus stop. Not to worry, we only had to wait 10 minutes for the next free shuttle bus, then it was just a 10 minute bus ride to the pick up point. The bus driver even helped all the people to lift their heavy bags onto the bus. It was a very smooth trip, well done Alamo!
The rental car return at LAX was even more efficient. There was no paperwork involved when dropping off the car, just leave the key in the car and jump onto the bus. There were two buses waiting and we left within 1 minute of me hopping onto the bus.
Overall it was less than 5 minutes from driving in the front gate of the Alamo drop off centre to driving back out again in the bus. Very impressive service, well done Alamo!
Picking Up Your Rental Car
Picking up our rental car from Alamo at LAX was an interesting experience. The man at the pick up counter was very efficient. The whole discussion and signing procedure took all of about 3 minutes. In fact is was so fast that I was left scratching my head, thinking “is that it?”.
He instructed us to proceed to the pick-up bay and informed me that we could choose any car we want out of the line-up. Keys are in the cars.
Then it felt like a mad race, where all the customers were trying to get the best car in the line-up. There were about 20 cars in the medium SUV line-up, and about 5 other customers looking for a rental car at the same time as us. We felt like we had to beat those other guys to find the best car.
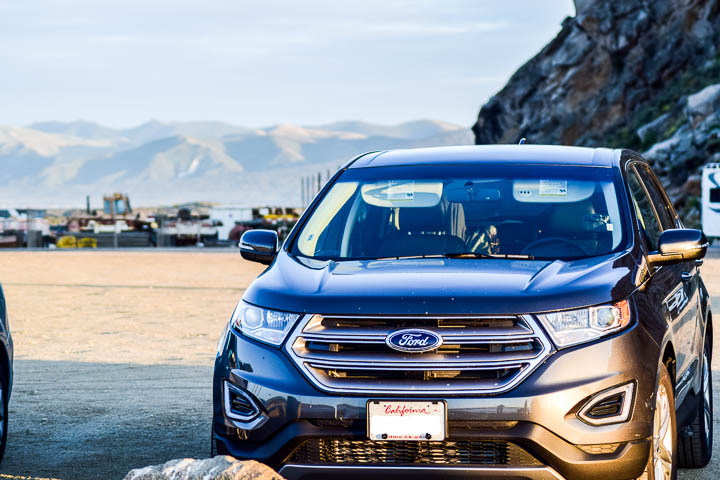
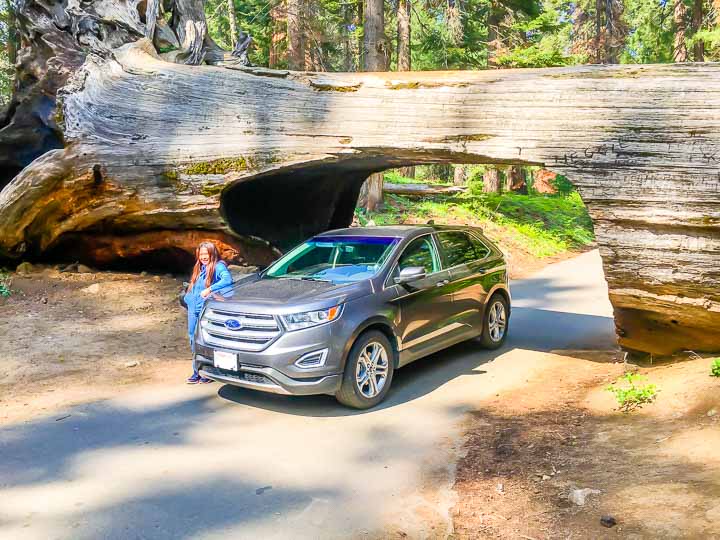
We took the most comfortable looking car, a nice Ford Edge Titanium with leather trim and a classy entertainment system. Alas no console GPS in this, or any other cars in our medium SUV lot.
It was a pleasant experience compared to hiring a car in Australia, where the car rental company chooses the car for you, and hands you the key.
Interesting driving in Sequoia National Park
Gas Stations
I was warned by one of my Australian friends that US gas stations are very different to Australian gas stations. In Australia we pull up to the fuel pump and the console operator turns on the pump remotely. Then you fill up your car. Then you go in and pay. It is very different to the United States.
In the United States you need to pull up at the pump, then go in and pay the console operator. If you suspect it’s somewhere around $30 to fill up the fuel tank, just pay $40 to the console operator.
Then walk outside and fill up your car. After filling up you simply walk back inside and collect your change. Easy when you know how.
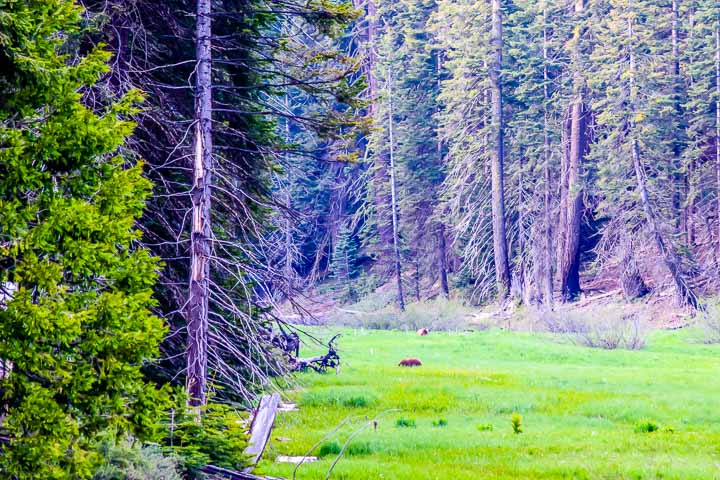
Spotting bears along the road in Sequoia National Park
Research the Road Rules
Traffic rules are very different in California than in Australia. First of all there’s the obvious differences, like driving on the left side of the road. But there are also major differences with “give way” rules at intersections.
In California there is an “All Stop” traffic rule where all cars stop, then the first car at the intersection proceeds first. Don’t try this in Australia or you may end up with a fender bender! We have very different “give way” rules.
The lesson here is to research the local traffic rules before you start driving. In California I went onto the DMV (Department of Motor Vehicles) website and they have a wonderful video series to explain the basic rules.
It took me about 40 minutes to learn all I need to know to drive safely. Not doing this can be a risky and frustrating mistake. This is probably the most important step of the whole car hire process, knowing how to drive safely and obey the road rules.
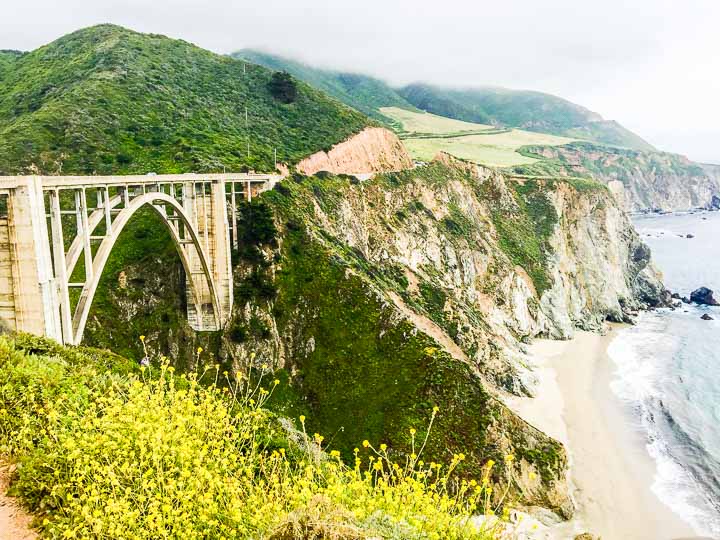
Driving around the Big Sur region
Rental Car Return at LAX
After 17 days of driving through California our car was a little dirty and the front bumper was full of bugs. So I called Alamo and enquired on how clean the car must be upon return. “In the same condition as when you picked it up” they told me.
I asked what is the penalty if it is not as clean as when I picked it up. “That will cost you a $250 cleaning fee” they told me. So I spent 2 hours and $8 going to a car cleaning centre for a clean and vacuum. It was spotless when I finished cleaning.
When I dropped the rental car at LAX off the attendant asked me if I washed the car. “Of course I did”. “Why did you do that” the attendant asked, with a funny look on her face. I explained my phone call the previous day, and my aversion to paying a $250 fine. She laughed and asked me to look around.
“All the cars are dirty, yours is the only clean one” she joked. “You don’t have to clean the car, next time just return it dirty and there will be no extra cost” she advised me. Now I know. Next time I do a rental car return at LAX it’s not going to be so clean.
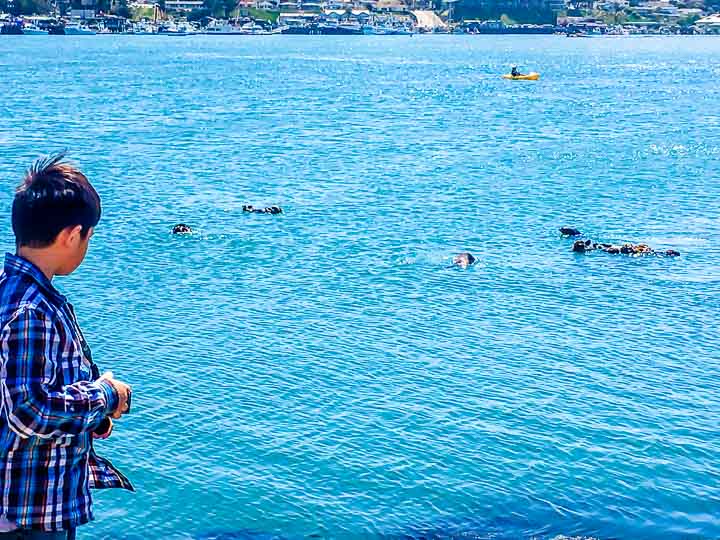
Otters can be seen from the car park in Morro Bay
Overall Experience
Our rental car experience was a overall pleasant one. But we did have some minor hiccups. Here are a few of the minor dramas we experienced along the way. None of these were serious enough to upset our trip.
First time we went to start the car we could not figure out how to do it. We had to read the book, and learned that the keyless start won’t work unless you touch the brake lightly.
Lesson learned: Be ready to read the book in the glove compartment of the car.
We did not know that cleaning the car was unnecessary when returning the car.
Lesson learned: Ask at the counter when you first hire the car, what how clean it must be when you return the rental car at LAX.
In Australia the speedometer is always about 5% below the actual speed. Not so in USA, the speedometer is exactly right.
Lesson learned: Drive to the GPS speed to be sure.
Even roadside stops can be fun in Yosemite.
Hot Tips for Getting Rental Cars at LAX:
Choose a car with a reversing camera, they are priceless.
Learn how to use the cruise control quickly, if fitted. Read the instruction manual for this. This may save you a ticket for speeding.
Photograph the car extensively before you leave the pick up location, especially all noticeable defects. There will be less chance of being charged for damage this way.
Make sure you have a pre-printed copy of your agreed terms and conditions when you pick up the car. Then confirm that the counter staff honor these in your contract.
Ask the front counter staff to draw you a map to the nearest shopping mall to purchase your GPS upon arrival. Also pick up you phone sim cards at the same time. It pays to do a little research of your own for the nearest location to buy these.
Make sure you fill up at a gas station before returning the car. I found at least 4 stations very nearby the drop off point.
Research Drivers License requirements before you rent.
Research the road rules before you arrive, definitely before you pick up your Alamo car rental in LAX.
Ask the counter staff what condition requirements there are for rental car return at LAX.
Check the rental car website for number of suitcases and people which will fit in each size class, and choose you size to suit.
Try the rentalcars.com site if you are from overseas, it will probably give you extras not available on the car company’s website.
Facts and Figures for our Alamo Rental Car at LAX
Booking agent = rentalcars.com
Company = Alamo
Pickup address = 9020 Aviation Blvd, Inglewood, California
Car = Ford Edge 5 seat, automatic with air conditioning.
Cost = $45 per day, $95 Tom Tom 4.3″ GPS from Target, $8 cleaning
A necessary road side stop at Facebook HQ Silicon Valley.
Terms and Conditions for our Alamo Rental Car LAX
You should get the below inclusions for free. If we can do it, you can too!
Intermediate SUV Auto A/C – Ford Edge(RAV4 equivalent)
Unlimited miles included
Full collision damage waiver included (covers cost of damage, loss or theft of vehicle)
Extended protection included (third-party liability protection)
All taxes and fees included
Free cancellation
Entering Kings Canyon National Park.
Here are a few ideas to spice things up along the way.
Would you like a free copy of our Ultimate Bucket List?
Not sure where to travel to next? We have created the Ultimate Bucket List to help you plan your next trip. 1170 awesome travel destinations in 167 countries. And we want you to have it for FREE.
Kuala Lumpur is a great option for a family holiday. It’s relatively cheap and there is loads of cool stuff to see and do. Singapore is another awesome destination, and it’s just 350 km away. But is it best to travel from Kuala Lumpur to Singapore by bus or train?
Note: This post may contain affiliate links. Please read our disclosure policy for more information.
Is It Best To Travel From Kuala Lumpur to Singapore by Bus or Train?
On our holiday we decided to spend one week in Kuala Lumpur, then travel to Singapore and spend our second week there. Travelling between the two destinations presented heaps of different travel options. The three conventional modes of transport are train, bus or fly. And all 3 options have some definite pro’s and con’s.
Petronis Towers in Kuala Lumpur
Catching a Train From Kuala Lumpur to Singapore
I really wanted to try the train because it sounds like such an interesting journey. I love long train trips, they’re so relaxing. And let’s face it, trains are normally more spacious than buses, making it much easier to stand up and have a stretch.
I found the train trip from Kuala Lumpur to Singapore quite difficult to research, mainly due to changing countries midway though the journey. And the fact that the Malaysian side is not well translated into English online. In fact it’s hard just to figure out which train stations are along the route
After loads of research I discovered that a train journey actually meant catching a minimum of 4 trains to get from our Kuala Lumpur hotel to Singapore. That meant unloading our heavy baggage 4 times.
Also finding our directions in 4 different train stations looked like being a massive headache, especially with a child in tow. We had already tackled Kuala Lumpur metro train stations, and learnt that they are notoriously difficult to navigate.
Catching a train from Kuala Lumpur to Singapore? No way! Although an interesting option, it is just too difficult to contemplate with heavy baggage and kids. The Kuala Lumpur to Singapore bus fare is roughly the same as the train fare, but with much less hassles.
Fly from Kuala Lumpur to Singapore
Skyscanner is our favourite site for searching for cheap flights. Flights are ridiculously cheap for this particular journey, and all the budget carriers seem to offer flights. I’ve seen flights for as low as A$23 per person one way, in fact this is very common. Add a further $15 for 20kg of check-in baggage, and it comes to a modest $38 per person!
40 minutes for taxi from KL city centre to KL International Airport
120 minutes arrival at KL airport before flight
65 minutes flight
60 minutes to clear customs and collect baggage at Singapore
30 minutes for taxi from Changi Airport to Singapore city centre
Total 5 hours 15 minutes
Our bus at the Malaysia Immigration building
Catching a Bus from Kuala Lumpur to Singapore
A bus from Kuala Lumpur to Singapore did not sound very enticing to us. That’s because we have been on some very uncomfortable bus trips over the years. Let’s face it, a bus is not the first thought that comes to mind if you’re looking for a comfortable mode of transport. But a bus is well worth considering for this particular journey!
We used BusOnlineTicket.com to book our ticket, which cost S$20, or about A$19. These buses are seriously comfortable. They are so well equipped they feel more like a first class plane seat, complete with large recliner chairs and in-built entertainment systems.
Total cost to travel from Kuala Lumpur to Singapore by bus:
A$19 x 3 persons = $57
A$10 for taxi from KL city centre to bus station (optional)
A$15 for taxi from Changi Airport to Singapore city centre
20 minutes for taxi from KL city centre to bus station
60 minutes arrival at bus station before bus
330 minutes bus trip
15 minutes for taxi from bus stop to Singapore city centre
Total 7 hours 10 minutes
As you can see, the Kuala Lumpur to Singapore bus fare is remarkably cheap, and the duration is not too bad either.
Kids entertainment heaven aboard the bus
Fly Versus Drive Comparison
The cost of catching a bus is about half the price of flying when you factor in taxis. A$82 versus A$169.
The time required to catch a bus is about 2 hours more, 7 hours versus 5 hours.
So is it worth the cost saving to catch the bus? Our recommendation is a resounding yes. The bus trip proved to be a comfortable option from start to finish. The bus terminal at both ends were well located, comfortable and convenient. Bus terminals both come with restaurants, ATM’s and convenience stores nearby. And the bus seats were clean, lovely and spacious.
The selection of on-board movies was good, and there was even on-board wi-fi. The road is high-speed freeway all the way and is quite safe. Overall it was a much better experience than a budget flight. The only negative aspect the journey was the Singapore immigration.
Malaysia Immigration Stop
About half way along the route you have to get off the bus to go through Malaysia Immigration. This is a fast and simple procedure, in about 10 minutes you should be back on the bus and on the road again.
Singapore Immigration Stop
You know you’ve reached the bridge to Singapore Island when you hit the traffic jam. It took the bus about 1 hour to traverse the final kilometer. Not that it’s uncomfortable waiting on the bus, it’s just that traffic jams are at rock bottom of our list of favourite things to do.
Then when you finally get to the customs and immigration building you have to get off the bus and line up for another half hour or so to clear customs counters. It was an overall unpleasant experience for us, however I feel the average traveller would not be as negative.
How to Book a Bus from Kuala Lumpur to Singapore
Here are some easy step by step instructions on how to do the entire journey by bus.
Go to BusOnlineTicket.com and purchase your online bus ticket Kuala Lumpur to Singapore. It’s similar to booking a flight, there are many buses to choose from. The bus company we used is called Transtar Travel. We highly recommend Transtar as safe and clean operator.
Although you can get picked up at the hotel, I recommend catching a taxi to the bus terminal. The Transtar Travel bus terminal is located just around the corner from the popular Berjaya Square. I recommend travelling to the terminal (starting point for the bus) to remove any possibility of confusion.There are countless similar looking buses operating in Kualar Lumpur. How do you recognise which one is the one you’re supposed to get on? It’s much better if you go to the terminal, where they have a comfortable waiting room with coffee and TV. Taxis are very cheap in KL so it shouldn’t cost much to get to the bus terminal.
Grab your drinks and snacks from the convenience store right next to the Bus Terminal for your journey.
Sit back and relax on the bus. Watch a couple of movies.
When you get to Singapore, everybody gets off at the same bus terminal. It has a taxi rank, convenience stores, restaurants, ATM’s and money changers. Like most transport infrastructure in Singapore it’s supremely well organised.
Catch a taxi to your hotel. Taxis are surprisingly cheap in Singapore, you will most likely only have to pay $10-$15 if your hotel is centrally located.
Note that the steps for booking and catching a Singapore Kuala Lumpur bus is exactly the same.
Even my 6 foot frame has plenty of leg room
Review of the Kuala Lumpur to Singapore Bus
We are glad we caught the Kuala Lumpur to Singapore bus. Airports tend to be fairly bland experiences, and don’t really add much to the holiday experience. The bus trip was comfortable and entertaining, and we got to observe the changing scenery along the way.
We didn’t feel at all exhausted from the journey, and were quite happy to have saved a few dollars along the way. I would happily do this bus trip again and I do recommend you give it a try.
And here is a short video of exactly the same bus and route that we took, except in the opposite direction (ie. bus to Kuala Lumpur from Singapore).
Should You Take the Kuala Lumpur to Singapore Bus?
We recommend you travel from Kuala Lumpur to Singapore by bus instead of train, especially if you have children or heavy baggage. It’s a cheap, comfortable and easy trip. And it may be the most luxurious bus trip you have ever had.
Would you like a free copy of our Ultimate Bucket List?
Not sure where to travel to next? We have created the Ultimate Bucket List to help you plan your next trip. 1170 awesome travel destinations in 167 countries. And we want you to have it for FREE.
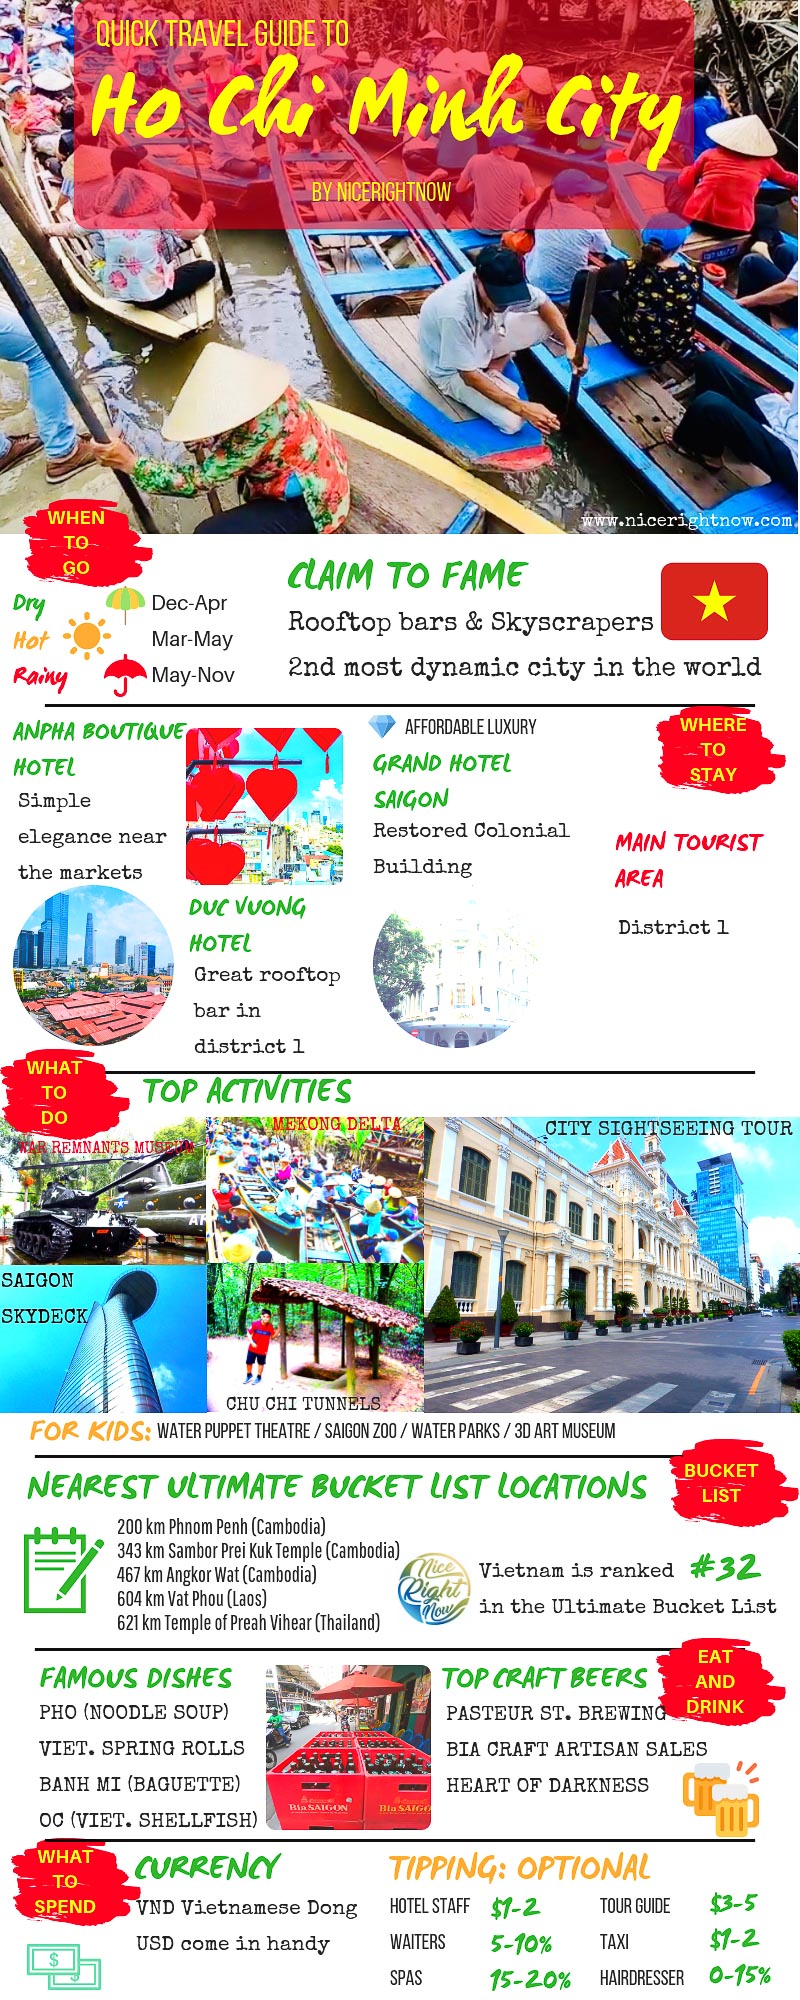
Ho Chi Minh City is a vibrant, fast paced, incredibly historic city. It is so jam packed with things to do that it’s hard to know where to start. Not only is Ho Chi Minh the biggest city in Vietmam, it is also the most interesting to visit. This Quick Guide to Ho Chi Minh City will help you to get started on what promises to be an incredible holiday.
Note: This post may contain affiliate links. Please read our disclosure policy for more information.
What To Do in Ho Chi Minh City
Ho Chi Minh City has 2 main themes for the best day trips out of the city. Ho Chi Minh City (Saigon) played an incredibly important role in the Vietnam – American War half a century ago. As a result you will find a high concentration of historic sites dedicated to the war. The most famous of these is the Cu Chi Tunnels.
And then there is the Mekong River Delta. The Mekong is undoubtedly one of the great waterways of the world, and the Mekong Delta is a melting pot of tradition and culture. Consequently you will find many great tours to look through this large delta area.
There are also some great day tours in Ho Chi Minh City itself. Uniquely with French colonial and Chinese influence in Ho Chi Minh city, it’s not hard to dig up some interesting and historical sites. Such as these ones:
War Remnants Museum
The Reunification Palace
Notre Dame Cathedral
The Old Post Office
Ben Thanh Market
Saigon Sky Deck
We highly recommend Saigon Motorbike Tours. On these unique and inexpensive tours you will see the real Saigon on motorbike, and see the more subtle attractions that the major tour miss.
The War Remnants Museum is in my opinion the premiere must see attraction in Ho Chi Minh City. This is rated in the top 10 museums in the world on Trip Advisor, and is a particularly moving experience. Here you will learn about the darker side of the war, particularly Agent Orange and other lasting after effects.
Where to Stay in Ho Chi Minh City
Ho Chi Minh City is divided up into districts, and District 1 is the undisputed best place to stay. District 1 in Ho Chi Minh is jam packed with restaurants, bars, cafes, hotels, hostels, tour agencies, massage parlours, markets, convenience stores, ATM’s… everything you could possibly need as a tourist.
All the major attractions in central Ho Chi Minh City are easily accessible from your Hotel in District 1. You can do a circular walking loop in about 2 hours and see the major attractions. Or you can go to any of them for 25,000 VND in a Grab taxi.
Our favourite place to stay is the Duc Vuong Hotel. This tastefully decorated hotel is amazing value and has it’s own popular rooftop restaurant and bar.
Our second favourite place to stay is next to the Ben Tanh markets in the centre of Ho Chi Minh City, the Anpha Boutique Hotel. Just walk across the road from this hotel and you step into the markets for some amazing bargain hunting, and a great day out.
If you’re looking for luxury you can’t go past the Grand Hotel Saigon. This is a restored colonial building in a prime location near the Song Saigon River. And best of all, there are often heavily discounted rooms available online for this 5 star hotel.
Quick Travel Guide to Ho Chi Minh City
Plan Your Trip to Ho Chi Minh City
Read More about Ho Chi Minh City
Planning the Ultimate Southeast Asia Itinerary 3 Weeks
Amazing Mekong Delta Tour at Ben Tre Vietnam
Insider Guide to Saigon Motorbike Tours
Quick Travel Guide to Ho Chi Minh City
Your Southeast Asia Itinerary
If you’d like some more help planning your Southeast Asia holiday itinerary then check out this blog post, with several different itineraries to choose from.